Tag 3d printing

Introducing Spaces

Spaces contain subsets of the broader turtleSpaces primitive (keyword) set dedicated to various types of creation. They also have restricted feature sets, to enable gradual exposure to everything turtleSpaces has to offer.

You can select a Space from the menu provided by clicking on the name of the current Space (eg omniSpace) in the top-left corner of the web IDE, or by clicking on the link in the following list:

welcomeSpace (2D) – a very simple Space with only basic turtle commands and no editor

penSpace (2D) – has a simple editor and the subset of turtle pen commands

wireSpace (2D) – like penSpace but in three dimensions

artSpace (2D) – adds the ability to create fills (arbitrary 2D shapes) and other goodies

designSpace (2D) – adds shapes and text fonts

animationSpace (2D) – adds movement capabilities

physiSpace (2D) – adds 2D physics functionality

actionSpace (2D) – adds missiles, objects and other game-related functionality

textSpace – dedicated to text / list manipulation

musicSpace – dedicated to MIDI music creation

omniSpace – everything!

To come:

modelSpace (3D) – assisted 3D model creation

motionSpace (3D) – 3D animation

(simulationSpace, virtualSpace…?)

Each Space also has its own published / example database containing projects that use the keywords available in the Space.
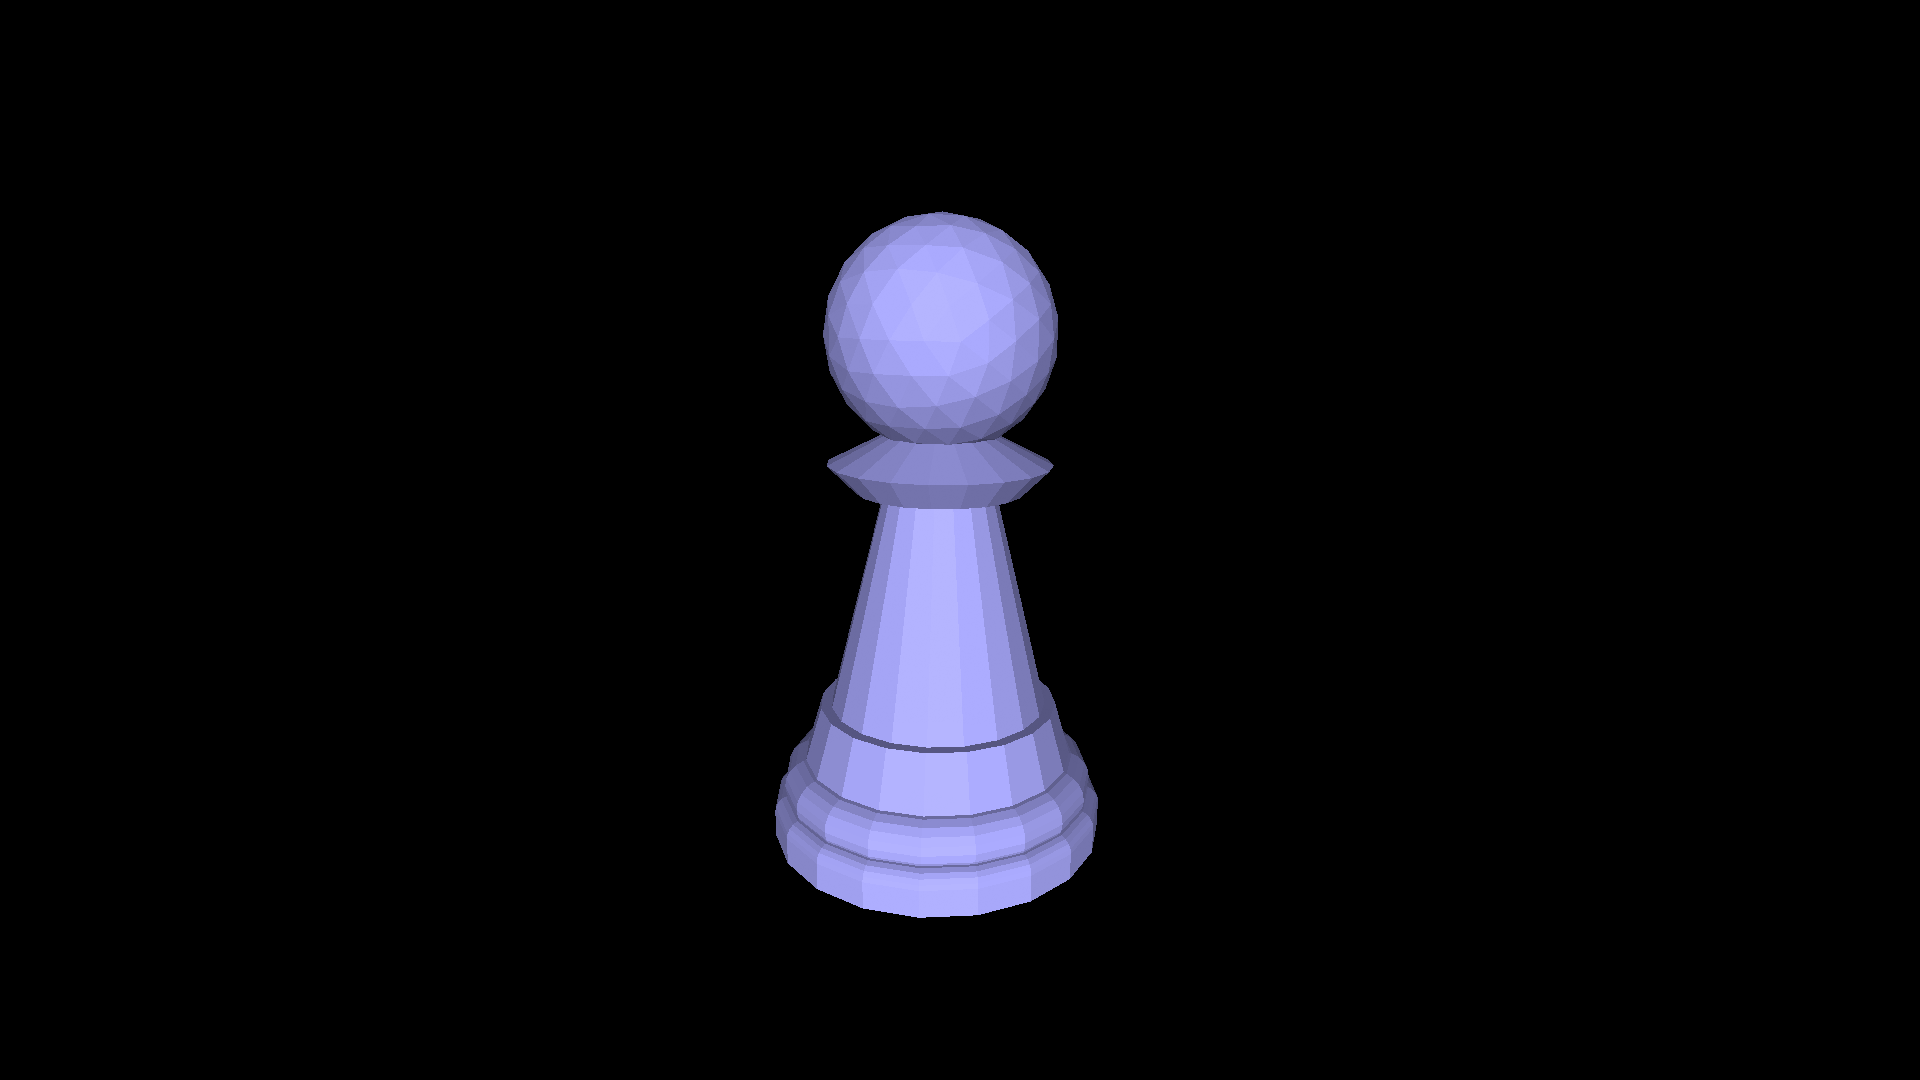
How to create and 3D print a chess pawn in turtleSpaces Logo

First, open the weblogo.

Then, click in the bottom right REPL area

Create the ‘head’ of the pawn using the ico primitive

cs penup ico 20


If you start the line with a cs, you can use the up arrow to go back to the line after adding each command (and seeing the result) to edit what you’ve done and add more! Append all of the following instructions on to the same line, then just keep re-executing it.

We’re going to be making a cone next, and cones are created under the turtle. So we need to tiilt the turtle down, and lower it close to the bottom of the ico, in preparation for creating a ‘cut cone’:

dn 90 lo 17

Next we create a cutcone, lower the turtle and create another cutcone. Type help “cutcone to see the parameters…

cutcone 10 20 5 20


Lower the turtle and create the next cone segment

lo 5 cutcone 20 15 5 20


Lower the turtle again and create a larger cone

lo 5 cutcone 10 20 40 20


… smaller cone, but deeper than is visible so that the 3D printer slices the pawn correctly …

lo 40 cutcone 22 28 20 20


… a torus … (type help “torus to see the parameters)

lo 15 torus 5 24 20 20

… another torus …

lo 5 torus 3 28 20 20

… and a cylinder to finish the base! (type help “cylinder to see the parameters)

cylinder 31 5 20


All done! Now you can download the STL file under the File menu, open it up in your slicing program and print it. But don’t forget to type hideturtle first or you might get a surprise!

The pawn sliced in Ultimaker Cura…

The whole line of code should look something like this:

cs ico 20 dn 90 lo 17 cutcone 10 20 5 20 lo 5 
cutcone 20 15 5 20 lo 5 cutcone 10 20 40 20 lo 40 
cutcone 22 28 20 20 lo 15 torus 5 24 20 20 lo 5 
torus 3 28 20 20 cylinder 31 5 20 hideturtle

Easy peasy! Click and hold the left mouse button over the model and drag to rotate it.

Read through the shape guides available under the Docs menu on this website and think about how you could create other chess pieces!

This is the chess pawn as a procedure:

TO pawn
  cs penup
  dn 90 
  ico 20 
  lo 17 
  cutcone 10 20 5 20 
  lo 5 
  cutcone 20 15 5 20 
  lo 5 
  cutcone 10 20 40 20 
  lo 40 
  cutcone 22 28 20 20 
  lo 15 
  torus 5 24 20 20 
  lo 5 
  torus 3 28 20 20 
  cylinder 31 5 20 
  hideturtle
END

You can turn it into a procedure just by typing to pawn in the REPL, pressing the up arrow until you retrieve the pawn code, press enter, and then type end. Then you can save it!