News

Logo Game Design Introduction: Downhill Skiing

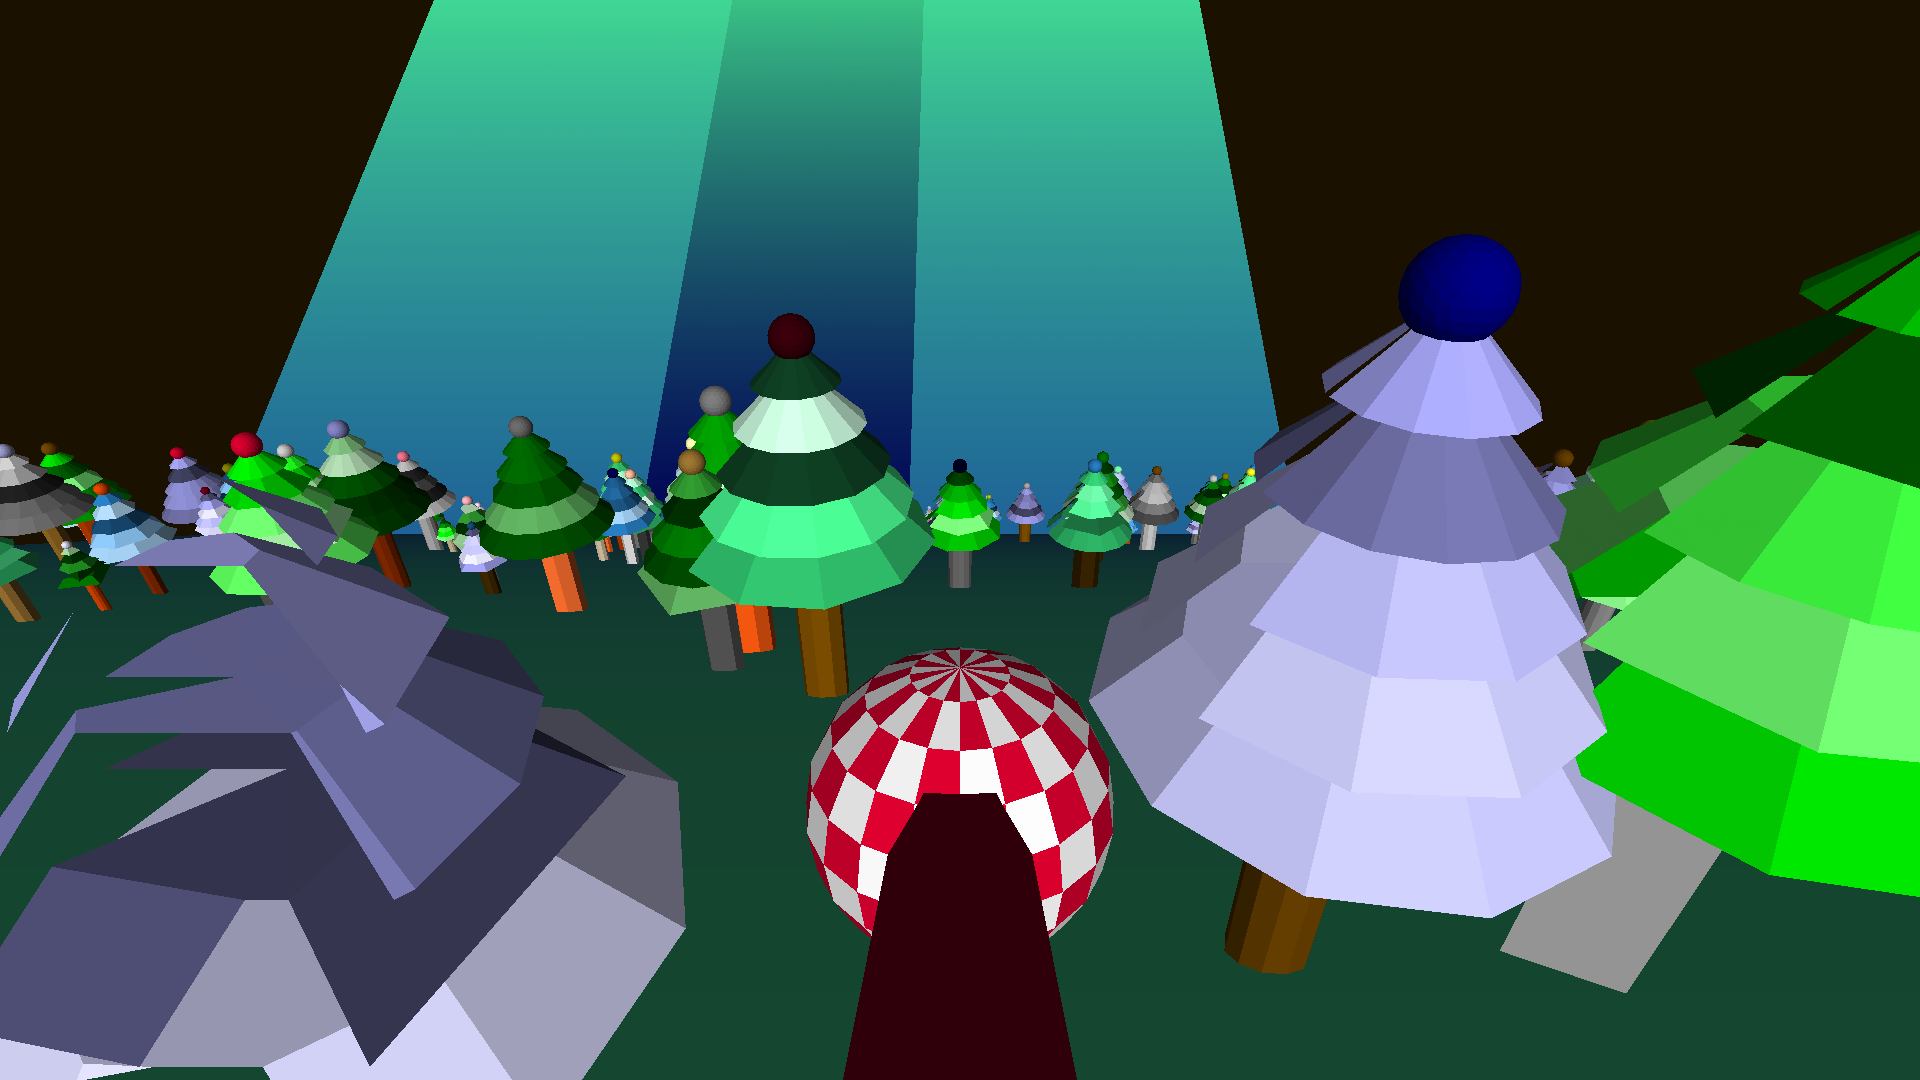
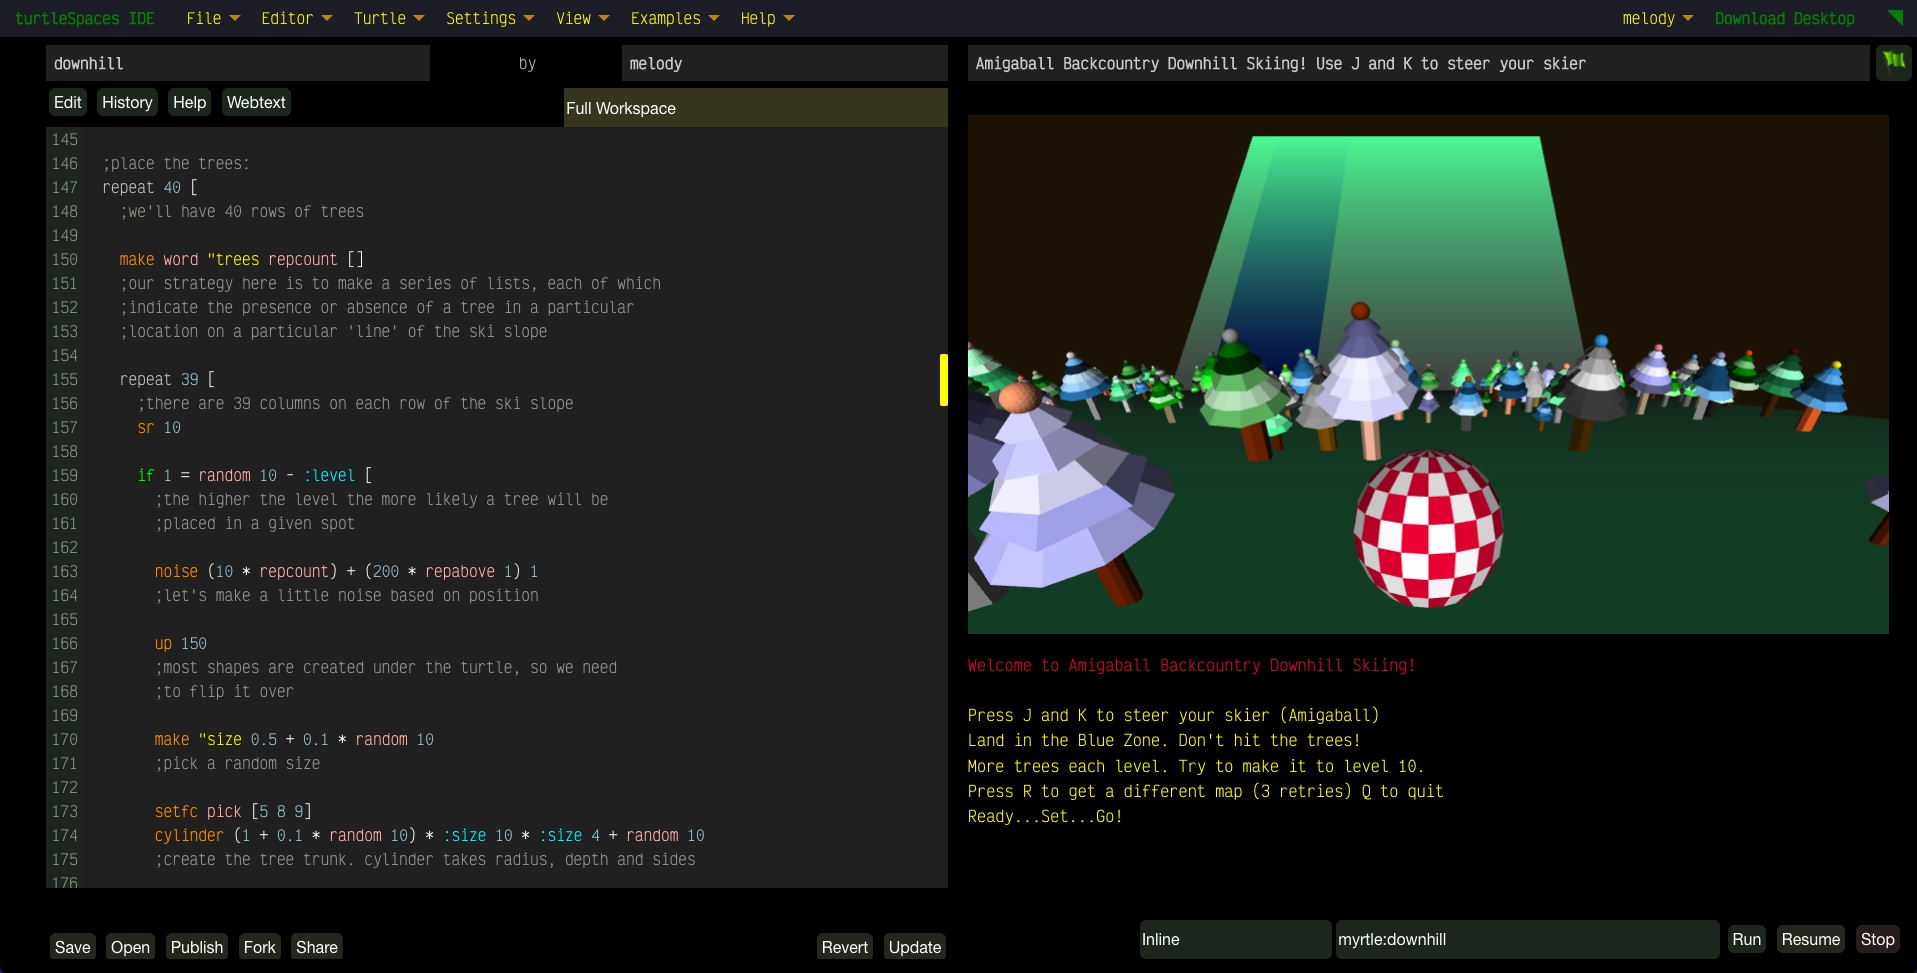
Downhill Skiing exercises Logo’s list handling capabilities and leverages turtleSpaces 3D functionality to create an engaging yet simple game.

Once loaded, click the flag icon to start.

Click here to open this project in the web IDE.

Herein lies a wonderful introduction to game development in turtleSpaces. The game mechanic behind downhill is simple: the player travels down the ski slope, avoiding randomly-positioned trees while shifting left and right to end in the target zone.

The core game mechanic is similar to simple early text-based ‘action’ games written in languages such as BASIC, where the player needs to avoid asteroids in an asteroid field, for example. It is straightforward and easy to understand.

As such, this program would make an excellent project for students moving from Scratch to text-based coding. It provides an introduction to the turtle, programmatically-generated lists, 3D model creation, user input and various sound primitives, without using any sophisticated math or complex language primitives.

The game logic is as follows:

  • Create initial graphic elements (stars, ground, slope)
  • Create the ‘landing zone’ and store its location in a container (variable)
  • Move the turtle across the ‘slope’ to each spot on a 39 x 40 grid
  • Decide randomly to create a tree or not, create that tree and log that decision in a list
  • Each row has a separate list (trees0 trees1 etc), made up of 39 values (one for each column)
  • Once finished, place the turtle randomly at the top, in a location free of trees
  • Loop through each row of trees (and their respective list containers) in descending order
  • Check the relevant list to see if the player is occupying the same location as a tree, if so crash
  • Check to see if the player has pressed a key, and act accordingly, moving the player
  • Pause between rows but for less time each iteration, so that the player speeds up as they descend
  • When we get to the ‘bottom’, check to see if we’re in the target zone
  • If we’re not in the target zone, retry with the same level
  • If we are in the target zone, create a new level increasing the odds of trees

As you can see, developing a lesson plan is easily achievable. Let’s explore each area of the code in depth. This tutorial assumes some familiarity with text-based coding on the part of the reader, and sometimes speaks in general terms. The fully-commented source code for this game is available at the end of this article, and inside the turtleSpaces environment itself as a published project.

In the beginning…

When the procedure starts, the first thing we need to do is reset the workspace, to ensure we’re working with a clean slate. Next, we need to provide the user with some instructions!

For this, we’ll use the simple text command print. We can change the color of the text using settextforeground. Note that for every set command there is a corresponding function to return the parameter’s status, such as textforeground. settextforeground takes a number as a parameter, which represents a color (type showcolors in the console to see a list of colors and their numeric values). However, turtleSpaces has a number of color primitives (red, orange, yellow etc.) that return their respective numeric values, so that you can say, for example, setttextforeground yellow (which works because yellow is a function that returns the number 13.)

The print command itself takes either a word (a single word preceded with a quote “) a list (a series of words wrapped in square brackets []) or a ‘long word’ (a series of words wrapped in pipes ||). You can use either a list or a long word to display a sentence, eg print [Welcome to turtleSpaces!] or print |This also works.| The advantage to using a list is that you can cherry-pick one word from it easily, eg print first [Welcome to turtleSpaces!], however it can be more complicated when pairing text with numeric values, for example, when using a long word would be preferable.

Note that print “Welcome to turtleSpaces” will throw an error, because the parser will attempt to execute to and turtleSpaces” as commands.

We can use cursordown to put a blank line between sections of text. We can also say text as well, to make things more interesting!

Next, we need to create some default containers (variables). We can create these using the make primitive, which is the traditional method in Logo (eg make “container 5), although turtleSpaces also supports put x in “container and “container := x (note the colon before the equals). A colon before a word in Logo returns the value stored in the container of that name, eg :container. But make needs the container name specified with a quote ” — this is because if you used a colon, make would create a container with the name of the value stored inside that container!

We need to set the initial :level (0). We’re also going to create a container containing the number of available ‘retries’ (we will give the player limited opportunities to generate a new level if the level provided to them is impossible.)

make “level 0 make “retry 3

Notice that we can ‘stack’ multiple commands on the same line! This can sometimes be a blessing, sometimes a curse, so use your discretion when stacking commands.

Finally, we’re going to declare a label, which can be returned to using the go primitive:

label “start

so that we can return here at the start of a new level.

My God, It’s Full of Stars!

It’s time to start building the graphical environment in which the game will take place. First, let’s create a starfield. This is a fairly simple algorithm:

  • set a ‘static’ z (depth) position
  • set a random x and y position
  • set a random ‘fill’ shade and color
  • set a random fill opacity
  • create a spot of varying size
  • do this all 100 times

In the code we use the setxy and setz primitives to accomplish the first two items, and the random function to generate the random values we need to give to each. There’s some turtleSpaces-specific primitives such as randomfillshade and randomfillcolor (the color used to create shapes is the ‘fill’ color, as opposed to the color used to create lines which is the ‘pen’ color.)

We wrap all of this in a repeat loop, which repeats the contents of the list provided to it the given number of times, for example repeat 20 [print repcount] which counts from 1 to 20.

We actually need to create two starfields, one behind the hill, and one in front of it (so that we see stars regardless of which direction we’re facing, either looking at the hill, or from it while we’re playing. We can make the single loop do double-duty by using the oddp primitive which returns true if the value passed to it is odd. As you saw with the above example, repcount returns the current repeat loop iteration, and so if we pass repcount to oddp, then oddp will be true on odd iterations of the repeat loop.

We can then pass oddp to if, which will then execute the first list of instruction if oddp is true, and the second list of instructions if it is false. In this way, we set the z position of the turtle in an alternating fashion.

Note that the back side of a spot is not ‘lit’ and so we need to enable twosided mode before we create the stars to ensure both sides of the spot are lit, since we’re going to be looking at them from both directions.

Making Ground

Next, we’re going to create the ground. This is another spot, like the stars, just a very big one! We use setxy and setz to position the turtle in the lower-centre of the screen, and then tilt it up 90 degrees (so that we see the ‘dark’ back side of the spot), setting random fill and shade colors before making the spot. The value passed to spot signifies its radius, and is given as ‘turtle units’, the same unit of measure used by all shapes and lines.

To choose the fill color we use the pick primitive, which randomly selects an item from a list, eg print pick [1 3 5 7 9]

The landing area is where our skiball will end up assuming the player avoids all of the trees. This is created using the quad primitive, which creates a filled rectangle. A container is created containing a random value signifying the left (from this perspective) side of the target area. It’s width is dependent on the level, but to begin with, it could just be arbitrary (eg 100 ‘turtle units’ wide). We will use the value in this container later, to determine if the player is inside the target zone.

There are, then, three quads, the left side before the target zone, the target zone itself, and the right side after the target zone. We color the target zone dark blue to distinguish it from the rest of the landing area.

Finally, we create the ski hill itself. Its angle does not matter that much, as from now forward the turtle will operate on the plane of the hill. In this example we’ve used the gradient mode to create a gradient fill on the quad that makes up the ski hill. In gradient mode, the pen and fill colors are both used to create the gradient, the pen color being the ‘near’ color and the fill color being the ‘far’ color.

It’s time to populate the hill with trees.

Seeing the forest for the trees

When this game was first developed, the ‘trees’ were simple icospheres. In creating a lesson plan, you can take two approaches here:

  • Create and validate the core game logic first, using a placeholder such as a sphere
  • Create the trees first, and then develop the game logic later

This is really a choice between whether we have vegetables or dessert first, but here we’ll start with dessert.

The trees are made up of firstly a cylinder (for the trunk), then a series of cutcones and then finally an icosphere on the top. We select the color of each trunk and tree using the pick primitive, and select a random fillshade for each layer of the tree.

We need to do a bit of turtle acrobatics to ensure the trees are upright relative to the ground, and not upright relative to the slope! Shapes are created beneath the turtle, and so as a result the turtle needs to be ‘flipped over’ and the trees trees created successively from the trunk ‘downward’ to the icosphere on the top of the tree.

From a default startup state, type cylinder 20 50 20 into the console, then click and drag on the view area to rotate the camera:

As you can see, the cylinder is created beneath the turtle. To create additional shapes at the opposite end of the cylinder, we will need to lower the turtle the length of the cylinder.

cutcones are similarly created under the turtle. However, icospheres are created around the turtle. See the shape guides available on this website for more information about shape orientations relative to the turtle.

And so we sweep left to right, working up the slope, deciding at each ‘stop’ whether or not to build a tree, and then noting in the list for the current row if we have created a tree at the current column.

Here comes the vegetables. At the start of each row we create a list:

make word “trees repcount []

word combines two inputs into a single output. We’re using it here to create a new list container [] based on the current repcount, prefixing it with the word “trees, creating for example :trees11

As we sweep across each row, we use the queue primitive to add either a 0 (no tree) or a 1 (tree) to the end of the list:

queue 1 word “trees repabove 1

repabove returns the iteration of the parent repeat loop, in this case the row repeat loop. Using repcount here would return the current column, as we are iterating through the row.

We will use these lists later to cross-reference with the turtle’s position and reveal if a tree is present at that location.

Introducing the Player

Once we’ve created all the trees, we could spend a bunch of time creating an actual skier model, but I like just using the amigaball, which creates a checkered ball based on the current fill and pen colors. We use setmodel to make it the turtle model. Later on we can use setpremodel to make it ‘roll’ down the hill, which looks pretty cool! Note that we will need to elevate the turtle the radius of the amigaball to ensure it’s ‘sitting’ on the slope.

Skiing the Slopes

So basically now we’re ready to position the turtle at the top of the slope. We pick a random location and then check :trees40 and :trees39 to ensure there isn’t a tree at the random location, or below it, respectively. We do this by using a container called :pos which contains the column number occupied by the player.

Alright, so now we enter the main game loop, which is a repeat loop based on the number of rows (40):

  • Check for keypresses and action them as appropriate
  • Move the ball down one row
  • Check for collisions and act accordingly

We use if to check keyp which returns true if there are any keypresses waiting in the keyboard buffer. If there are, we use peekchar to ‘peek’ at what the first keypress in the buffer is. If the key is j or k we check our :pos and if valid we then move the turtle player and increment or decrement the :pos container as appropriate.

We can also check for a press of the r key and then initiate a ‘retry’ but that is something that we can add in later. We don’t need to deal with it now.

Once we’ve dealt with the keypress, we can remove it and any superfluous keypresses from the key buffer using clearchar

The second thing we do in the loop is move the turtle forward 10 turtle units (one row). This is pretty straightforward.

Third, we check for a collision:

if 1 = item :pos thing word “trees 40 – repcount [do this stuff…]

Whew! That’s a mouthful, isn’t it? The first thing you’ll notice is the meat of our sandwich is on the right — other programming languages would tend to have the sides of the equals reversed, with the complicated bit first followed by the = 1. But Logo ‘parses’ right to left, which means that if we did that, the = comparator would only check 1 against repcount, ignoring all the rest of it.

We can solve that problem by putting round brackets () around the entire expression (the meat) but that adds extra clutter we don’t need if we just put the value first.

  • item returns the nth list item. So print item 3 [1 2 3] will return 3, for example. item :pos returns the list item based on the player’s current position.
  • thing returns the value stored in the container of the given name. It’s the longhand of :container. But it’s useful here because unlike using the colon method, we can construct the name of the thing to be retrieved, as we did with make earlier.
  • word acts similarly here to when we created the lists, with the exception of subtracting repcount from 40 in order to get the current row list in descending order.
  • And so, if the value returned from all of that is 1, we’ve hit a tree! Do the stuff in the list.

Ouch! Well, when all else fails, try, try again… we can use a label go pairing to send the player back up to the top, logically speaking. And we can wrap a tag around the player’s progress down the hill so we can erase it, sending the player turtle back to where it started, turtle-y speaking.

If we make it to the bottom of the hill we need to check to see if we’re in the target zone:

if and xpos > -200 + :zone xpos < -100 + :zone – 10 * :level [do this stuff…]

xpos holds the turtle’s current x position. We can use it along with the value stored in the :zone container to decide if we’re in the zone. This statement assumes we’ve factored the :level into the width of the :zone.

If we’re in the zone, congratulations! Then (if we’re not on the last level) we increase the level and send the player off to try again. If we’re not in the zone, too bad, and we send the player off to try the level again.

Of course, the version available to play has a few more bells and whistles, you can read all about them in the documented source code below.

Note: This was created as a monolith procedure, but you could break bits of it out into separate procedures in order to demonstrate Logo’s abilities in that area. For example, the tree model creation could be its own procedure, as could the contents of the main game loop, the crash logic, the level completion logic and so forth.

TO downhill
  ;myrtle builds a ski slope and then rolls down
  ;it in the guise of a rolling amiga ball.
  
  ;this is a wonderful introduction to game
  ;development in turtlespaces. The game mechanic
  ;is quite simple:
  
  ;the player needs to travel down the ski slope
  ;while avoiding the randomly-placed trees
  ;and finish in the highlighted zone.
  
  ;most of this procedure is window-dressing.
  ;at its core it simply fills a number of lists
  ;with 0s and 1s, and then checks these against
  ;indices inferred by the player's position, eg
  ;the 'row' being the current iteration of the
  ;player's progress down the ski hill, and the
  ;column being the player's horizontal location
  ;on that hill. The row matches against the list
  ;generated with the row number, eg :trees 10
  ;while the column (:pos) matches with the item
  ;number in that list, eg item :pos :trees10
  
  ;this game would be rather pedestrian with a
  ;simple text representation, but in turtlespaces
  ;we can 'jazz it up' and make it more engaging.
  
  ;Let's go!
  
  reset
  cam:pullout 10
  ;the slope doesn't quite all fit in the screen!
  ;so we'll pull out the camera turtle a little bit.
  ;'cam' is shorthand for whichever turtle is the current
  ;view turtle
  
  cleartext settextforeground red
  print |Welcome to Amigaball Backcountry Downhill Skiing!|
  ;bars indicate a 'long word' or a word that contains spaces
  ;while quotes indicate a single word and square brackets
  ;indicate a list. Curly braces indicate a list 'resolved'
  ;when the list is processed during execution. (Don't worry
  ;if you don't know what that means just yet!)
  
  cursordown
  settextforeground yellow
  print |Press J and K to steer your skier (Amigaball)|
  print |Land in the Blue Zone. Don't hit the trees!|
  print |More trees each level. Try to make it to level 10.|
  print |Press R to get a different map (3 retries) Q to quit|
  say |Welcome. Don't hit the trees!|
  make "level 0
  ;'make' creates a container with the given name containing the given value
  
  make "retry 3
  ;although the odds of trees on lower levels is less,
  ;it is still possible to get a very dense level if you are unlucky!
  ;and so we'll give the player three opportunities to regenerate
  ;the level
  
  ;hint: if you open this in the web IDE you can hover
  ;over the primitive names with the mouse and a popup will
  ;appear with their syntaxes
  
  label "start
  ;we will return here at the start of each 'level'
  ;the program gets redirected to labels using 'go'
  
  ;create the 'mountain':
  clearscreen hideturtle penup
  ;you can 'stack' multiple directives on the same line
  
  twosided ; by default the back side of faces is not 'lit'
  
  ;make the background stars:
  repeat 200 [
    if oddp repcount [setz -600] [setz 600]
    setxy -800 + random 1600 -100 + random 600
    randomfillshade ; aka randfs
    randomfillcolor ; aka randfc
    setfillopacity 50 + random 50 ; aka setfo
    ;opacity is the transparency of the shape
    ;it takes a value from 0 to 100 (full)
    spot 2 + random 7
  ]
  
  setfo 100 ; aka setfillopacity
  
  setz 0
  setxy 0 -115
  
  ;create the 'ground spot':
  notwosided
  up 90 raise 1
  setfs -5 + random 15 ; aka setfillshade
  setfc pick [4 5 8 9] ; aka setfillcolor
  spot 1000
  slideleft 200 lower 1
  
  ;pick colors:
  setbg pick [2 6 7] ; aka setbackgroundcolor
  setbs -5 + random 15 ; aka setbackgroundshade
  setpc pick [5 6] ; aka setpencolor
  setps random 10 ; aka setpenshade
  setfc pick [10 15 7 14] ;aka setfillcolor
  setfs -10 + random 10
  gradient
  ;this causes many shapes to transition from the
  ;pen color to the fill color
  
  ;create the landing area:
  make "zone random 300
  ;pick the 'target zone' area
  
  ;containers that hold values are created using 'make'
  ;with the given name and value
  
  twosided
  quad :zone 400 ; creates a quad stretching to the start of the zone
  ;values in containers are retrieved by specifying the container name
  ;prefaced with a colon. You can also use the 'thing' function to retrieve
  ;the value of containers, eg 'quad thing "zone 400'
  slideright :zone ; aka sr
  make "pencol pencolor
  ;we need to store the pencolor and restore it later
  setpc blue ; several color names translate to their color number
  quad 100 - 10 * :level 400 ; create the zone based on the level
  sr 100 - 10 * :level
  setpc :pencol
  ;this is where we restore the pencolor
  quad 300 - :zone + 10 * :level 400 ; create the remainder of the landing area
  sl 100 + :zone - 10 * :level ; return to the start
  
  
  ;create the ski slope:
  notwosided
  down 120
  quad 400 400
  nogradient
  
  
  ;position the turtle for creating trees:
  fd 5 ; aka forward
  sr 5 ; aka slideright
  
  ;place the trees:
  repeat 40 [
    ;we'll have 40 rows of trees
    
    make word "trees repcount []
    ;our strategy here is to make a series of lists, each of which
    ;indicate the presence or absence of a tree in a particular
    ;location on a particular 'line' of the ski slope
    
    repeat 39 [
      ;there are 39 columns on each row of the ski slope
      sr 10
      
      if 1 = random 10 - :level [
        ;the higher the level the more likely a tree will be
        ;placed in a given spot
        
        noise (10 * repcount) + (200 * repabove 1) 1
        ;let's make a little noise based on position
        
        up 150
        ;most shapes are created under the turtle, so we need
        ;to flip it over
        
        make "size 0.5 + 0.1 * random 10
        ;pick a random size
        
        setfc pick [5 8 9]
        cylinder (1 + 0.1 * random 10) * :size 10 * :size 4 + random 10
        ;create the tree trunk. cylinder takes radius, depth and sides
        
        lo 10 * :size
        ;remember, these shapes are created under the turtle
        ;so we have to 'lower' to continue to build 'beneath' them
        
        setfc pick [4 5 6 7 12 14]
        
        ;create the body of the tree:
        repeat 5 [
          randfs
          cutcone (7 - repcount) * :size (5 - repcount) * :size 2 * :size (5 + random 10) * :size
          ;cutcone takes 4 parameters: the starting radius, ending radius, depth and sides
          lo 2 * :size
        ]
        
        ;put a little 'cherry' on the top of each tree:
        randfc ico 1 * :size
        
        ra 20 * :size
        dn 150
        ;return to the base of the tree and reorient back
        
        queue 1 word "trees repabove 1
        ;a 1 in the list indicates a tree
        ;queue adds it to the end of the list
      ]
      [
        ;this second list executes if the if condition is false:
        queue 0 word "trees repabove 1
        ;a 0 indicates no tree
      ]
    ]
    sl 390
    fd 10
    ;move ahead a row and return back to the starting column
    
  ]
  ;return to the start of the repeat loop and loop until finished
  
  ;we're done making trees! Let's place the player:
  
  bk 10
  ;pick a random placement:
  make "pos 5 + random 30
  sr 10 * :pos
  ;and check to make sure there's no tree there or directly in front:
  until (
    and 0 = item :pos :trees39
    0 = item :pos :trees40) [
    sr 10
    inc "pos
    if :pos > 39 [sl 400 make "pos 1
      ;if we hit the end of the row, circle back to the start
    ]
  ]
  rt 180
  ;turn to face down the hill
  ra 5
  ;elevate a little bit off the hill
  
  make "startpos :pos
  ;store the starting position to return back to it later
  
  label "attempt
  ;we will return here if the player's attempt fails
  
  setpremodel []
  ;setpremodel allows for the manipulation of the orientation
  ;and position of the turtle model.
  ;we use setpremodel later and need to clear it if
  ;the player needs another attempt
  
  begintag "route
  ;we're going to place the players 'route' into a 'tag'
  ;so that we can erase it if the player's attempt fails.
  ;this way we can keep the level we've generated and
  ;they can try again
  
  setview "myrtle
  ;view the scene from myrtle's perspective
  myrtle:setlight 1
  snappy:setlight 0
  ;switch the light to myrtle's position
  setviewpoint [0 10 -30]
  ;set the viewpoint offset from myrtle's position
  
  randpc ; aka randompencolor
  setpenwidth 4 ; make the turtle draw fat lines
  
  pendown ; let's draw the route the player takes!
  ;because why not? It'll look interesting later
  
  clearchar
  ;clears the keyboard buffer so the player doesn't
  ;end up with a bunch of buffered keypresses
  ;influencing movement
  
  setmodel [
    setfc red
    ico 5 ; aka icosphere
  ]
  ;sets the turtle 'model' to the given contents
  ;setmodel can also use tags
  
  ;Ready set go:
  showturtle
  type "Ready...
  toot 1000 30
  ;frequency and duration in 60ths of a second
  
  setmodel [
    setfc white
    ico 5
  ]
  type "Set...
  toot 1000 30
  print "Go!
  setmodel [
    setfc red
    setpc white
    amigaball 5 10 20
    ;creates a chequred ball
  ]
  toot 2000 60
  ;and we're off!
  
  repeat 39 [
    setpremodel {"dn repcount * 20}
    ;the premodel processor doesn't know what 'repcount' is, and so we need
    ;to use curly braces to make a 'soft list' that is evaluated when it is
    ;executed -- that is, repcount is resolved into its value, which is then
    ;passed to setpremodel
    
    fd 10
    ;move forward
    
    if keyp [
      ;has a key been pressed?
      
      if and :pos < 39 "j = lowercase peekchar [ ;if it's the j key and the position is less than 39: sl 10 ; aka slideleft inc "pos ; increment the 'pos' container value ] if and :pos > 0 "k = lowercase peekchar [
        ;similarly, if the k key and the position is greater than 0:
        sr 10 ; aka slideright
        dec "pos ; decrement the 'pos' container value
      ]
      
      if and :retry > 0 "r = lowercase peekchar [
        ;if the player presses the r key and has retries remaining:
        dec "retry
        (print :retry |retries remaining...|)
        setview "snappy
        snappy:setlight 1
        setlight 0
        ;switch the light and view back to snappy, the default view turtle
        endtag
        ;close the route tag
        go "start
        ;jump back to the start label
      ]
      
      if "q = lowercase peekchar [finish]
      ;I quit!
      
      clearchar
      ;clear the key buffer
    ]
    
    if 1 = item :pos thing word "trees 40 - repcount [
      ;are we where a tree is?
      
      ; - 'thing' returns the value of the given container.
      ;   we need to use it because we programatically
      ;   created a series of list containers earlier named
      ;   trees0 trees1 trees2 etc. and so we're using thing
      ;   and 'word' to create the appropriate container name
      ;   and then using 'item' to retrieve the value in the
      ;   relevant column (list index)
      
      ; - 'repcount' returns the current iteration of the
      ;   repeat loop. there is a similar function for other
      ;   loops called 'loopcount' and indeed loopcount will
      ;   also return the current repeat loop iteration. But
      ;   repcount is used by a number of different Logos and
      ;   it's a useful distinction
      
      ; so apparently we did:
      
      pr |Ouch! You Crashed! Try again.| ; aka print
      playsound "crash
      say pick [|too bad| |ouch| |that hurt| |dont hit the trees| |wipeout|]
      
      setview "snappy
      snappy:setlight 1
      setlight 0
      ;return the view and light back to 'snappy' the default view turtle
      
      repeat 2 [ht wait 30 st wait 30] ; aka hideturtle and showturtle
      ;wait causes the program to pause for the given number of 60ths of a second
      ;this is due to early computers operating at 60 frames per second
      ;you can also use 'sleep' which takes milliseconds
      
      make "pos :startpos
      ;return the value of the 'pos' container to its starting value
      endtag
      ;close the 'route' tag
      erasetag "route
      ;erase the 'route' tag. This returns the turtle to the position
      ;it was at at the start of the tag, as we have erased part of its
      ;'turtle track'
      go "attempt
      ;return to the 'attempt' label and continue execution from there
    ]
    ;indicates the end of instructions to execute if the player hits a tree
    
    noise repcount * 200 (40 - repcount) * 0.5
    wait (40 - repcount - :level) * 0.5
    ;make a little static noise based on progress down the hill
    ;and similarly wait a little bit based on the progress and the level.
    ;this makes us speed up as we descend the hill
    
  ]
  
  ;we've made it to the bottom!
  up 60
  ;reorient the turtle upward
  
  repeat 100 [
    setpremodel {"fd repcount "dn 10 * repcount}
    ;this causes the ball to move ahead of the camera
    setmodel [
      setfc 1 setpc 15
      setfillopacity 100 - repcount
      setpenopacity 100 - repcount
      amigaball 5 10 20
      ;this causes the ball to fade out
    ]
    setpenopacity 100 - repcount
    ;this causes the line to fade out
    forward 1 noise 8000 - 80 * repcount 1]
  ;do a little victory 'lap'
  
  endtag
  ;close the 'route' tag
  
  setfo 100 setpo 100 ; aka setfillopacity setpenopacity
  ;set the fill and pen opacity back to full
  
  setview "snappy
  snappy:setlight 1
  setlight 0
  ;set the view and light back to snappy, the default view turtle
  
  if and xpos > -200 + :zone xpos < -100 + :zone - 10 * :level [
    ;are we in the zone? if so:
    
    say pick [|great job| |good effort| |way to go|]
    playsound "cheers
    inc "level
    
    if :level < 10 [
      (print |Great Job! Try level| word 1 + :level "!)
      ;round brackets allow more than the default number of
      ;parameters to be 'passed' to a primitive, in this case
      ;print
      
      go "start
      ;return back to the 'start' label to create a new level
    ]
    
    print |You Win! Game Over.|
    say |you win|
    finish
    ;this finish isn't strictly necessary because we will fall out
    ;of execution at this point anyway...
  ] [
    ;we're not in the zone! Let's try this again:
    
    playsound "aw
    print |You missed the Blue Zone! Try Again.|
    say pick [|try again| |go again| |you can do it| |you'll get it this time|]
    wait 120
    make "pos :startpos
    erasetag "route
    go "attempt
  ]
  ;that's all folks!
END
 

Alpine Trees: an Introduction to Terrain

turtleSpaces new terrain functionality provides some great opportunities for simple coding examples with few lines of Logo code, in this case less than 30.

First, we need to introduce the setterrain primitive. setterrain creates ‘terrain’ or a contiguous object of varying elevation.

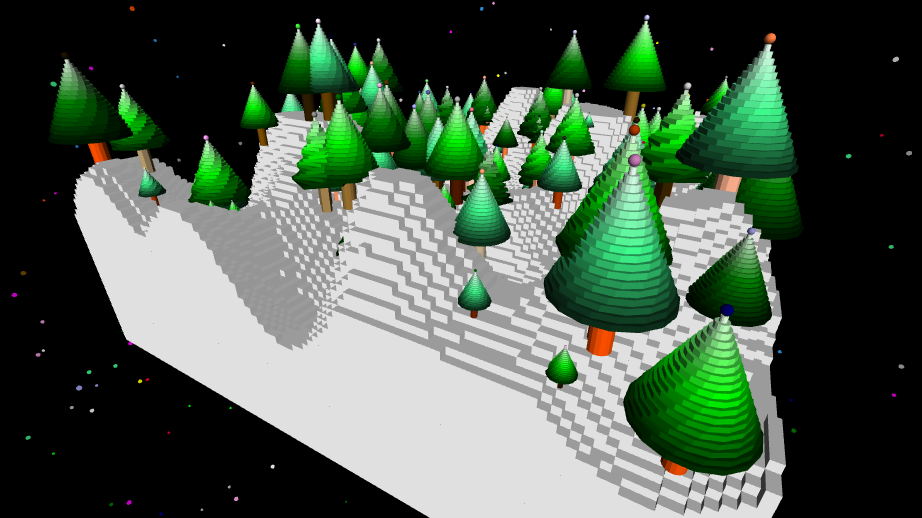
The above is an example of the object created by setterrain. The setterrain primitive takes a number of parameters, and is a good opportunity to explain the different types of parameters used in turtleSpaces to students.

The setterrain command used to create the above is:

setterrain [-5 -5 5 5] [0 50 10 40] random 1000 [fbm 2] “voxel

As you can see, the command has a number of different parameters.

The first parameter is a list containing the number of quadrants (blocks of ten elevation points, by default spaced one turtle-unit apart) in each direction from [0 0], the center of the turtleSpace, expressed as X Y pairs.

So, in this case, we are creating a grid of 25 quadrants in each of the four directions (forward/left, back/left forward/right back/right) surrounding [0 0], for a total of. 100 quadrants.

The second list contains four values: The elevation (or z value) of the ‘bottom’ of the terrain, the elevation of the highest points of the terrain mathematically generated, the ‘floor’ of the terrain which is the lowest level of the generated terrain rendered (so you can create lakes) and the ‘ceiling’ of the terrain which is the highest elevation of the generated terrain rendered (so you can create plateaus).

You can use the setterraincolors primitive to set the colors of various elevations, but this is beyond the scope of this article.

The third parameter is the ‘seed’ of the terrain generator. In the case of our example, we are using the random function to generate a random number to use as the seed, to create a different terrain each time we execute the command. But you can use an absolute number, eg 433, which will create the same terrain every time. This allows you to build additional objects on the terrain and ensure that terrain is the same every time you execute your program.

The fourth parameter, the algorithm used to generate the terrain, is a chameleon of sorts: it can either take a list or a word value depending on your intent. You can provide just a word, eg “fbm (the only algorithm type currently available) or a list, eg [fbm 2] — the second value in the list provides the ‘magnification’ of the algorithm. The larger the number, the less dense the terrain will be in terms of peaks and troughs. If you use a fraction eg 0.2 then the terrain will become more dense, to the point of looking more like a cityscape then terrain!

The final parameter is a word that specifies the style. There is currently only one style, voxel, hence the parameter in our example is “voxel

And so, as you can see, we have lists, numbers and words all as parameters passed to setterrain.

You can play with these values a bit and see the results. Be aware that you need to either call reset or clearterrain (not clearscreen, which does not affect terrain) before you execute the setterrain command again, because you cannot ‘overwrite’ existing terrain. But keep in mind you can create different blocks of terrain in different areas, so long as they do not overlap!

The voxels in the terrain by default are only one turtle-unit cubed, which are very small, You can increase the size of the voxels used in the terrain by using the setterrainresolution primitive to change that size, eg setterrainresolution 10. This will expand the size of the terrain by a factor of 10, so keep in mind your camera may end up ‘inside’ the terrain and you will need to use the scroll wheel on your mouse to pull the camera to the outside of it. Or you could use commands like:

cam:setorbitdistance 1000

cam:orbitdown 60

which pulls the camera turtle away from the center point and ‘orbits’ it down 60 degrees, cam: denoting that we are talking to the camera turtle, by default ‘snappy’ (if you use the setview primitive to change the camera turtle, then cam: commands that turtle instead.)

And so the start of our program looks like this:

TO trees
  reset hideturtle penup
  setterrainresolution 10
  
  setterrain [-5 -5 5 5] [0 50 10 40] random 1000 [fbm 2] "voxel
  ;create random terrain
  
  cam:setorbitdistance 1000
  cam:orbitdown 60
  ;position camera
END

and results in this:


And so we have our terrain, which is by default all white and suits our purposes. But now we need to put trees on it!

Our trees are made up of cylinders, of varying size and side counts, to provide variety. A random icosphere adorns the top of each tree.

First, we’ll create a repeat loop of 100, to create 100 trees:

repeat 100 [

]

The lines between the square brackets are where we’ll put the lines we want to repeat. Next we want to position the turtle in a random spot on the terrain, but we want the treeline to be at least 200 turtle-units on the positive Z axis.

We’re going to be using the elevation primitive, which returns the elevation at the given x and y co-ordinates expressed as the z co-ordinate of the elevation NOT the voxel count (remember, we’ve set the terrainresolution to 10, which means the actual z co-ordinate will be 10 times the voxel count).

We’re also going to be using dountil, which repeats an action until the condition provided to it is satisfied. And so we’re going to position the turtle in random spots within the area of the terrain and measure the elevation there, only continuing if the elevation is 200 or greater:

    dountil 200 < elevation pos [
      setxy -480 + random 960 -480 + random 960
    ]

Once we’ve found an appropriate spot, we’re going to set our elevation to the top of the terrain and flip the turtle upwards 180 degrees, because cylinders are created beneath the turtle:

    setz elevation pos up 180

We need to pick a color for the trunk (8 is brown and 9 is orange) and a random shade:

    setfillcolor pick [8 9]
    randomfillshade

Next we’ll create containers containing randomly-generated values determining the size of the tree and the number of sides it has:

    make "size 5 + random 20
    make "sides 3 + random 20

We’ll use the values contained in these containers in our cylinder commands to create our tree appropriately. Next we make the trunk based on these values:

    cylinder :size / 2 2.5 * :size :sides

cylinder takes three parameters: the radius of the cylinder, the depth of the cylinder and the number of sides. :size returns the value stored in the “size container, similarly with :sides.

Next we’ll lower the turtle to the end of the cylinder:

    lower 2.5 * :size

Now comes the creation of the tree’s ‘foliage’. First we need to select the tree’s color, then create 20 cylinders making up the foliage, then place a randomly-colored icosphere on the top.

    setfillcolor pick [4 12 14]

4, 12 and 14 are greenish colors.

repeat 20 [

]

We’re going to make 20 cylinders. Inside the repeat loop we place the following:

      setfillshade 15 - 1.5 * repcount
      cylinder 2.5 * :size - ((2.5 * :size) / 20) * repcount :size / 4 :sides
      lower :size / 4
      right 90 / :sides

repcount returns the current repeat ‘loop’ we’re in, and so first we set the fill shade (fill colors are used by shape primitives such as cylinder) based on the repeat loop. Second we create the cylinder, third we lower the turtle to the bottom of the cylinder, and finally we turn the turtle right based on the number of :sides the cylinder has, creating the spiral effect.

    randomfillshade randomfillcolor
    raise :size / 4 lower :size / 5
    icosphere :size / 5 up 180

Next, we set a random fillshade and fillcolor, raise the turtle back up so that we can lower it with a more appropriate value for our icosphere, then create the icosphere based on the :size value. Finally, we create the icosphere. Then we repeat all of this 100 times for 100 trees, ending up with something like this:

Here is the listing in full:

TO trees
  reset hideturtle penup
  setterrainresolution 10
  ;the terrain resolution affects all terrain! If you change it, terrain is regenerated.
  
  setterrain [-5 -5 5 5] [0 50 10 40] random 1000 [fbm 2] "voxel
  ;create random terrain
  
  cam:setorbitdistance 1000
  cam:orbitdown 60
  ;position camera
  
  ;create 100 trees:
  repeat 100 [
    dountil 200 < elevation pos [
      setxy -480 + random 960 -480 + random 960
    ]
    ;position the turtle someplace where the elevation is 200 or greater
    
    setz elevation pos up 180
    ;raise the turtle to that elevation and flip it on its back
    
    setfillcolor pick [8 9]
    randomfillshade
    ;select trunk color / shade
    
    make "size 5 + random 20
    make "sides 3 + random 20
    ;select random values
    
    cylinder :size / 2 2.5 * :size :sides
    ;make the trunk
    
    lower 2.5 * :size
    setfillcolor pick [4 12 14]
    ;select foliage colors
    
    repeat 20 [
      ;create 20 'rings'
      setfillshade 15 - 1.5 * repcount
      cylinder 2.5 * :size - ((2.5 * :size) / 20) * repcount :size / 4 :sides
      lower :size / 4
      right 90 / :sides
      ;this creates a spiral effect in the tree
    ]
    
    randomfillshade randomfillcolor
    raise :size / 4 lower :size / 5
    icosphere :size / 5 up 180
    ;make the 'ball' on top
  ]
END

Don’t forget that you can click and drag the mouse to move the camera around the model, and scroll in and out to zoom!


Turtle Wordle: A Clone of Wordle in 60 Lines of Logo

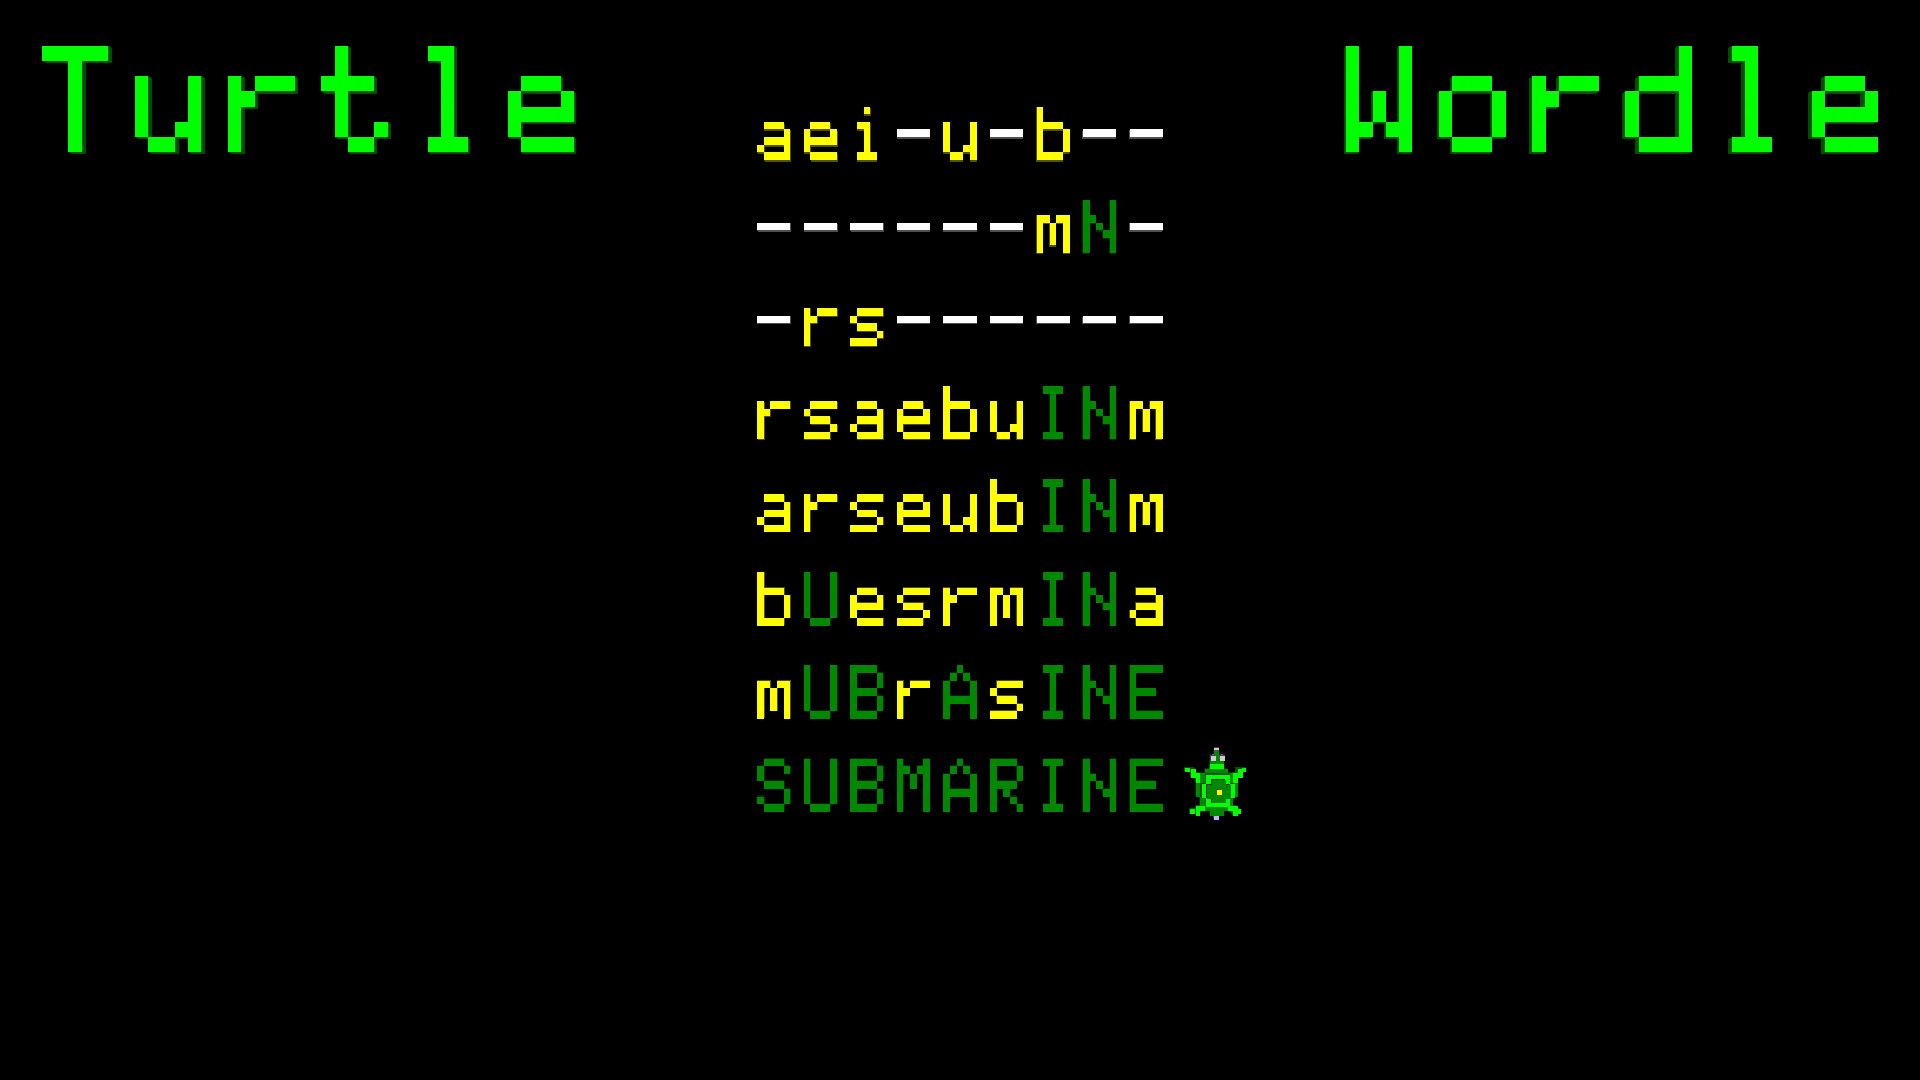
Wordle, a cross between Mastermind and Hangman, seems to be the rage these days. Also, implementing it in as few lines as possible. In Logo we get to cheat a little about the second bit, as we can stack multiple commands on the same line. But we still need to keep things within a reasonable line length.

We’re happy to say we succeeded in our efforts, and even expanded on the model somewhat, adding progressively longer words and hints, among other things. This is a pretty good example of string and list management in Logo, which is what it was initially created for, even before the turtle!

Check out the source code below, or open in the web IDE…

TO wordle
  reset hideturtle make [score level stage] [0 1 1] maximize settextsize 1
  cleartext overlayscreen settextwindow [0 30 99 47] settextforeground 14 ;short form: settf
  print |TurtleWordle: Get one point for each letter in solution, lose one point for each guess.|
  print |You have word-length + 1 chances to guess the word. Level acts as score multiplier.|
  print |Get 6 4-letter words correct to advance, 5 5-letter words, 4 6-letter words and so-on.|
  print |Game ends when you run out of guesses, or guess the 9-letter word! (You brain you!)|
  print |Uppercase indicates correct letter and position, lowercase only that letter is in word.|
  cursordown playsound "drop ;we use simple encryption not to make this too easy!
  make "words1  [bsai dpme ql?n kgli hskn ap?@ jmai qj?k afsk ngli mtcp jmem dgpc @cr? @jsc ctcl]
  make "words2  [xc@p? nsnnw kmsqc ?@msr slbcp fmpqc qmslb jmaiq @p?gl ilmai lmprf ?jnf? glbcv]
  make "words3  [q?j?kg ngaijc afccqc igrrcl ngejcr rsprjc rmgjcr @mtglc amddcc ecp@gj bctglc]
  make "words4  [mar?nsq qg@jgle mnsjclr ejsrrml n?wkclr asqfgml n?p?qmj jcrrcpq gltmjtc @j?licr]
  make "words5  [bp?k?rga nclr?eml kmrmpa?p qmjsrgml slbcpqc? mtcpam?r sk@pcjj? l?rrpcqq qslqfglc]
  make "words6  [qs@k?pglc u?rcpd?jj qrpccra?p slbcpuc?p bcqrpmwcp ?n?prkclr bmaskclrq pm?bam?af]
  label "select ;return here using 'go'
  if :level = 7 [settf 3 print |Congratulations! You win!| playsound "applause go "playagain]
  make "selection random count thing word "words :level
  make "enword uppercase item :selection thing word "words :level
  make word "words :level remove :selection thing word "words :level
  make "word empty foreach "char :enword [make "word word :word char (ascii :char) + 34]
  make "chances 1 + count :word make "tries 0 clearscreen penup setfillcolor 12 ht
  settypesize 20 setxy -200 80 typeset "Turtle setxy 80 80 typeset "Wordle settypesize 10 home st
  foreach "letter "abcdefghijklmnopqrstuvwxyz [make :letter instances :letter :word]
  forever [
    foreach "letter "abcdefghijklmnopqrstuvwxyz [make word "p :letter 0]
    settf 6 (print |Tries remaining:| :chances - :tries) settf 15
    dountil (count :guess) = (count :word) [
      (type |Word is | count :word | letters: |) make "guess lowercase readword]
    inc "tries make "correct 0 make "hits []
    setxy 0 - (5 * count :word) 100 - (:tries * 20)
    foreach "letter :guess [
      if :letter = item loopcount :word [inc word "p :letter] ]
    foreach "letter :guess [
      if :letter = item loopcount :word [
        settf 4 type uppercase :letter
        setfc 4 typeset uppercase :letter
        inc "correct playsound "drop queue loopcount "hits
      ] [if containsp :letter :word [inc word "p :letter
          if (thing word "p :letter) <= thing :letter [ settf 13 type lowercase :letter setfc 13 typeset lowercase :letter playsound "drip] [ settf 15 setfc 15 type "- typeset "- playsound "dunk] ] [settf 15 setfc 15 type "- typeset "- playsound "dunk] ] ] print empty slideright 10 if :correct = count :word [ settf 12 type |You got it! | playsound pick [sheep sheep2 sheep3] make "score :score + ((1 + ((count :word) - :tries)) * :level) if (:chances - :tries) > 0 [
        inc "stage if :stage = 8 - :level [
          make "stage 1 inc "level settf 9 print |Level up!| playsound "please] ] [
        settf 1 print |No points. Try again.| playsound "crow]
      settf 13 print sentence |Your score is: | :score go "select]
    if :tries = :chances [settf 3 (print |Word was:| :word)
      settf 7 (print |Too bad! Final score: | :score) playsound "evil go "playagain]
    if 0 = remainder :tries 3 [
      dountil not containsp :pick :hits [make "pick 1 + random count :word] settf 8
      (print |Psst: the letter in position | :pick | is | uppercase item :pick :word |!|)] ]
  label "playagain settc 13 question |Play again? (Y/N)|
  if "N = uppercase answer [restore resetall finish] [wordle]
END


Floaty Turtle: A Flappy Bird clone in Logo

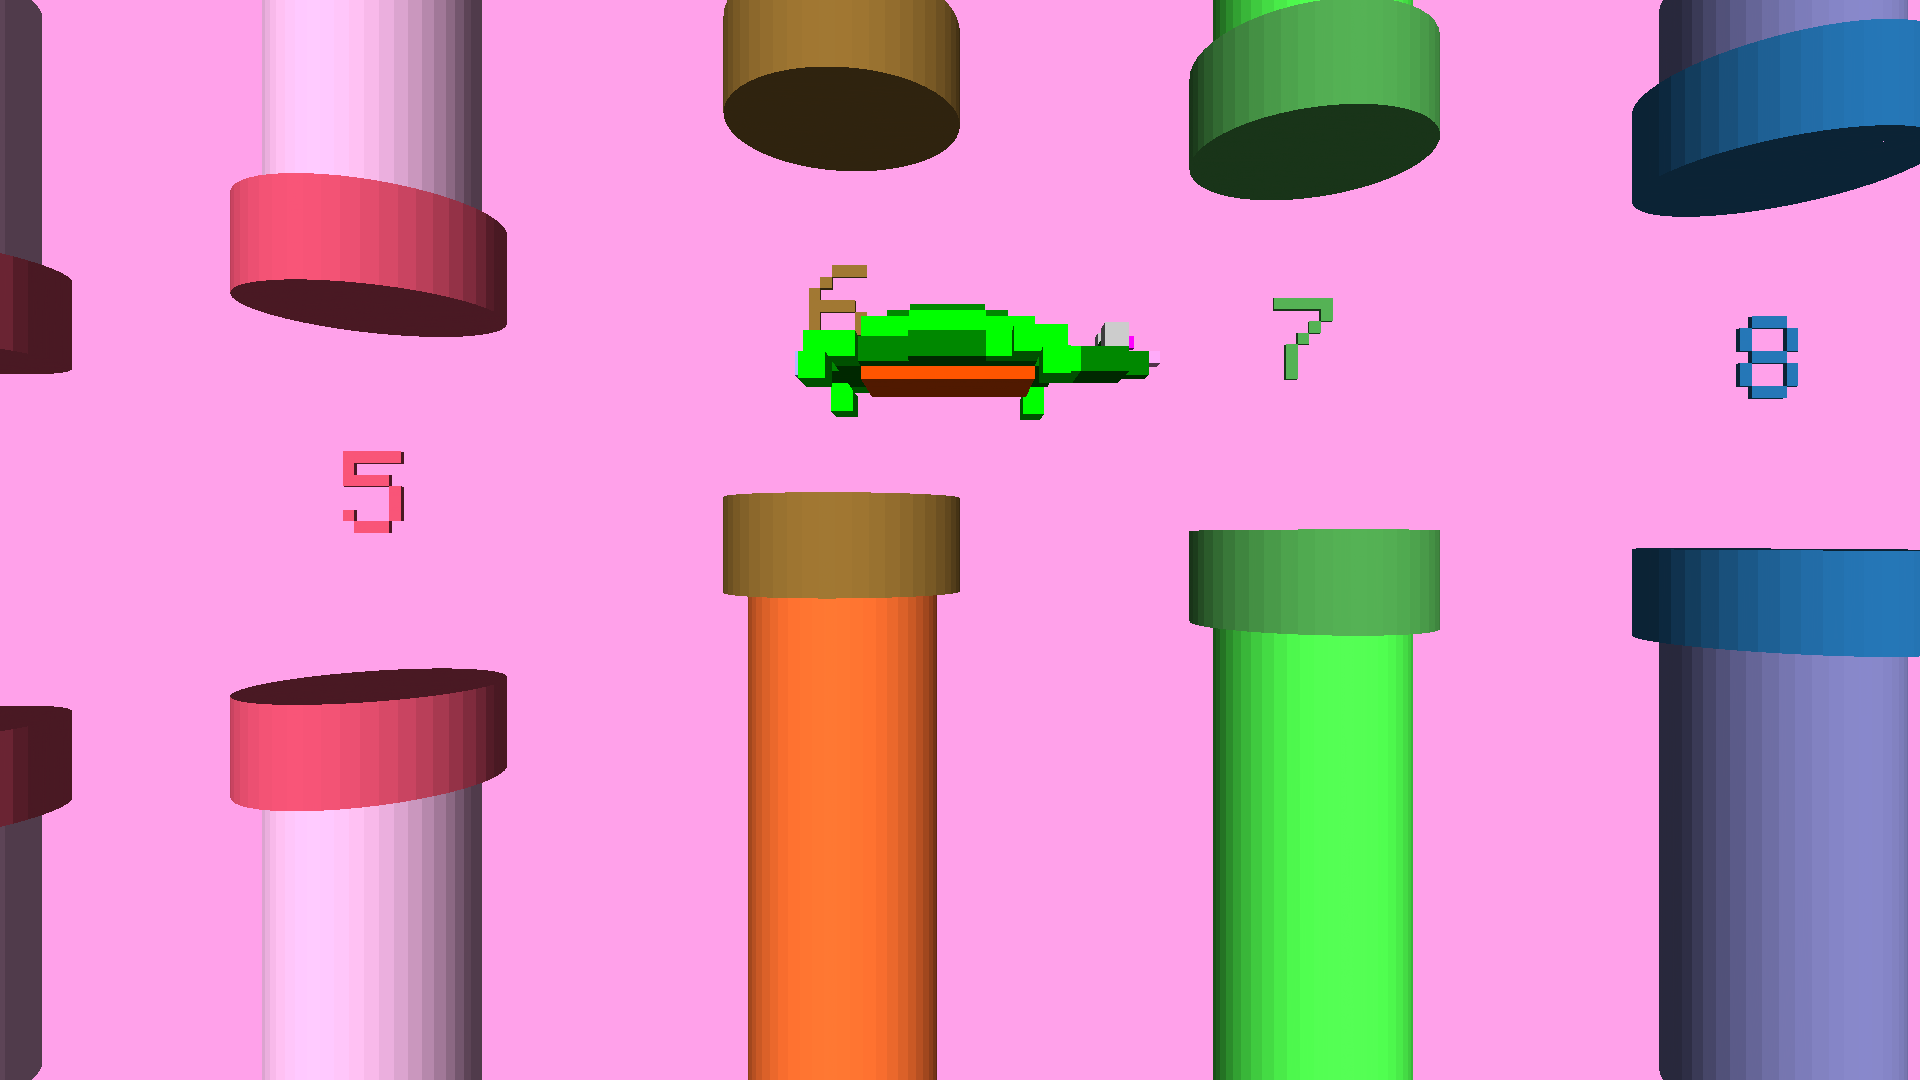
Floaty Turtle is a simple clone of Flappy Bird written in the Logo programming language that turtleSpaces uses.

Open in the integrated development environment (IDE)

NEWTURTLE "myrtle

TO floaty
  ;here is yet another example of a relatively complex
  ;game that can be rather simply implemented in Logo:
  ;a flappy bird clone!

  ;to make it work we use two turtles, one is the player
  ;and the other creates, moves and erases the pipes
  ;these are two seperate 'workers' or threads

  ;this procedure kicks off the game, displays a title
  ;screen, and then manages the player, processing
  ;input and moving the player appropriately

  ;the pipemaker turtle and its pipes procedure
  ;manages the pipes and checks for collisions

  ;the turtle does not move horizontally,
  ;instead the pipes do!

  reset
  cleartext
  setbackgroundcolor pick [6 7 14 5 10 11 14 15]
  ;select a random background color from the given list

  noaudiowait
  ;don't wait for audio to finish playing

  setmodel [penup back 7 stamp "myrtle]
  ;we need to offset Myrtle's actual position more
  ;toward her center for the purposes of this game

  setmodelscale 5
  ;make myrtle big!

  playsound "doodoo
  ;startup sound

  pipemaker:newworker [pipes]
  ;'kicks off' the pipemaker turtle, who
  ;creates and moves the pipes

  ;create the title screen:

  penup
  randomfillcolor
  slideleft 180 forward 5
  settypesize 60
  pushturtle
  ;'push' the turtle's state (position etc) on
  ;to a stack, from which it can be 'popped'
  ;off later

  typeset "Floaty
  popturtle
  ;restore the previously pushed state

  back 100
  randfc
  ;short for randomfillcolor

  pushturtle
  typeset "Turtle
  popturtle
  bk 10 sr 70
  ;back and slideright

  settypesize 10
  randfc
  typeset |Press any key to float!|
  ;title screen complete!

  home
  dn 90 rt 90
  ;down and right

  make "raise 0
  ;the :raise container holds the current
  ;value remaining to float Myrtle upwards

  forever [

    if loopcount = 1 [say "Ready!]
    if loopcount = 16 [say "Set!]
    if loopcount = 31 [say "Go!]
    ;the loopcount is the number of times the forever
    ;loop has executed. Based on that count, say the
    ;appropriate ready set go component

    if divisorp 100 loopcount [
      ;every 100 loops pick a random background
      setbg pick [6 7 14 5 10 11 14 15]
      ;from the given list
    ]
    ;setbg short for setbackground

    dosleep [50] [
      ;try to maintain an average of 50ms to do
      ;the following:

      if loopcount > 30 [
        ;if the loopcount is greater than 30:

        if :raise = 0 [
          ;if the value inside the :raise container
          ;is 0, then lower the turtle 2.5 turtle-units:

          lower 2.5
        ]
        [
          ;otherwise raise the turtle 2.5 turtle-units
          ;and decrease the value inside the :raise
          ;container by 2.5
          raise 2.5
          make "raise :raise - 2.5
        ]

        if keyp [
          ;if a key is pressed, play a sound,
          ;remove the key from the keyboard buffer
          ;and increase the value of the :raise
          ;container by 20:

          playsound "air
          clearchar
          make "raise :raise + 20
        ]

        clean
        ;remove the turtle's 'track' -- it's not
        ;drawing or creating anything so we don't
        ;need to have it piling up

      ]
    ]
  ]
END
NEWTURTLE "pipemaker

TO pipes
  ;the pipemaker turtle's job is to
  ;create the pipes, shift them to the left
  ;and check if they've hit the turtle

  clearscreen
  noaudiowait
  penup
  home
  slideright 250
  back 120
  up 90
  ;position the turtle appropriately for
  ;creating the pipes offscreen to the right

  begintag "move
  endtag
  ;this tag is used to shift the pipes,
  ;by replacing its contents with an ever-
  ;increasing slideleft directive

  make "height 100
  ;this is the starting height of the pipes

  make "heights [0 0 0 0 0]
  ;initialize an 'zeroes' list of pipe heights

  make "score 0
  make "count 0
  ;initialize the score and the pipe count

  settypesize 20
  ;set the type size. Type is the text you
  ;create inside the 3D world

  forever [
    ;do this forever:

    sleep [50]
    ;try to do this stuff in an average of
    ;50ms -- less or more as needed to keep
    ;that average:

    if divisorp 20 loopcount [
      ;every 20 loops:

      inc "count
      ;increase the contents of the :count container
      ;by one

      if loopcount > 60 [
        ;if the loopcount is greater than 60:
        playsound "clang
        inc "score
        say :score
        ;make a sound, increment :score and say it
      ]

      slideright 100

      begintag loopcount
      ;create a new 'tag' for the pipe
      ;so we can remove it after it passes the
      ;left side of the screen

      randomfillshade
      ;select a random fill shade

      make "col 1 + random 5
      ;select a random number and put it in :col

      setfillcolor item :col [12 9 7 6 11 14 10 13]
      ;set that color based on :col's index in the
      ;provided list

      make "height :height + (-60 + random 120)
      ;increase or decrease :height based on a
      ;random number

      if :height < 20 [make "height 30 + random 20] if :height > 120 [make "height 110 - random 20]
      ;if too high or low, pick a new value higher
      ;or lower as needed

      queue :height "heights
      ;add the new height to the list of heights

      ;create the lower pipe:
      cylinder 20 :height 50
      lower :height
      setfillcolor item :col [4 8 6 2 1 12 5 3]
      ;select the complementary color for the pipe

      cylinder 25 20 50
      lower 50

      ;type the pipe number:
      down 90 right 90 back 10
      if :count > 9 [bk 10]
      inscribe :count
      if :count > 9 [fd 10]
      forward 10 left 90 up 90
      ;if gameplay is too slow, comment out
      ;the above five lines

      ;create the upper pipe:
      lower 50
      ;remember, the turtle is upside down!
      cylinder 25 20 50
      lower 20
      setfillcolor item :col [12 9 7 6 11 14 10 13]
      cylinder 20 120 - ypos 50
      raise :height + 120

      endtag
      ;close the pipe 'tag'

      if loopcount > 119 [erasetag loopcount - 100]
      ;erase the pipe that has left the screen

      ignore pop "heights
      ;remove its height from the :heights container
      ;and just throw it away (ignore it)
    ]

    if loopcount > 60 [
      ;check for crash:
      if (or
        myrtle:ypos > (-120 + (90 + item 3 :heights))
        myrtle:ypos < (-120 + (20 + item 3 :heights))
        ;the third item in the :heights list is the
        ;height of the pipe around where the turtle
        ;is, so we can use that to see if we've hit
        ;anything
      ) [
        (print |Crash! Final Score: | :score)
        print |Press flag icon to play again!|

        calm "myrtle
        myrtle:run [setfillcolor 1 icosphere 30]
        ;red ball

        audiowait
        playsound "crack
        playsound "aw

        myrtle:clean
        ;gets rid of the red ball

        noaudiowait
        playsound "fall
        say |too bad|

        myrtle:repeat 90 [
          forward 3 lower 3 wait 1
        ]
        ;fall to the ground

        audiowait
        playsound "crash
        finish
        ;that's all folks

      ]
    ]

    replacetag "move [slideleft loopcount * 5]
    ;increase the value of the slideleft
    ;command in the move tag, shifting the
    ;pipes to the left

  ]

  ;and that's it! Not really much code, is it?

END

Tutorial: Fancy a game of darts?

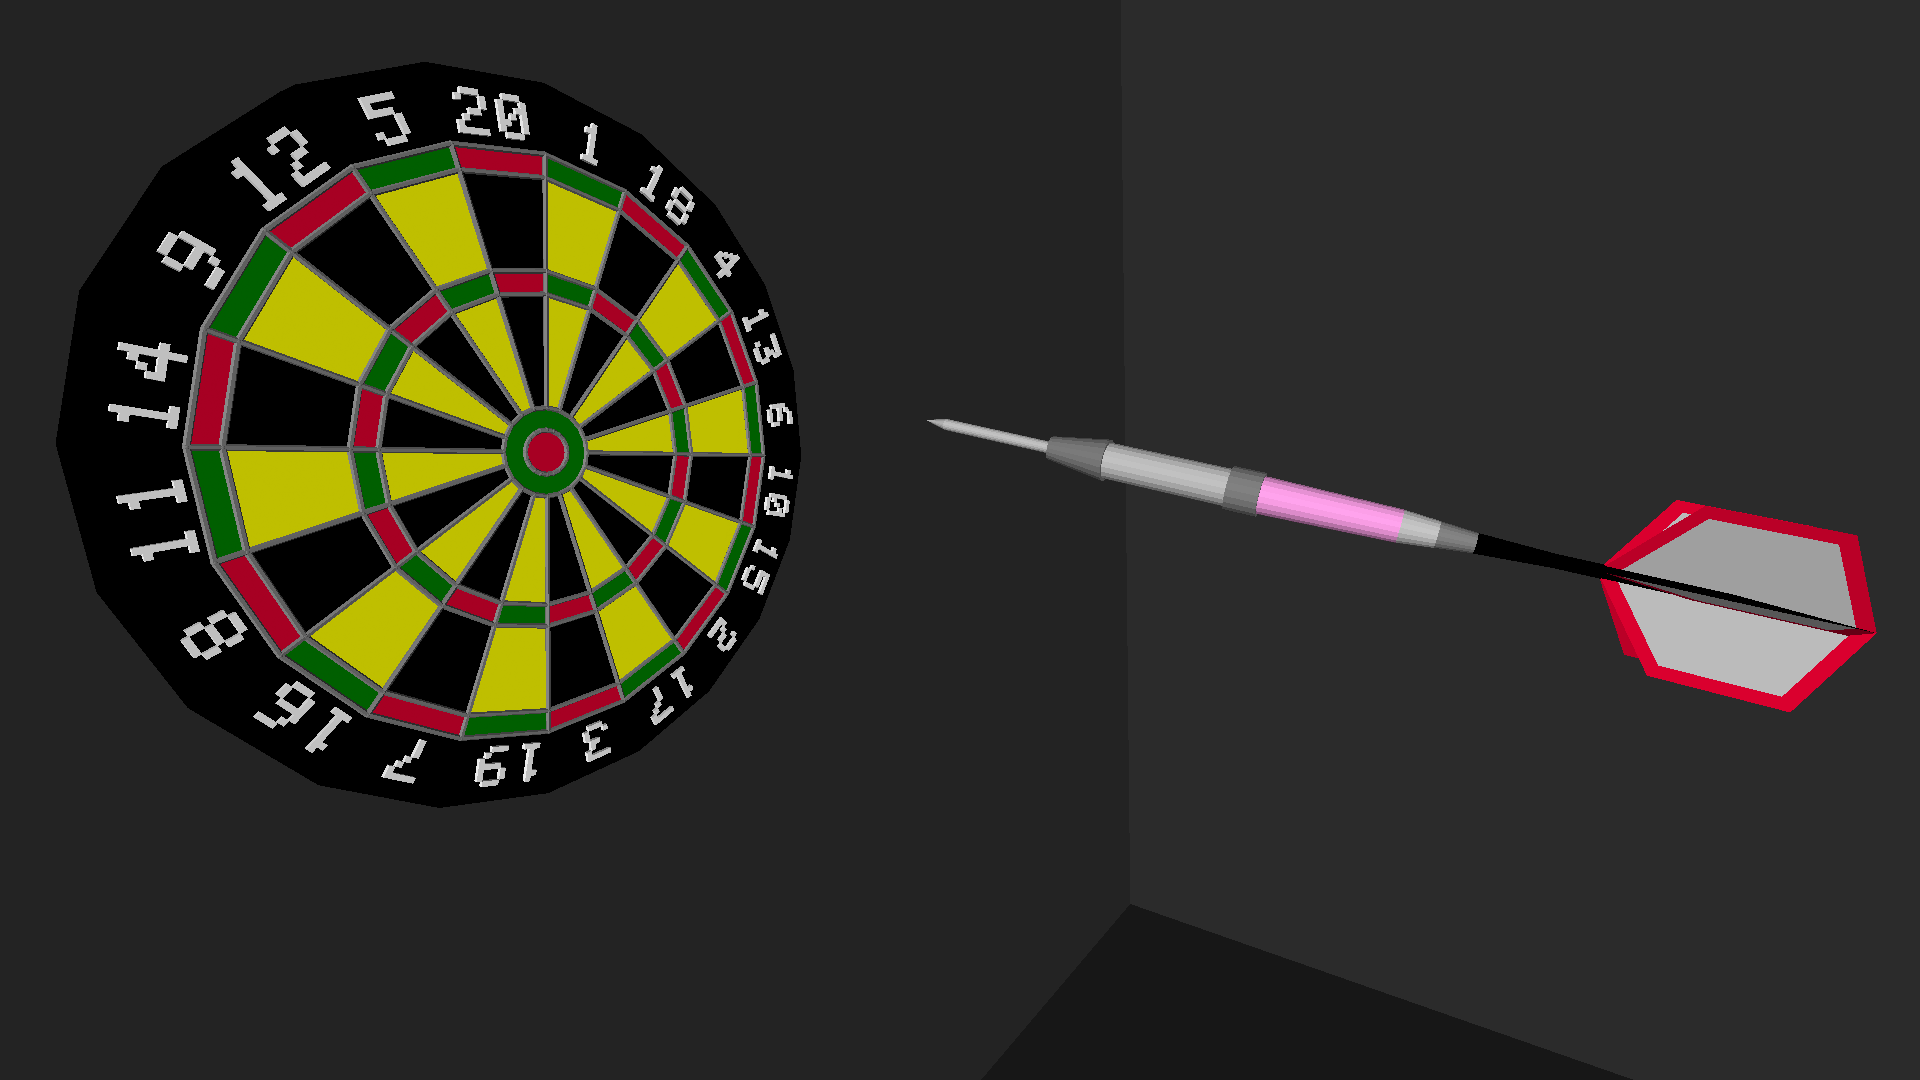
Consider the below game of ‘pub darts’:

You can open it in our Javascript-based IDE by clicking here

If you hover over the various primitives in the editor, a popup will tell you what they do.

The game consists of three main parts: the dartboard, the darts and the game itself.

The dartboard is constructed primarily using the ringarc primitive and a number of repeat loops. It uses the oddp boolean to decide which color each segment of each ring should be, allowing us to match the colors of a standard dartboard.

TO board
  ;create the dart board
  
  hideturtle
  rt 9 setfc 1 polyspot 5 20
  ;bullseye
  
  lo 0.1 setfc 4 polyspot 10 20
  ;outer bullseye
  
  repeat 20 [if oddp repcount [setfc 13] [setfc 0] ringarc 25 10 20 1 rt 18]
  repeat 20 [if oddp repcount [setfc 4] [setfc 1] ringarc 5 35 20 1 rt 18]
  repeat 20 [if oddp repcount [setfc 13] [setfc 0] ringarc 20 40 20 1 rt 18]
  repeat 20 [if oddp repcount [setfc 4] [setfc 1] ringarc 5 60 20 1 rt 18]
  ;rings
  
  lo 0.1 setfc 0 cylinder 80 10 20 lt 9 penup setfc 15 rt 180
  ;backboard

The numbers around the outside of the dartboard are created using the inscribe and orbitleft primitives. We offset the numbers as required to center them on their relevant wedges. We also use the orbit / pullin / pullout functionality to create the wire frame overlaid on the dartboard.

 dropanchor pullout 65 ra 2
  foreach "i [20 1 18 4 13 6 10 15 2 17 3 19 7 16 8 11 14 9 12 5] [
    lt 90 if :i > 9 [bk 10] [bk 5] inscribe :i
    if :i > 9 [fd 10] [fd 5] rt 90 orbitleft 18
  ]
  ;numbers
  
  home setpw 1.2 setpc 5 setfc 5
  dropanchor tether pullout 5 orbitleft 9
  repeat 6 [
    pd
    repeat 20 [orbitright 18 ico 0.6]
    pu switch {repcount}
    case 1 [pullout 5] case 2 [pullout 25]
    case 3 [pullout 5] case 4 [pullout 20]
    case 5 [pullout 5]
  ]
  ;metal rings
  
  home pullout 10 orbitleft 9
  repeat 20 [pd pullout 55 pu pullin 55 orbitright 18]
  ;metal lines
  
  home
  
END

The darts are assembled using cylinders, cones, cutcones and poilyspots (for the fletchings).

TO dart :color
  ;create the dart models
  
  lower 50 setfillcolor 10 cone 1 4 20
  raise 20 cylinder 1 20 20
  ra 10 setfc 5 cutcone 3.5 2 10 20
  ra 20 setfc 10 cylinder 3 20 20
  ra 5 setfc 5 cylinder 3.5 5 20
  setfc item :color [11 6]
  ra 20 cutcone 2.5 3 20 20
  ra 5 setfc 10 cutcone 2 2.5 5 20
  setfc 5 ra 5 cutcone 1.5 2 5 20
  ra 10 setfc 0 cutcone 1 1.5 10 20
  ra 20 cutcone 1 1 20 20 up 180
  cone 1 15 20 rr 90
  
  repeat 3 [
    up 60 setfc 10 twosided
    polyspot 13 6 setfc :color
    ring 2 13 6
  ]
  ;fletchings
END

The game itself consists of a setup section and the main game loop. Inside the game loop we have the aiming section and the scoring section. Every three darts we switch between players. If one of the players score exceeds 301 then they are declared the winner and the game ends.

TO game
  ;world's smallest dart game
  
  reset
  clearfrozen
  cleartext
  print |Welcome to darts! Two players take turns until one scores more than 301.|
  cursordown
  print |Try to aim the dart with the mouse and press the mouse button to throw...|

The setup section creates the dart ‘room’, draws and ‘freezes’ the board (breaks it off into its own ‘turtle track’) and creates the dart models using the dart procedure. Default containers (variables) are created using surnames (container classes), one for each player. Surnames enable us to use the same code for each player without needing to use lists or tables.

  pu sl 300 bk 300 ra 600
  setfc pick [3 5 8 9] setfs 10
  setbs fillshade setbg fillcolor
  voxel -607 setfs 0 home
  ;create dart room
  
  board
  ;create board
  
  cam:pullout 180
  freeze "board
  
  newmodel "dart1 [dart 1]
  newmodel "dart2 [dart 2]
  ;create dart models
  
  setmodel "dart1
  setmodelscale 0.7
  setanchor [0 0 0]
  
  foreach "i [red blue] [setsurname :i
    rt 180 make "down forwarddir rt 180
    make "updown random 2 make "leftright random 2
    make "dart 0 make "frame 0 make "total 0
    make "oldx mousex make "oldy mousey
  ]
  setsurname "red
  ;define player containers
  
  print word surname |'s turn...|
  showturtle
  
  setposition [0 0 250]

The main game loop moves the dart according to the mouse position. The dart moves up and down and side to side to simulate shaky hands, in an exaggerated fashion to make the game more challenging. The player pushes the left mouse button to launch the dart. The camera follows the dart in a method dictated by a random number.

  forever [
    ;main game loop
    if or :oldx != mousex :oldy != mousey [
      make "oldx mousex make "oldy mousey
      setposition {-100 + 200 * mousex / 100 50 - 100 * mousey / 100 250}
      cam:sety myrtle:ypos
      ;move the dart with the mouse
    ]
    move 1 random 360

    if :updown = 0 [up 1 if and pitch < 350 pitch > 20 [make "updown 1]]
    if :updown = 1 [dn 1 if and pitch < 350 pitch > 20 [make "updown 0]]
    if :leftright = 0 [rl 0.5 if and roll < 350 roll > 10 [make "leftright 1]]
    if :leftright = 1 [rr 0.5 if and roll < 350 roll > 10 [make "leftright 0]]
    ;shaky hands, maybe try drinking herbal tea?

    wait 1
    ;delay

    if buttonp 0 [
      ;if button clicked:

      make "camdir random 4
      ;pick random camera action

      dountil (item 3 extrapolate position vectorsub updir [0 0 0] 35) < 0 [
        ;until the tip of the dart hits the board (basically):

        setpremodel {"lt loopcount}
        ;spin the dart model
        lo 1 dn 0.1 cam:pullin 1
        ;toward the board and down a little

        if :camdir != 3 [cam:sety myrtle:ypos]
        if :camdir = 1 [cam:orbitleft 0.3]
        if :camdir = 2 [cam:orbitright 0.3]
        if :camdir = 3 [cam:orbitup 0.3]
        ;camera actions
      ]

Once the dart reaches the wall / board, we calculate if the dart hit the board or the wall by checking its distance from the center of the dart board [0 0 0]. If it actually hit the board then we 'stamp' the model in place.

      norender
      ;stop rendering graphics while we deal with things

      ht lo 34
      make "vec vectors
      setvectors originvectors
      updatestate
      ;need to update the state for towards to work
      ;with rendering disabled

      make "dir towards [0 0]
      ;where did we land relative to the center?

      if and :dir >= 171 :dir < 189 [make "score 20]
      if and :dir >= 189 :dir < 207 [make "score 1]
      if and :dir >= 207 :dir < 225 [make "score 18]
      if and :dir >= 225 :dir < 243 [make "score 4]
      if and :dir >= 243 :dir < 261 [make "score 13]
      if and :dir >= 261 :dir < 279 [make "score 6]
      if and :dir >= 279 :dir < 297 [make "score 10]
      if and :dir >= 297 :dir < 315 [make "score 15]
      if and :dir >= 315 :dir < 333 [make "score 2]
      if and :dir >= 333 :dir < 351 [make "score 17]
      if or :dir >= 351 :dir < 9 [make "score 3]
      if and :dir >= 9 :dir < 27 [make "score 19]
      if and :dir >= 27 :dir < 45 [make "score 7]
      if and :dir >= 45 :dir < 63 [make "score 16]
      if and :dir >= 63 :dir < 81 [make "score 8]
      if and :dir >= 81 :dir < 99 [make "score 11]
      if and :dir >= 99 :dir < 117 [make "score 14]
      if and :dir >= 117 :dir < 135 [make "score 9]
      if and :dir >= 135 :dir < 153 [make "score 12]
      if and :dir >= 153 :dir < 171 [make "score 5]
      ;calculate dart position and assign score

      make "dist distance extrapolate position vectorsub updir [0 0 0] zpos [0 0 0]
      ;how far away from the center is the tip of the dart?
      if :dist <= 5 [make "score 50]
      ;bullseye!
      if and :dist > 5 :dist < 10 [make "score 25]
      ;half bullseye
      if and :dist >= 35 :dist <= 40 [make "score :score * 3]
      ;triple ring
      if and :dist >= 60 :dist <= 65 [make "score :score * 2]
      ;double ring
      if :dist > 65 [make "score 0]
      ;missed!


We use the towards primitive (an original Apple Logo II primitive!) to determine the number of degrees the landed dart (which is in reality pointed upwards toward the ceiling, the dart 'descending' towards the board along the Z axis) would have to turn to face [0 0]. This, combined with the distance from the center allows us to calculate the dart's score.

      (print |Dart| word :dart + 1 |:| :score) make "frame :frame + :score
      setvectors :vec
      if :dist < 79 [
        ;'stick' a dart to the board using stamp
        playsound "click2
        ra 34
        run premodel
        if surname = "red [stamp "dart1] [stamp "dart2]
        render wait 120
      ]

      else [
        playsound "knock
        pr "Missed! ra 34 st render
        repeat (ypos + 300) / 4 [drift 4 :down cam:lo 4 wait 1]
      ]
      ;drop the dart to the floor

      cam:cs
      ;reset the camera

      setheading 0 setpitch 0 setroll 0
      setvectors originvectors
      ;reset state

      make "updown random 2
      make "leftright random 2
      ;pick random starting wobble directions
      ;for the next dart

      inc "dart
      ;add one to :dart

      if :dart = 3 [
        ;if we've thrown three darts:

        (print |Frame Score: | :frame)
        make "total :total + :frame
        (print word surname |'s Total Score: | :total)
        make "dart 0 make "frame 0
        cam:pushturtle
        cam:run pick [[repeat 30 [orbitleft 1 wait 1]] [repeat 30 [orbitright 1 wait 1]]]
        wait 120 cs cam:popturtle

        if :total > 301 [(print surname "wins!) finish]
        ;the end

        if surname = "red [setsurname "blue setmodel "dart2]
        else [setsurname "red setmodel "dart1]
        print word surname |'s turn...|
        ;switch players
      ]

      setpremodel [] cam:pullout 180 setposition [0 0 250] showturtle
      ;position camera, reset 'spin', show the next dart

    ]
    ;end of throw

  ]
  ;end of main game loop

END

Logo code is like poetry! It's easy to read and describes what the computer is doing in fairly broad terms. This is why it has always been great as a first text-based coding language.


Bale Example: Dodgeball

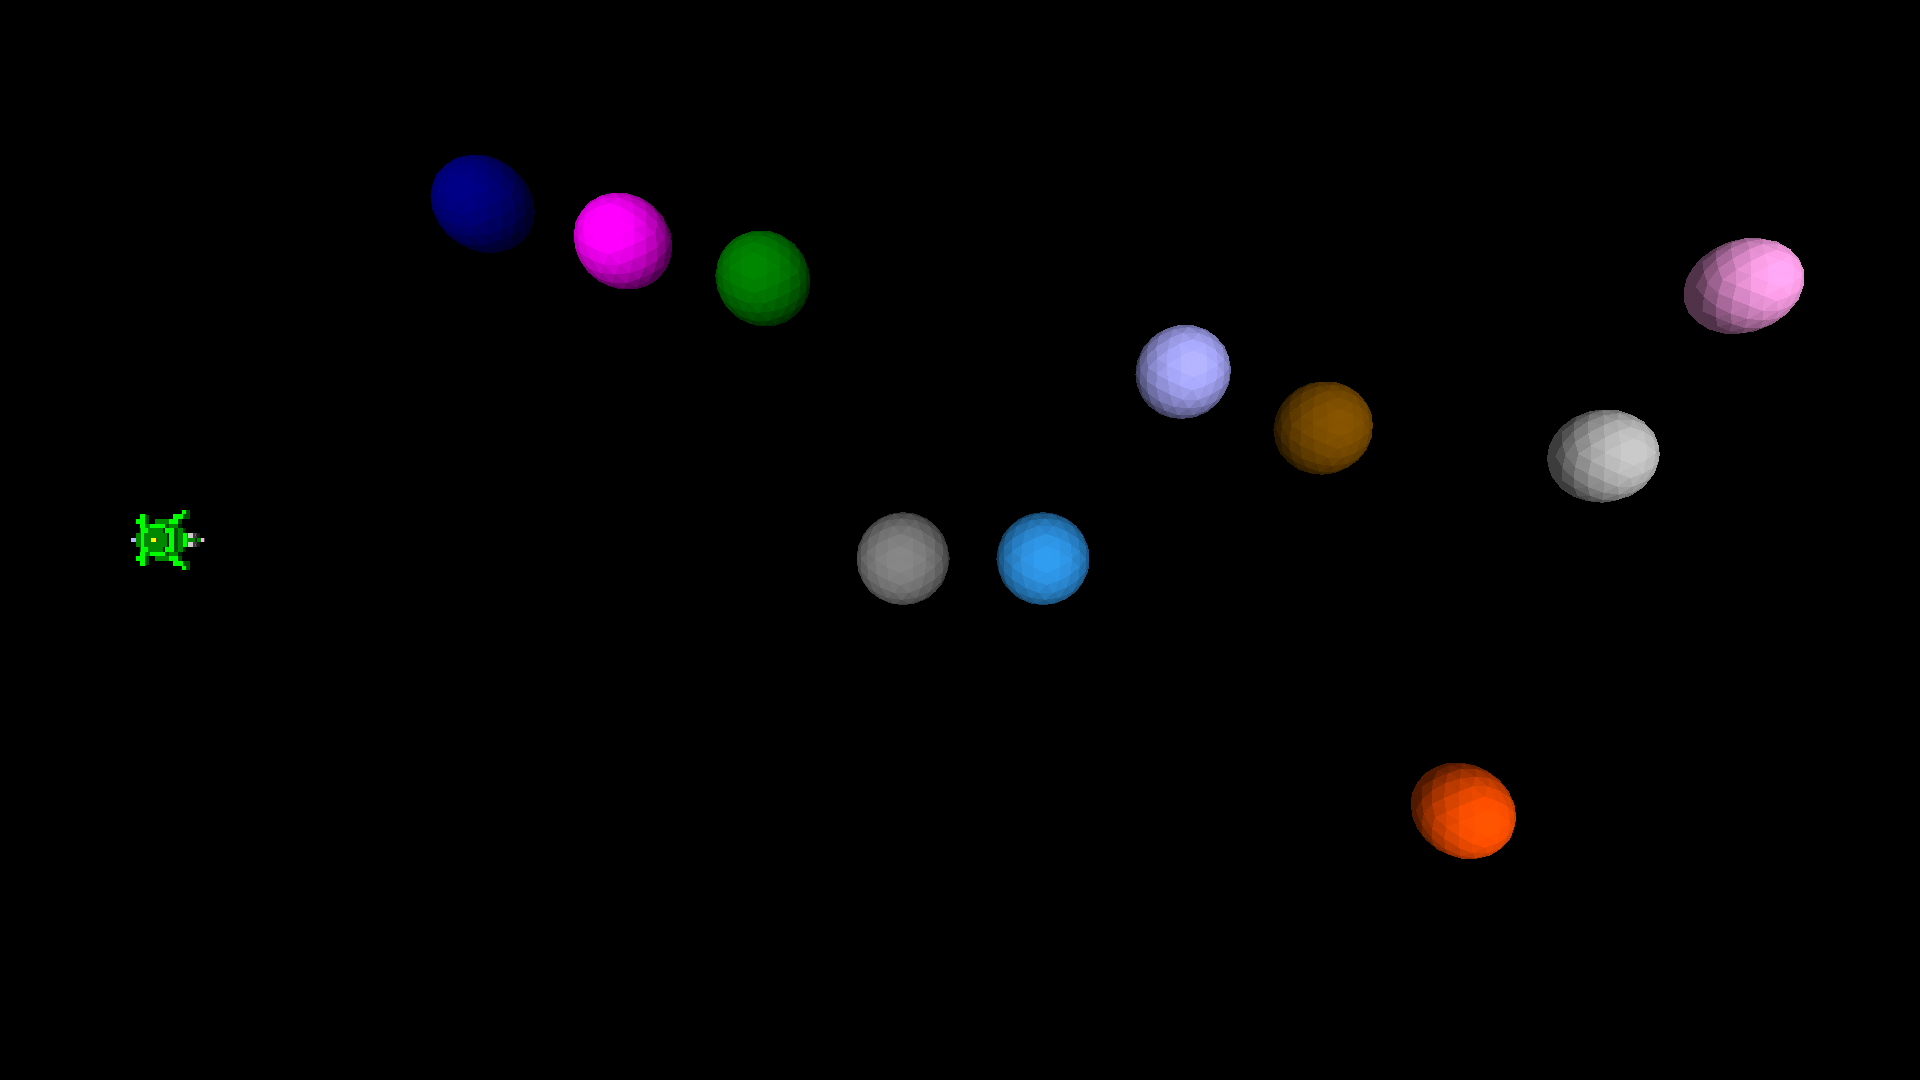
Dodgeball is a very simple game using a bale wherein the player moves the turtle from the left to right sides of the screen using the keyboard.

This is similar to a popular example used to teach Scratch, and the basic concept should be familiar to most Scratch learners.

In the case of this example, there are multiple balls that are controlled by a ‘bale’, a group of turtles who all execute the same code, first the code in the bale’s init procedure, and then the code in the ‘main’ procedure repeatedly. Each member of the bale executes consecutively, and once all members of a bale have executed (a cycle), the bale’s graphical output (its ‘turtle tracks’) is updated.

The bale’s execution is started by Myrtle, using the startbale command.

Myrtle checks to see if the user has pressed any of the movement keys and moves if required. She also checks to see if she’s been hit by a ball, or if she’s reached the right side of the screen, and if either condition has been met, the game ends.

The balls meanwhile move up and down at different speeds, gradually sliding towards the left side of the screen (to prevent Myrtle from procrastinating!)

NEWTURTLE "myrtle

TO start
  ;this is a very simple yet addicting and frustrating game
  ;add in your own sound effects!

  reset
  setmodel [bk 7.5 stamp "myrtle]
  ;myrtle's position is usually her tail, so we need to move her a bit
  ;so that her position is center-ish of her shell

  startbale "balls 11
  pu
  setxy -170 0
  rt 90
  forever [
    if keyp [
      make "key lowercase readchar
      if :key = "k [sr 10]
      if :key = "i [sl 10]
      if :key = "j [bk 10]
      if :key = "l [fd 10]
    ]
    ;pressing keys causes turtle to move

    if nearp 15 [pr "ouch! repeat 1000 [rt 1] finish]
    ;got hit by a ball

    if xpos > 180 [pr "win! finish]
    ;made it to the other side!
  ]
END

ON start flag queue []
  start
END


NEWTURTLE "snappy


NEWTURTLE "libby


NEWBALE "balls

TO init
  setmodel {"setfc baleindex "ico 10}
  st
  penup
  setxy -160 + baleindex * 30 100
  output {"dir 1 "speed 1 + (0.1 * random (5 * (5 + baleindex)))}

END

TO main
  if :dir = 0 [bk :speed] [fd :speed]

  slideleft 0.1
  ;the balls gradually move toward the left side
  ;of the screen to discourage procrastination!

  if ypos < -100 [make "dir 1]
  if ypos > 100 [make "dir 0]
END


Bales, Missiles and Triggers, Oh My!

turtleSpaces is great for creating 3D models and animations, but we also want it to be great for games. Unfortunately, the interpreter is not the fastest thing around — but that’s okay! We can compensate by creating new commands that work ‘under the hood’ to take care of certain game elements.

Bales are groups of turtles that all execute the same code, for example alien attackers in a space battle game. They are declared similarly to turtles, using a NEWBALE declaration.

When each member of a bale is initialized, it executes the code in the bale’s INIT procedure. Then, it repeatedly executes the code in the MAIN procedure in sequence with the other members of the bale, that is each member of the bale executes the code in succession using the same thread. At the end of each cycle, when all bale members have executed, their ‘turtle tracks’ are rendered. This makes it seem like they’ve all moved at the same time.

Take for example this code from a Space Invaders-inspired game (you can try it out here: https://turtlespaces.org/weblogo/?pub=81)

NEWBALE "ships

TO init
  ;bales are groups of turtles that execute the same code in sequence,
  ;one after the other. They are useful for things like groups of
  ;enemies, to keep them in lock step, where hatchlings can end up
  ;executing at different rates of speed and fall out of sequence
  ;with each other.
  
  ;new bale members always execute the init procedure, after which
  ;they repeatedly execute the main procedure until they are
  ;removed or the entire bale is stopped.
  
  penup
  noaudiowait
  newmodel "bullet [setfillcolor 15 icosphere 1.5]
  setmodelscale 1.5
  setposition {
    (-150 + 30 * (remainder baleindex - 1 5))
    100 - (20 * (int ((baleindex - 1) / 5)))
    5
  }
  ;based on the number (index) of the bale member, place
  ;it in the attacking wave
  
  if 1 = remainder int (baleindex - 1) / 5 2 [setx xpos + 10]
  ;let's offset the turtles in alternating rows
  
  right 180
  ;turn to face down
  
  showturtle
  ;show the turtle
  
  rollright baleindex * 10
  ;set the default roll rotation
  
  output [dir 1]
  ;the pairs provided by output become variables in main
  ;in this case we're setting the default move direction, which
  ;is the same for all members in this bale
END

Each member of the bale is placed based upon its index number in the bale. Once we position the bale member, it moves on to the main execution loop:

TO main
  dosleep 10 [
    ;take at least 10 milliseconds to do the following:
    
    rollright 10
    ;roll right ten degrees
    
    if and xpos < 150 :dir = 1 [drift 5 [1 0 0] drift 1 [0 -1 0]] if and xpos = 150 :dir = 1 [make "dir 0 drift 10 [0 0 -1] drift 10 [0 -1 0]] if and xpos > -150 :dir = 0 [drift 5 [-1 0 0] drift 1 [0 -1 0]]
    if and xpos = -150 :dir = 0 [make "dir 1 drift 10 [0 0 1] drift 10 [0 -1 0]]
    ;we use drift to move the ships because we're rolling them for effect
    
    if 1 = random 20 [
      newmissile "missile "bullet [0 -1 0] 20 + random 20 [200]
      playsound "zap3
    ]
    ;fire a missile randomly
    
    if or ypos < -100 containsp "myrtle near position 20 [ make "hit true ] ;if an alien reaches the bottom of the screen it's over if baleindex = last balemembers balename [ if :delay > 0 [dec "delay]
      ;this increases the speed of the invaders 'music'
      ;once each time all the bale turtles have executed
      ;(each loop)
    ]
  ]
END

Each bale member moves across the screen, randomly firing missiles, until they are destroyed or reach the bottom of the screen, triggering a ‘game over’ condition.

newmissile "missile "bullet [0 -1 0] 20 + random 20 [200]

Missiles are simple elements that are controlled by the game engine. They move through 3D space, and are detected by primitives such as NEARMISSILEP and NEARMISSILES. They can also be detected by the nearmissile trigger. They are much more efficient than using turtles as projectiles.

Similarly, triggers are blocks of code that are executed when a certain condition occurs. These conditions are monitored by the underlying game engine, and are ‘triggered’ when these conditions are detected to be true. Once again, this is much more efficient then having a turtle constantly execute Logo code waiting for the condition to occur!

The following trigger belongs to the previously mentioned alien ships bale:

ON boom nearmissile block [missile2 10]
  hideturtle
  playsound "explosion
  inc "score
  show :score
  stopmissile flat list :boom :boomanim
  die
  ;this turtle is no more
END

This trigger increments the player’s score, disposes of the missile that triggered it, and then ends the turtle to whom the trigger belongs, in this case a member of the alien ship bale.

As you can see, bales, missiles and triggers all contribute to empowering turtleSpaces coders to create faster-paced, more engaging games.


The Art of the Turtle

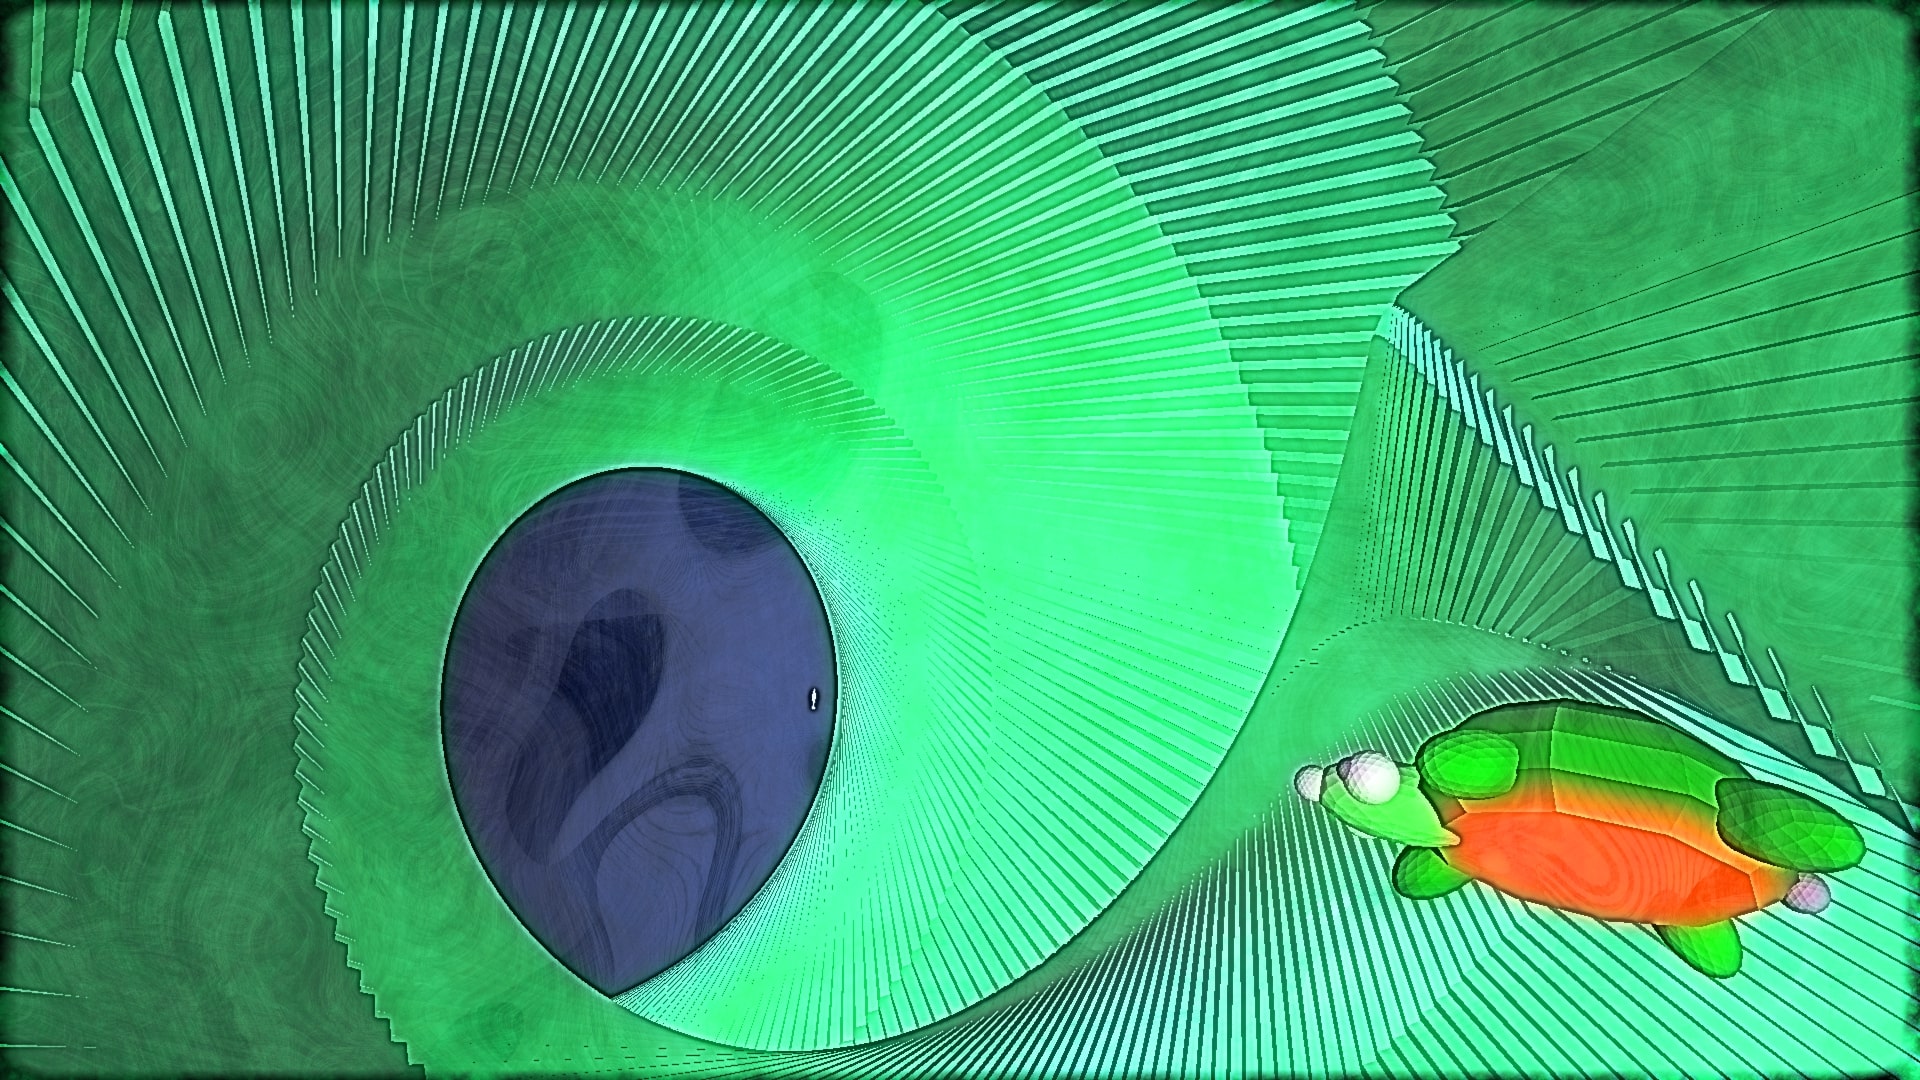
turtleSpaces isn’t just about games or 3D models, it’s also about art. Although generated by a Logo computer program, some of the visuals created by turtleSpaces can be quite striking! Combined with a digital art program such as Filter Forge, the results can be very artistic indeed.

Check out this gallery of turtle art:

Images Copyright 2021 Melody Ayres-Griffiths

Activity Idea: Gone Fishin’

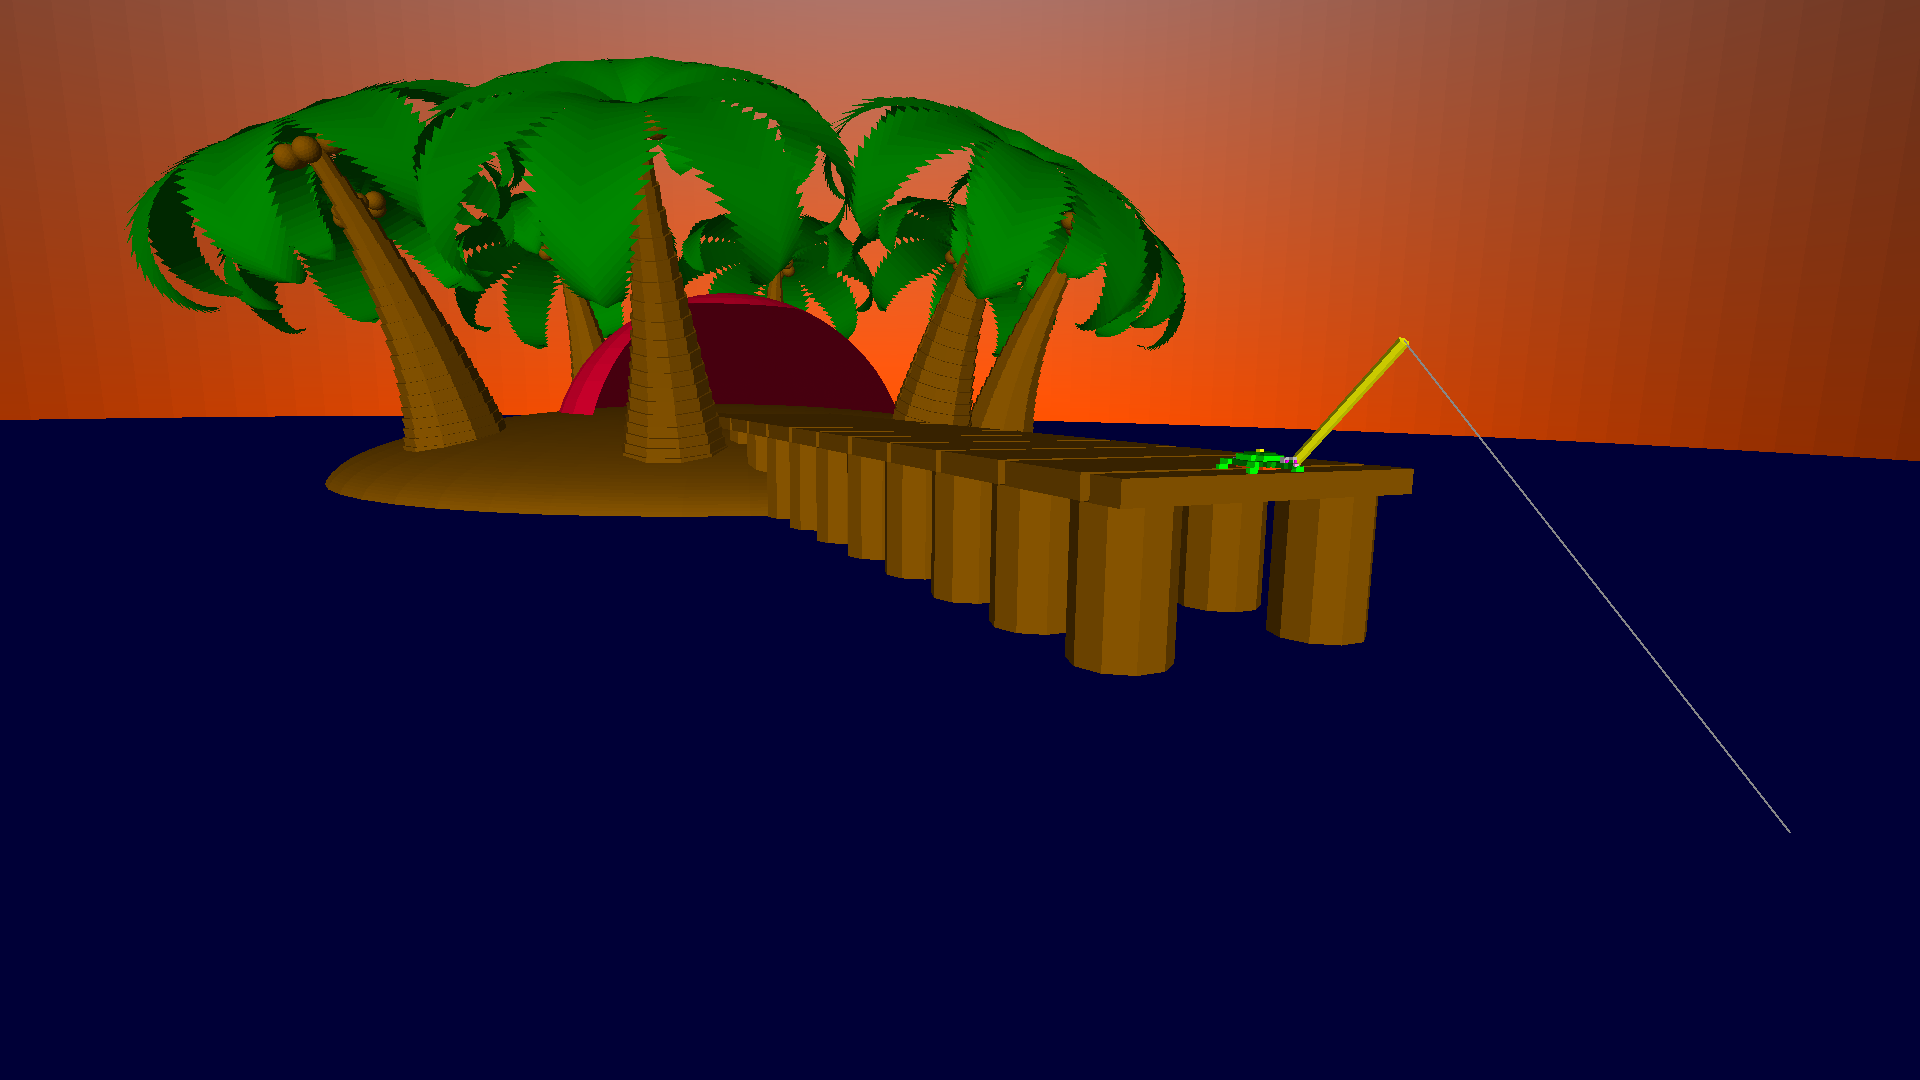
Build this cool island scene using turtleSpaces Logo and a few basic shapes!

First we begin with a tree. We can build a trunk using a repeat loop of cylinders that get narrower in diameter and longer as we go. We can introduce a slight curve as well by tilting the turtle up a bit each cylinder we create:

Next we need to create the leaves, which we can do using the fiso (filled triangle) primitive. We can use a repeat loop to create a series of triangles growing in size, and then a second repeat loop to create a further series of triangles shrinking in size. In both cases, we tilt the turtle down a bit each triangle we create:

Then we can use a further wrapping repeat loop to create 8 of them around the trunk:

Let’s add six coconuts to the top of the tree using another repeat loop and icospheroids:

But one tree is kind of lonely, so let’s create a ring of eight around the edge of the island using the orbitleft primitive. We can also make the island more mound-like using a domoid:

Let’s add a dock Myrtle can fish off of made out of cylinders and voxeloids:

And a hut to shelter in made out of made out of a cutsphereslice and a sphereslice:

Myrtle’s all set, let’s get her fishing! The fishing rod is created using a thick line and a thin line:

The sunset effect is created using an inverted gradient tube:

Good job, Myrtle! You can check out the island yourself at https://turtlespaces.org/weblogo/?pub=64

Just click the flag to create the island. Don’t forget that you can click and drag on the viewport to move the camera, use the scroll wheel to zoom in and out, rotate using the right button and drag, and click both buttons and drag to pan.

Check out the code to see how it’s done! Then try something similar yourself. What will your island look like? Share it so we can see for ourselves!

Introducing Environments

Environments are a cool new way to get started with Logo. turtleSpaces now provides a variety of environments in different settings to inspire Logo creation:

Starry Night and Star Platform – Myrtle builds in space!

Winter Ice Pond – Myrtle goes skating!

Pyramid Desert – Build a monument to the Gods!

Under the Sea – Shelly swims with the fishes!

Forest Cabin – Myrtle’s hideaway in the woods.

City Park – Myrtle plays in Central Park!

Parking Lot – Myrtle learns to drive.

The Moon Base – Myrtle on the Moon!

Alien Trees – A ring of growing alien trees.

Environments are available in both the desktop application and the web application. In the web application, you can find them when you start a new project (under the file menu). On the desktop, you open them the way you open examples, in the environments folder.

Environments are written in Logo and are randomly created when they are opened, so some of them may take a minute or two to fully form. You can’t see the environment code in the built-in editors as they are managed by system turtles, which can be used to program the broader Logo environment for purposes such as environments, tutorials and games that use the Logo interpreter to interact with them.

But if you download the procedures, or look at them in an external text editor, you can see the code that makes up the environments, and tweak them, or use them as a template to create your own!