Example: Sierpinski’s Turtles
Sierpinski’s Gasket
These routines use recursion (they repeatedly call themselves) to realise different Sierpinski algorithms. Logo’s recursion capabilities and relational turtle make it excellent for the task of rendering these algorithms! They’re also very pretty.
TO half_s :size :level
  if :level = 0 [fd :size stop]
  half_s :size :level - 1
  lt 45 fd :size * sqrt 2 lt 45
  half_s :size :level - 1
  rt 90 fd :size rt 90
  half_s :size :level - 1
  lt 45 fd :size * sqrt 2 lt 45
  half_s :size :level - 1
END

TO sierpinski :size :level
  repeat 2 [
    half_s :size :level
    rt 90 fd :size rt 90
  ]
END

TO sierp
  cs pu back 180 pd sierpinski 3 5
END

sierp

Instead of drawing lines, we can construct triangles out of ‘pins’ dropped at appropriate points:
TO half_s :size :level
  penup
  if :level = 0 [fd :size stop]

  pin
  ;pin marks a point for use with pinfrag

  half_s :size :level - 1
  lt 45 fd :size * sqrt 2 lt 45
  half_s :size :level - 1
  rt 90 fd :size rt 90
  half_s :size :level - 1
  lt 45 fd :size * sqrt 2 lt 45
  half_s :size :level - 1

  pinfrag
  ;creates a triangle out of the last three 'pins'

END

sierp

We could drop twice as many pins and then select a color for each ‘frag’ (fragment) triangle from a list:
TO half_s :size :level
pu
if :level = 0 [fd :size stop]

pin
;drop pin

half_s :size :level - 1
lt 45 fd :size * sqrt 2 lt 45
half_s :size :level - 1

pin
;drop another pin

rt 90 fd :size rt 90
half_s :size :level - 1
lt 45 fd :size * sqrt 2 lt 45
half_s :size :level - 1

setfc item :level [9 8 1 13] pinfrag
;pick a color from a list based on the current level and create the fragment

END

sierp

Sierpinski’s Triangle
It’s triangles all the way down!
TO sierpinski :size :level
  if :level > 0 [
    rt 30
    repeat 3 [
      fd :size
      rt 120
    ]
    left 30
    sierpinski :size / 2 :level - 1
    rt 30
    fd :size / 2
    left 30
    sierpinski :size / 2 :level - 1
    rt 30
    back :size / 2
    left 30
    rt 90
    fd :size / 2
    left 90
    sierpinski :size / 2 :level - 1
    left 90
    fd :size / 2
    rt 90
  ]
END

TO sierpinskiexample
  sierpinski 500 8
END

sierpinskiexample

Neat but a bit plain. We could use frag to create filled triangles, but we need to avoid z-fighting by adding a little bit of code to change the elevation of each ‘level’:
TO sierpinski :size :level
  if :level > 0 [

    pu setz 0 lower 0.1 * :level
    ;add above line to avoid z-fighting

    rt 30
    repeat [
      fd :size
      rt 120
    ]

    setfc :level
    ;set the fill color to the current 'level'
    frag
    ;create a filled triangle from the last three points (triangle)

    left 30
    sierpinski :size / 2 :level - 1
    rt 30
    fd :size / 2
    left 30
    sierpinski :size / 2 :level - 1
    rt 30
    back :size / 2
    left 30
    rt 90
    fd :size / 2
    left 90
    sierpinski :size / 2 :level - 1
    left 90
    fd :size / 2
    rt 90
  ]
END

sierpinskiexample

If you seperate the layers more, and use shard instead of frag…
Sierpinski’s Tree
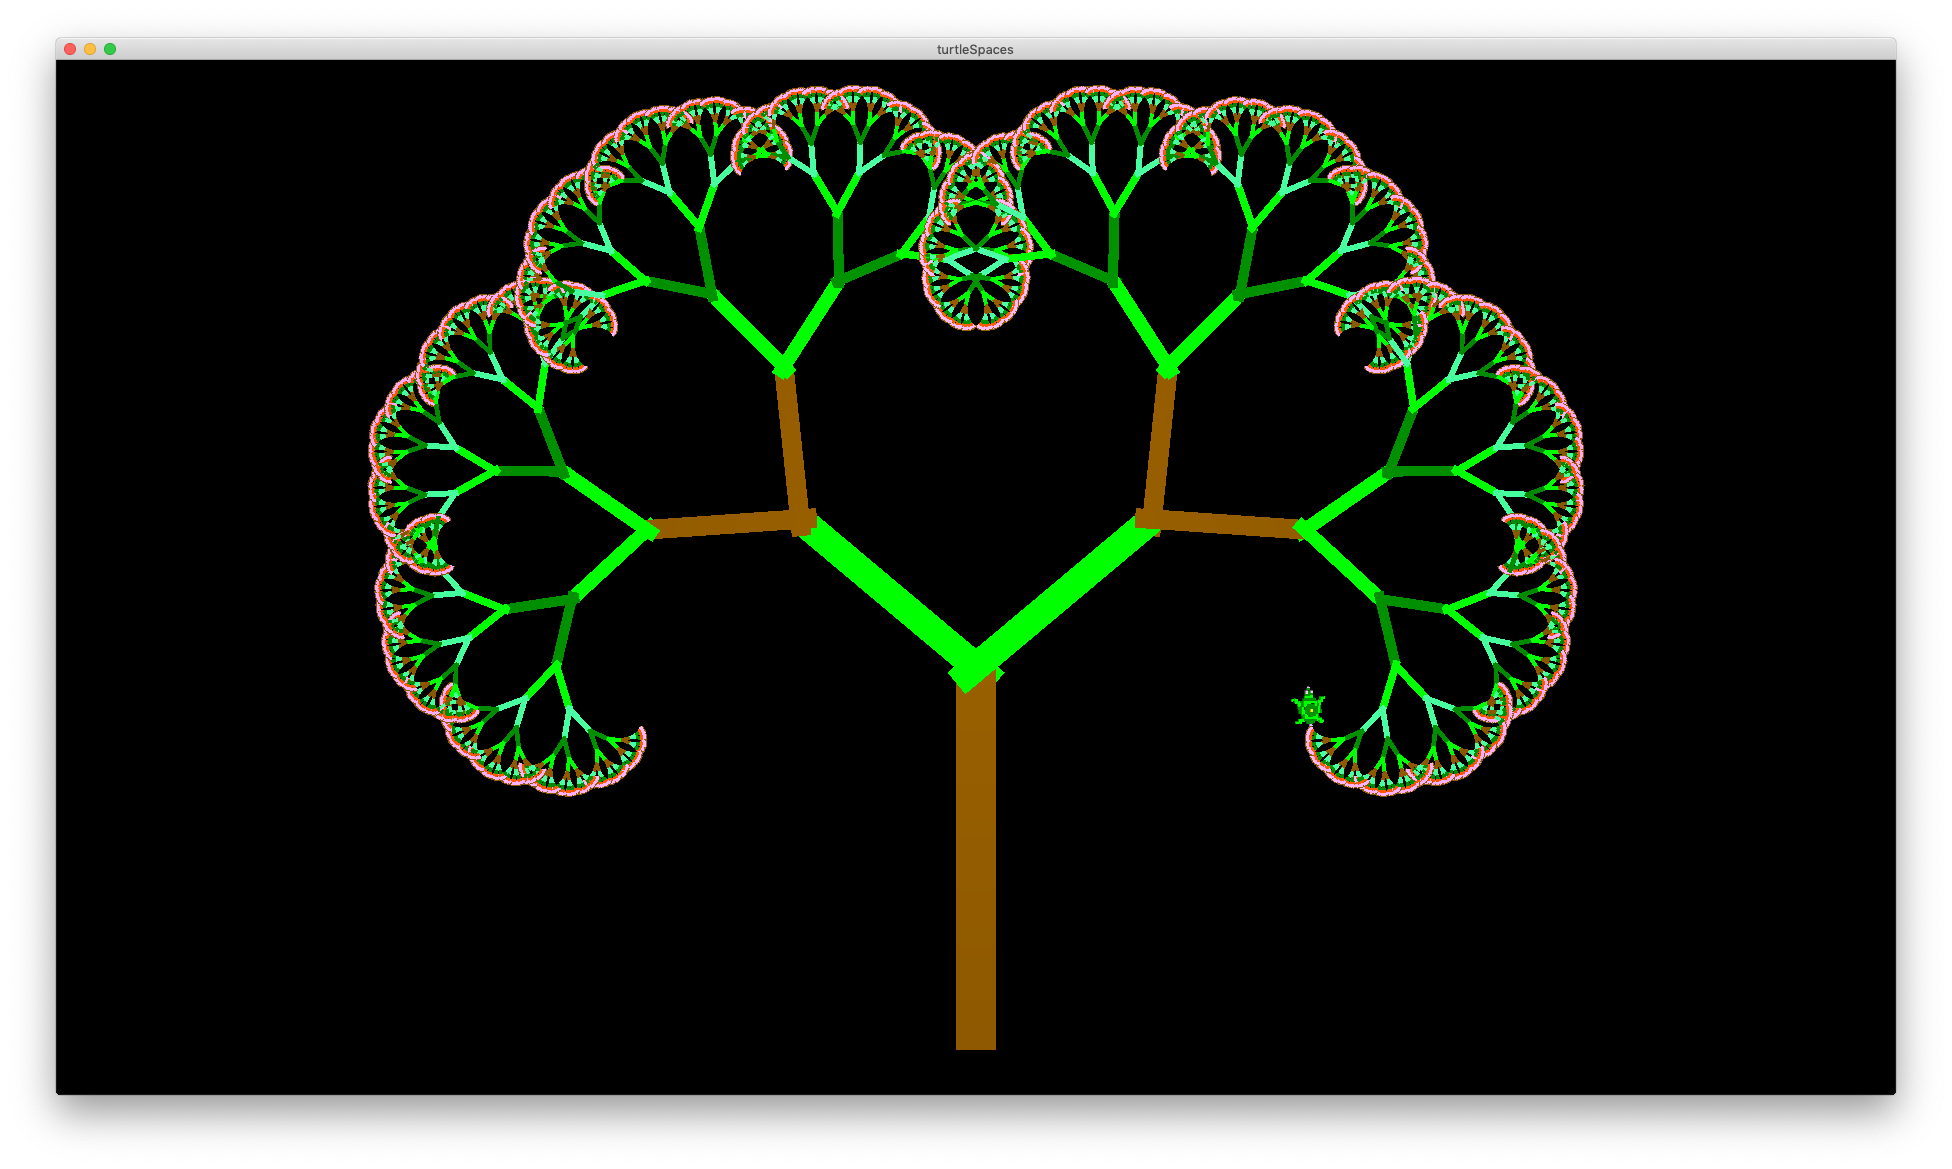
Trees are also a lot of fun, with the potential for so many variations!
TO tree :s :a :frac :depth
  fd :s / 2
  if :s >= 1 [
    local "p
    local "h
    make "p pos
    make "h heading
    left :a
    tree :s * 2 / 3 :frac * :a :frac :depth + 1
    pu setpos :p pd
    seth :h + :a
    tree :s * 2 / 3 :frac * :a :frac :depth + 1
  ]
END

TO drawtree
  reset
  cs pu bk 250 pd
  tree 350 25 1.1 4
END

Note that this takes quite some time to render!
tree 350 60 1.1 4

TO tree :s :a :frac :depth
  fd :s / 2
  if :s >= 1 [
     setpc :s
     ;set the pen color to the current 'size'
     ;which is fractional number truncated to an integer for use by setpc
     local "p
     local "h
     make "p pos
     make "h heading
     left :a
     tree :s * 2 / 3 :frac * :a :frac :depth + 1
     pu setpos :p pd
     seth :h + :a
     tree :s * 2 / 3 :frac * :a :frac :depth + 1
   ]
END

tree 350 180 1.1 4


setpc 12 - :s

tree 350 280 1 4


Play with tree’s parameters and the colors and see what you can come up with! Logo is all about exploration, tweaking and tinkering. By seeing how altering the parameters can change the end result, you can learn to better understand the underlying mathematics.
You can also change how the trees are rendered, for example using mark instead of forward and by setting the width of the mark using setmarkerwidth depending on the current ‘size’ of the segment being rendered:
TO tree :s :a :frac :depth
   penup
   setpc item (remainder int :s 7) [11 9 4 12 14 8 13]
   if pencolor = 0 [setpc 8]
   setmarkerwidth 1 + :s / 20
   bk :s / 20
   mark :s / 2
   if :s >= 1 [
      local "p
      local "h
      make "p pos
      make "h heading
      left :a
      tree :s * 2 / 3 :frac * :a :frac :depth + 1
      pu setpos :p pd
      seth :h + :a
      tree :s * 2 / 3 :frac * :a :frac :depth + 1
   ]
END

cs tree 300 50 0.88 4

Et voila!

