Archives 2022

A Logo Story

Once upon a time, in a land far, far away, there lived a group of clever little creatures called Logo turtles. These turtles loved nothing more than to follow instructions and create beautiful designs and patterns.

One day, a group of young children discovered the land of the Logo turtles and were fascinated by the amazing things they could do. The children quickly learned how to give the turtles instructions using a simple programming language called Logo.

With the help of the Logo turtles, the children were able to create all sorts of fun designs and patterns. They drew shapes, made music, and even created their own games.

The children quickly realized that the Logo turtles were very smart and could do almost anything they asked them to. They could even repeat instructions over and over again, which made it easy for the children to create complex designs and patterns.

As the children continued to explore the world of Logo programming, they learned even more advanced concepts, such as loops and conditional statements. These allowed them to create even more complex designs and programs.

Before long, the children had become master programmers, and the Logo turtles were their loyal assistants!

Together, they explored the world of technology and created all sorts of amazing things. In the end, the children learned that with a little bit of creativity and a lot of hard work, they could accomplish anything they set their minds to. And they all lived happily ever after.
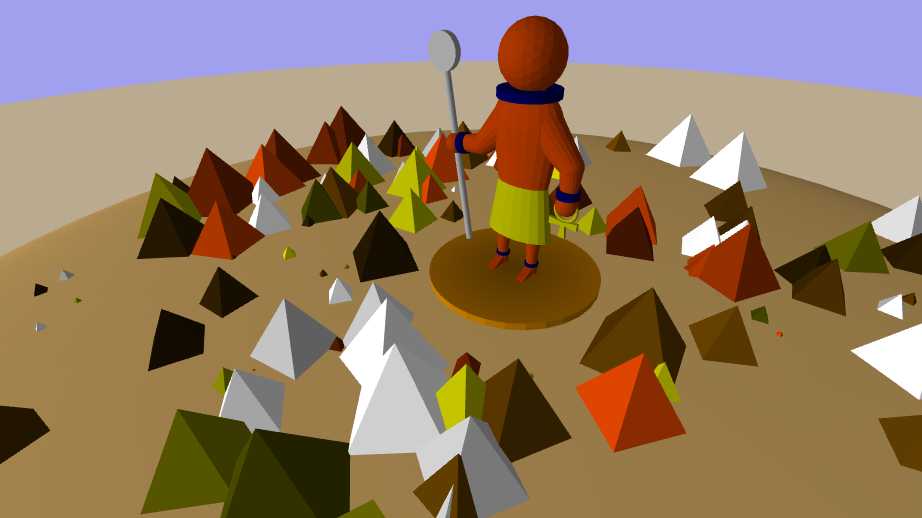
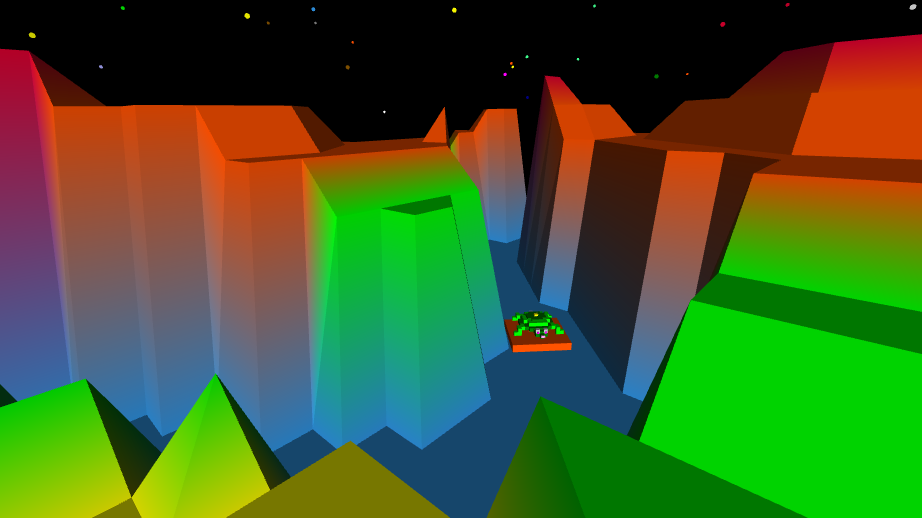
Logo

Logo programming is a computer programming language that is often used in educational settings to introduce students to the concepts of computer programming. The language, which was developed in the 1960s, is designed to be easy to learn and use, making it a great tool for introducing students to the fundamentals of coding.

One of the key educational benefits of Logo programming is that it helps students develop critical thinking and problem-solving skills. As they work with the language, students must think logically and systematically in order to create programs that accomplish specific tasks. This process encourages students to approach problems in a structured way, breaking them down into smaller, more manageable parts.

In addition to improving critical thinking skills, Logo programming can also help students develop their creativity. As they work with the language, students can use their imagination to create programs that do all sorts of interesting things. For example, they might create programs that draw shapes or patterns on the screen, or that allow users to control on-screen characters or objects.

This creative process can help students develop their imagination and creative problem-solving abilities. Another educational benefit of Logo programming is that it can help students develop their computational thinking skills. In the world of computer science, computational thinking refers to the ability to think logically and systematically about complex problems, and to use a variety of computational tools and techniques to solve them.

As students work with Logo, they will learn how to use the language to create programs that can make decisions, perform calculations, and store and manipulate data. This process can help students develop the skills they need to think like a computer and to solve complex problems in a systematic way.

Overall, the educational value of Logo programming is clear. The language is a great tool for introducing students to the fundamentals of computer programming, and for helping them develop a range of important skills, including critical thinking, creativity, and computational thinking.

This is why Logo is often recommended as a good programming language for beginners because of its simplicity and ease of use. It is a procedural language, which means that it follows a step-by-step approach to problem-solving.

This makes it well-suited for beginners who are just learning the basics of programming. Additionally, Logo has a strong emphasis on visual learning, which can be helpful for those who prefer a more visual approach to learning.

Parents

One way a parent could teach their child Logo programming is by starting with the basics and gradually building on them.

To begin, the parent could start by introducing the child to the concept of programming and explaining how it is used to give instructions to a computer. The parent could then introduce the child to the Logo programming language and show them how to use it to create simple shapes and patterns.

Next, the parent could guide the child through the process of creating a basic program in Logo. This might involve using commands like “forward,” “back,” and “right” to move a “turtle” on the screen and create different shapes and patterns.

The parent could also introduce the child to more advanced concepts like loops and conditional statements, which can be used to create more complex programs.

As the child becomes more familiar with the Logo programming language, the parent could encourage them to experiment and create their own programs. This could involve challenging the child to create a program that draws a specific shape or pattern, or even to create a simple game using the Logo programming language.

Throughout the process, the parent should provide support and guidance as needed, helping the child to troubleshoot any issues they may encounter and encouraging them to continue learning and exploring the world of programming. By teaching their child Logo programming, a parent can help them develop important skills that will serve them well in the future.

Teachers

As a teacher, you have the opportunity to introduce your students to the world of computer programming with Logo.

Logo is a programming language that was designed in the 1960s to be easy for beginners to learn. It was created to help students learn programming concepts, such as loops and procedures, in a fun and engaging way.

One way to teach your students Logo programming is to start by introducing them to the Logo turtle. The turtle is a virtual robot that can be programmed to move around the screen and draw shapes and patterns.

You can show your students how to use simple Logo commands, such as “forward” and “right,” to move the turtle and create simple shapes and patterns. Next, you can introduce your students to the concept of procedures.

‘Procedures are blocks of code that can be used to perform a specific task. In Logo, procedures are created using the “to” and “end” keywords. For example, if you wanted to create a procedure to draw a square, you could use the following code:

to square
  repeat 4 [forward 50 right 90]
end

Once your students understand how to create procedures, you can challenge them to use procedures to create more complex shapes and patterns.

For example, you can ask them to use procedures to draw a house, a tree, or even a face. This will help them develop their problem-solving and critical thinking skills as they figure out how to use procedures to create the shapes they want.

Another way to teach your students Logo programming is to introduce them to the concept of loops. Loops are blocks of code that are repeated until a certain condition is met. In Logo, loops are created using the “repeat” keyword.

For example, if you wanted to create a loop that would make the turtle draw a circle, you could use the following code:

repeat 360 [forward 1 right 1]

This code would make the turtle move forward 1 unit and turn right 1 degree, 360 times. This would create a circle on the screen.

You can challenge your students to use loops to create more complex patterns, such as spirals or stars.

Overall, teaching your students Logo programming can be a fun and engaging way to introduce them to the world of computer programming. By using the turtle, procedures, and loops, your students can learn important programming concepts in a hands-on and interactive way.

Kids

Did you know that learning to program in Logo can be lots of fun and can even help you with other subjects you’re learning in school?

Programming is all about giving a computer a set of instructions to follow. When you use Logo, you can create colorful shapes and patterns on the screen by typing in different commands. This can help you learn how to think logically and solve problems, which are important skills to have in many subjects, including math and science.

Learning to program in Logo can also help you develop your creativity. You can use the programming commands to create your own designs and animations, and even make your own video games!

Best of all, learning to program in Logo is not as hard as you might think. There are many resources available on this website to help you get started, including tutorials and links to books that can teach you the basics.

And as you get better at programming, you can start to explore more advanced concepts and create even more complex and interesting projects. So why not give it a try? Who knows, you might just discover a new hobby or even a future career that you’re passionate about!

Conclusion

The Logo programming language is a great choice for beginners because it is designed to be simple and easy to learn. Unlike other programming languages, which can be complex and difficult to understand, Logo has a straightforward syntax that makes it easy for even the most inexperienced programmer to get started.

One of the key features of Logo is its use of a turtle, which is a small cursor that can be moved around the screen using simple commands. This allows beginners to easily see the effects of their code, and it makes it easy to understand the concepts of programming, such as loops and conditionals.

Another reason why Logo is a great choice for beginners is that it is a visual programming language. This means that instead of typing out lines of code, you can use a graphical interface to create programs. This makes it easy for beginners to understand what their code is doing, and it allows them to quickly create and test programs without having to worry about syntax errors.

Additionally, Logo is a great choice for beginners because it is a high-level programming language. This means that it abstracts away many of the low-level details of computer programming, such as memory management and data types. This makes it easy for beginners to focus on the logic of their programs, and it allows them to create complex programs without having to worry about the underlying technical details.

Overall, the Logo programming language is a great choice for beginners because it is simple, visual, and high-level. Its straightforward syntax, use of a turtle, and graphical interface make it easy for even the most inexperienced programmer to get started, and its high-level nature allows beginners to focus on the logic of their programs without getting bogged down in technical details.
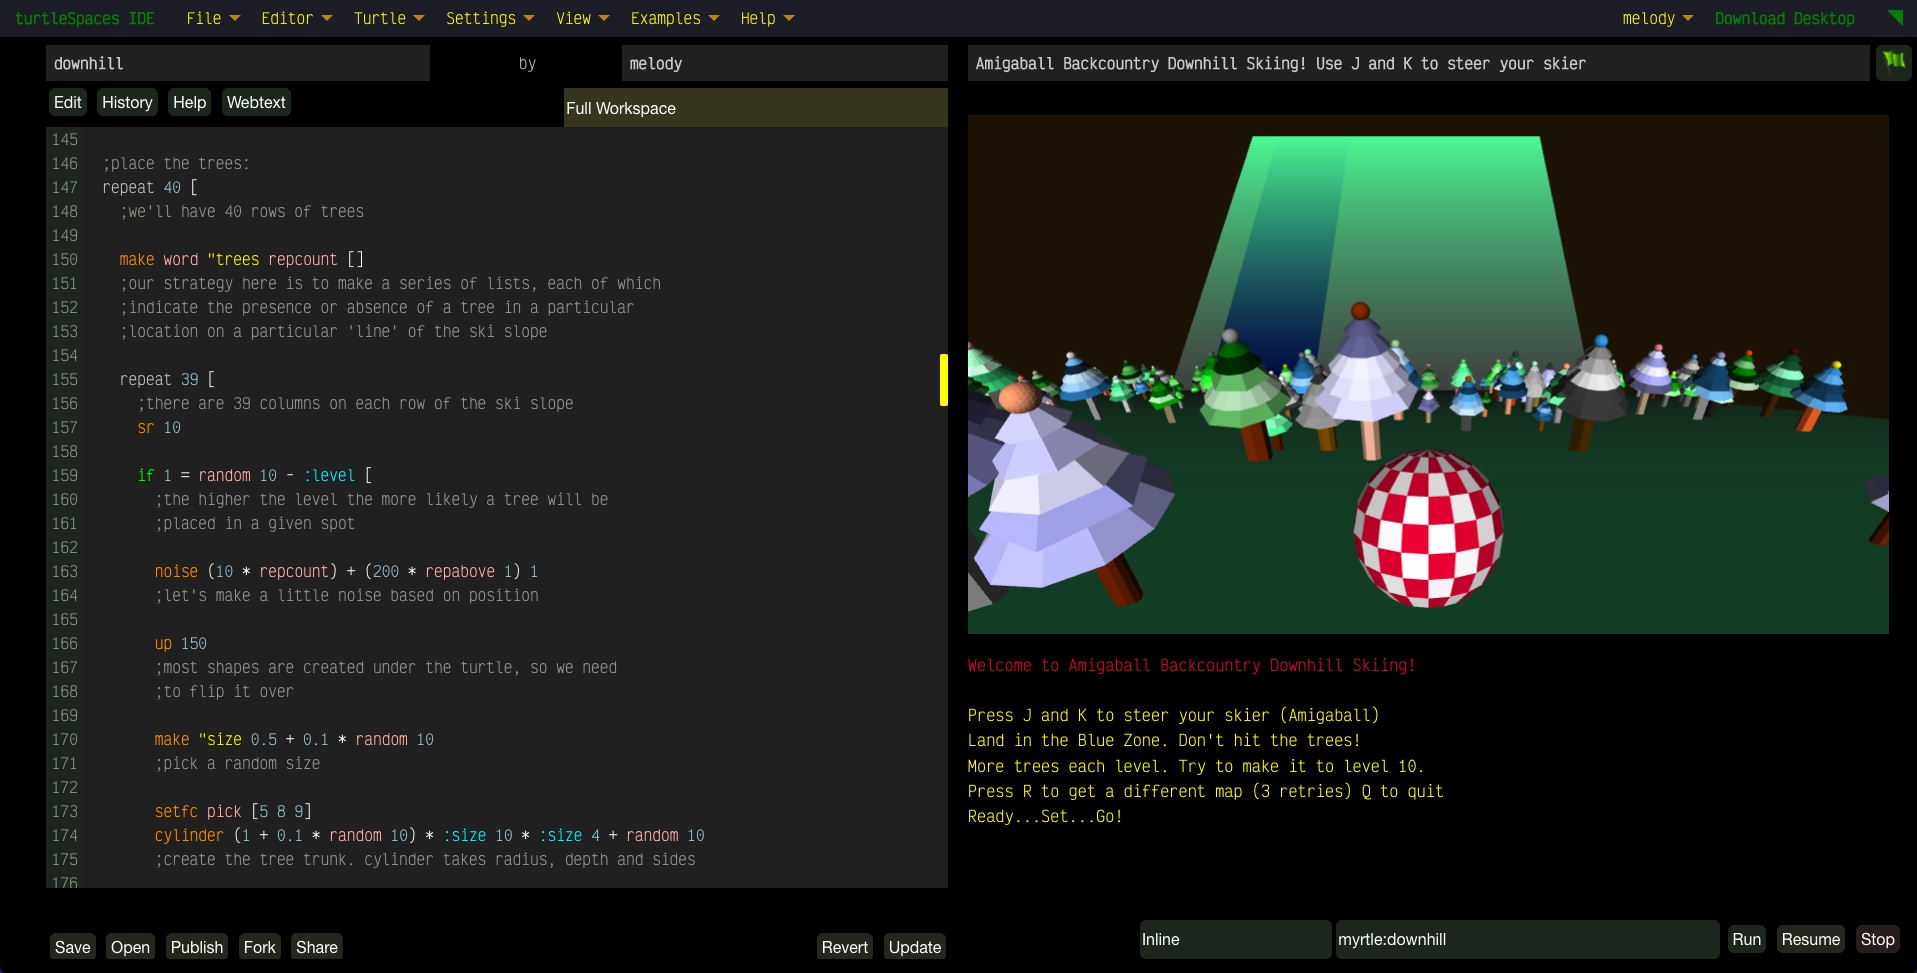
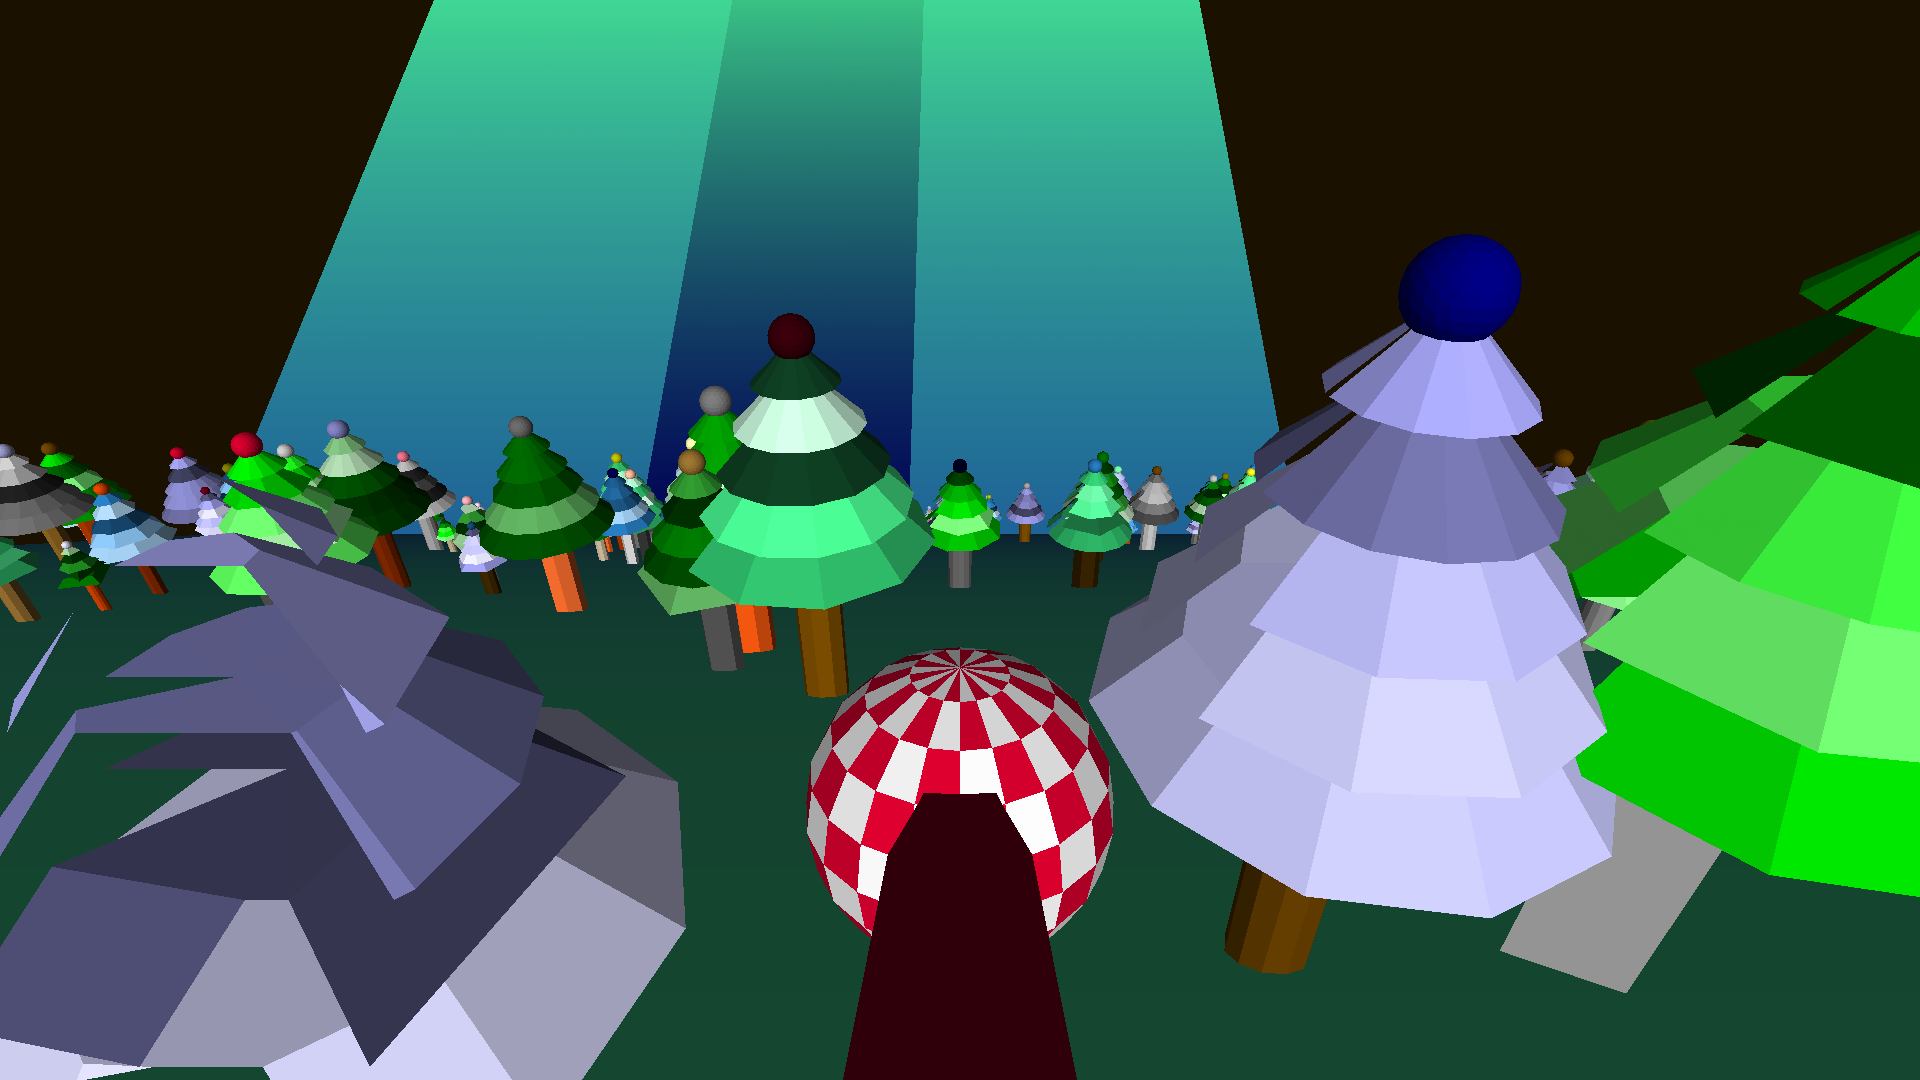
turtleSpaces

turtleSpaces is a versatile and user-friendly platform that is ideal for teaching Logo to beginners. This platform offers a wide range of features and tools that make it easy for beginners to learn the basics of coding and develop their skills over time.

One of the key advantages of turtleSpaces is its visual programming interface. This interface allows beginners to easily create and manipulate graphical elements, such as shapes and colors, using simple code. This makes it possible for beginners to see the results of their code in real-time, which can help them better understand the underlying concepts and principles of coding.

Another key advantage of turtleSpaces is its interactive learning environment. This platform includes a variety of learning resources, such as tutorials, examples, and challenges, that are designed to help beginners develop their coding skills in a fun and engaging way. These resources are also highly customizable, which means that teachers and educators can easily tailor them to meet the specific needs and learning styles of their students.

turtleSpaces also offers a range of advanced features that are useful for more experienced learners. For example, the platform includes includes tools for debugging and testing code, which can help beginners learn how to troubleshoot and solve problems in their code.

Overall, turtleSpaces is an excellent learning platform for teaching coding to beginners. Its visual programming interface, interactive learning environment, and advanced features make it a powerful and versatile tool for helping beginners learn the basics of coding and develop their skills over time.

Desert Mountain Lake — An Introduction to Fill

In a recent update to turtleSpaces, we added the ability to create arbitrary shapes, using the beginfill and endfill primitives.

To create a shape, you simply declare beginfill, draw out its borders and then declare endfill. If the lines do not cross each other, then the shape should be created.

For example:

beginfill forward 50 right 90 forward 50 endfill

will create a triangle. But we already have plenty of ways to create triangles, right?

If you add right 60 forward 20 to just before endfill, you’ll understand. You can create whatever shape you want, you just need to make sure your lines don’t cross!

So what can we do with this? Let’s start with a simple example. We could create randomly-generated mountains. Generative art is becoming popular, so let’s see what all the fuss is about.

Okay, so we’re going to draw out the shape of the mountains by starting at the far left, then angling the turtle 30 to 60 degrees to the right.

penup setx -250 beginfill right 30 + random 30

Next we’ll move forward 50 turtle units plus a random number made up of 100 minus the turtle’s current Y position. This will keep us (mostly) from going off the top of the viewable area.

dountil xpos > 220 [
  right 30 + random 30
  forward 50 + random 100 - ypos

Then we’ll turn right between 70 and 110 degrees, for the downslope, and move forward the value of the current y (vertical) position. This will keep us from going below the centerline of the viewable area.

  right 70 + random 40
  forward ypos

Then we’ll return the turtle to the upright position, and then keep creating new mountains until we end up off the right side of the viewable area.

  setheading 0
]

Then we set the turtle’s y position to 0 and declare the endfill:

sety 0
endfill

So that’s not too bad, but we want more! (We always want more.) We’ve made the background blue (using setbackgroundcolor blue) which is going to be our lake, but maybe we want the sky to be a different color. So let’s add a quad before we start drawing the mountains.

This is pretty simple, we’re just going to set the fill color to red and then create the quad at the point we’re going to start drawing the mountains:

setx -250
setfillcolor red
quad 500 150
raise 1/5

Note that we need to raise the turtle a little bit so our sky and the mountains don’t ‘Z-fight’ with each other.

Okay so what about that cool reflection effect? How do we do that? Well, it’s actually pretty simple.

All we’re going to do is log the positions of the turtle as we create the mountains, then ‘replay’ her movements, but with the y position reversed.

To do that, we’re first going to create an empty list, using make.

make "points []
setx -250

Next we’re going to queue our positions into the list. We need to do this in two places in our mountain creation loop, at the peaks and the troughs.

dountil xpos > 220 [
  queue position "points
  rt 30 + random 30
  fd 50 + random 100 - ypos
  queue position "points
  ...
  sety 0 queue position "points
  ;we need to make sure to 'log' the final position

Once the mountains are drawn, we simply declare beginfill again, and use foreach and setposition to move the turtle to each point we logged, but we’re going to use the list primitive to change the y value from a positive to a negative.

setfillshade 5
beginfill
foreach "i :points [
  setposition (list first :i negative second :i third :i)
]
endfill

In the full example we use definecolor to make our brown color a little more blue, for creating the reflection.

The sun is the proverbial icing on the cake. We’re going to make the sun and its reflection using the pie primitive to make half a circle. We’ll generate a number between 80 and 119 and put it into a container, representing the sun’s size.

make "sun 80 + random 40

We’ll position the turtle either at the left-third, center or right-third of the screen:

setxc pick [-71 0 71]

We’ll create the sun:

setfillcolor yellow
pie 180 :sun

Then we’ll redefine the yellow color to make it a bit more blue and subdued.

definecolor yellow [50 50 20]

Finally we’ll turn 180 degrees, create the reflection, then turn back.

right 180
pie 180 :sun
right 180
lower 1/10

We place all of this before we create the quad that draws the red background. So we need to lower the turtle to ensure the sun and the background don’t z-fight.

Here is the full procedure listing:

TO desertmountainlake
  reset hideturtle penup
  setbackgroundcolor blue
  definecolor red [100 0 0]
  definecolor brown [50 31 15]
  ;redefine the colors
  
  setx pick [-71 0 71]
  make "sun 80 + random 40
  setfillcolor yellow pie 180 :sun
  definecolor 13 [50 50 20]
  right 180 pie 180 :sun right 180
  lower 1/10
  ;draw the sun
  
  make "points []
  setx -250
  setfc red quad 500 150
  ;create the red sky quad
  
  raise 2 / 10 setfc orange
  beginfill
  ;start drawing the mountains
  dountil xpos > 220 [
    queue position "points
    right 30 + random 30
    forward 50 + random 100 - ypos
    queue position "points
    rt 70 + random 40
    ;rt is short for right, lt left etc
    fd ypos setheading 0
    ;fd is short for forward
  ]
  sety 0 queue position "points
  ;we need to queue the final position
  endfill
  ;close the fill
  
  ;the reflection:
  setfc brown setfs 5 beginfill
  foreach "i :points [
    setposition (list first :i negative second :i third :i)
  ]
  endfill
  
END

Logo and the Language Microworld

Logo isn’t just all about the turtles! When Logo was first being developed, there were no graphical displays — output was simple text on teletypes, which printed out interactions with the computer on paper. When the developers of Logo went into classrooms to test out their invention on students, all they had were teletypes.

As a result, the first Logo ‘microworld’ was the language microworld, not the geometry microworld which is more often associated with Logo. Logo was designed with many powerful commands used to manipulate strings and lists. Logo is based on Lisp, which stands for List Processing, a programming language in which data and code are the same, and are interchangeable and manipulatable by the running program. In Lisp, as in Logo, programs can modify, create and run themselves.

Some of these primitives (commands) include:

word – join two pieces of text together, eg word “dog “cat returns “dogcat

list – take two words and form a list, eg list “dog “cat returns [dog cat]

first, second, third, last – returns the appropriate character (word0 or item (list)

item, setitem – retrieve or change an item in a list or word based on its numerical index

fput, lput – returns a copy of a list with an additional item inserted in the front or back

butfirst, butlast – returns a list without the first or last item

leading, trailing – returns the front and back of words, respectively

push, pop, queue, dequeue – add or remove items on to the front or back of lists

There are also primitives that sort and search, retrieve words from a built-in English dictionary, convert characters to ASCII and back, and much more. You can browse them all in the Words and Lists reference.

So what can we do with all of these wonderful, powerful tools? Here’s a few examples:

Output

While we can manipulate strings and lists internally we still need to output the result to the user. In Logo, this can be done using the show, print and type primitives, and in turtleSpaces you can additionally typeset (create graphical text) or say (text-to-speech) them.

This example uses the print and the pick commands, the former types text into the console (text) area, following it with a line feed (carriage return) while the latter chooses (picks) a random item from a supplied list. In the example, this is used to generate a randomized simple story:

TO simplestory
  ;this language module contains a number of
  ;different procedures that manipulate language
  ;in fun ways!
  
  ;For example, this procedure uses the print
  ;and pick primitives to choose randomly from
  ;a series of lists, creating a simple one-line
  ;story:
  
  (
    ;encompassing the print command
    ;in round brackets allows us to supply it
    ;more parameters than normal. This also
    ;works with commands like say and functions
    ;like word and sentence
    
    print "The
    pick [
      red green blue
    ]
    pick [
      frog cow cat
    ]
    pick [
      jumped ran walked
    ]
    pick [
      |over to| over underneath
    ]
    ;to create a "word with spaces" (a phrase) in a list,
    ;a single list item containing spaces,
    ;enclose it with pipe symbols.
    
    "the
    word pick [
      overpass mountain |shopping mall|
    ] ".
    ;word is used here to create a single word
    ;made up of the final 'pick' and a period.
  )
END

Note that a ‘word’ in Logo is a single word, usually represented with a single double quote, eg “frog

Multiple words can either be represented in a list, eg [dog cat pig], or as a phrase |fat dog|, or both [|fat dog| |lazy cat| |pink pig|]

In the case of the last example, the second item in that list is |lazy cat|. You can turn |lazy cat| into a list of two items using the parse primitive.

A one-line version:

TO oneline
  ; a simple single line 'story':
  print (sentence pick [|The duck| |Old John| |A tabby cat| |Little Susie|] pick [ran walked surfed jumped danced] pick [|away from| towards] pick [|the city| |the mall| |their house|])
END

Questions and Answers, Repeats and Repcounts

The next example takes a user-supplied string and turns it into a word pyramid, by repeatedly displaying more and more of the word on successive lines.

It does this first by retrieving the desired word from the user using the question primitive, which prompts the user for input and then ‘stores’ the result in the ‘answer’ primitive, a function that returns the user’s input.

Then, it determines the length of the word using the count primitive, and employs repeat and repcount to generate the pyramid. repcount returns the current iteration of a repeat loop and is a very useful primitive.

reverse is also used in this example, which reverses a word or list.

TO wordpyramid
  ;this procedure creates a text 'pyramid'
  ;out of a string provided by the user:
  
  question |word| make "word answer
  ;the question primitive prompts the user
  ;for input, which is retrieved using the
  ;answer function
  
  ;the make primitive places the output from
  ;answer (the input to question) in a container
  ;called "word, which is read using :word
  
  repeat count :word [
    ;count is a function that returns the number
    ;of characters in the provided word, which is
    ;in this case the contents of the "word container
    ;symbolized using :word (which is the equivalent
    ;of 'thing "word', the primitive 'thing' able
    ;to retrieve and return the contents of containers.)
    
    repeat (count :word) - repcount [
      ;expressions are resolved right to left. What
      ;this means is that without the round brackets,
      ;Logo would try to subtract repcount (which returns
      ;the current number of repeat loop iterations)
      ;from the contents of the :word container, a string,
      ;which would result in an error. We solve this by
      ;placing round brackets around (count :word) to
      ;ensure that repcount is subtracted from the
      ;result of count :word instead
      
      type spacebar
      ;'type' prints a character(s) without adding a
      ;carriage return at the end, allowing one to type
      ;more on the same line. spacebar is a function that
      ;returns the space character
      
    ]
    if repcount = 1 [
      ;if the current repeat iteration is 1 (the first):
      print first :word
      ;print the first character of the contents of the :word container
    ] [
      ;otherwise:
      print (word
        ;print a word made up of:
        reverse leading repcount :word
        ;the leading (first) repeat loop iterations characters
        ;in the :word container, but in reverse.
        
        ;Remember, Logo evaluates expressions from right to left,
        ;so it first slices off the first however many 'leading'
        ;characters from the front of :word and then reverses it.
        
        butfirst leading repcount :word
        ;the second part of our combined word is the leading
        ;repcount number of characters, excluding (butfirst)
        ;the first character.
      )
    ]
  ]
  ;don't forget you can hover the mouse over keywords to
  ;get a popup that explains what they do!
END

Word(s) around the world!

The turtle is starting to get a bit bored, so let’s give her a bit of a workout! The next example uses the typeset and orbit primitives to create a ‘word circle’ out of user-provided input.

The orbit commands in turtleSpaces allow the turtle to orbit around a specific point in turtleSpace. We’re going to use the item primitive and a bit of math to distribute the input into a ring around the home [0 0 0] point:

TO wordcircle
  ;this procedure create a graphical 'word circle'
  ;out of the supplied word:
  
  clearscreen hideturtle
  dropanchor penup question |word|
  ;dropanchor moves the 'anchor point'
  ;used by orbit primitives to the turtle's
  ;current location
  
  pullout 8 * count answer
  ;pullout backs the turtle away from the
  ;anchor point without moving it with
  ;the turtle
  
  ;in this case, we're 'pullling out'
  ;8 turtle-units * the number of characters
  ;in the 'answer' provided to the question
  ;by the user
  
  repeat count answer [
    ;loop for however many characters are in the answer:
    
    randomfillcolor
    typeset item repcount answer
    ;typeset (create a graphical character) for the
    ;character 'item' in the place of the current repeat iteration
    ;eg if the word was 'frog', item 1 is 'f', item 4 is 'g'
    ;and on the third loop iteration it would be 'o'.
    
    slideleft 10
    ;the turtle moves when it typesets the character, but
    ;we're going to 'orbit' to make a circle, so we need to
    ;move the turtle back to where it started
    
    orbitright 360 / count answer
    ;'orbit' the turtle 360 degrees divided by the number of
    ;letters in the answer
  ]
  ;all done creating the circle
  
  forever [
    cam:rollright 1 wait 1
  ]
  ;rotate the camera forever
  
END

Spiral Stories

Similarly, this next example creates a spiral of words, which grow larger over time as the spiral is built. Each word is spoken by the computer’s text-to-speech facility. Rather than prompting for input, the ‘story’ is defined in a container (variable) using the make primitive.

While in the previous example, item was used to pick out each letter in the user’s input, here it is used to pick out each list item (word) in the “message (story) container.

The foreach primitive is used to typeset each letter in each word independently, to create a more flowing effect. This example demonstrates opportunities for creating text-based animations and artworks:

TO wordspiral
  ;creates a spiral made out of words from a given message:
  
  reset
  cam:pullin 100
  ;pulls the camera closer to the turtle
  cam:tandem myrtle
  ;causes the camera to match the turtle's movements
  penup
  ;don't draw lines
  
  make "message [Once upon a time there was a dog named Jim who used to deliver newspapers with his human Susan. One day they came upon an old house occupied by an ornery orange cat.]
  ;sets the message into the :message container.
  ;The message is a list of words,
  ;as opposed to a single word
  
  repeat count :message [
    ;repeat the following the same number of times
    ;as there are words in the message:
    
    cam:pullout 10
    
    repeat 19 [
      right 2 cam:rollright 2 wait 1
    ]
    ;turn in an animated way
    
    settypesize 10 + (repcount / 2)
    ;make the words larger as we progress
    
    if repcount = 32 [
      setfillcolor orange
      ;if this is the 32nd word, make the
      ;'fillcolor' orange
    ] [
      ;otherwise pick one from the given list:
      setfc pick [6 7 5 10 15]
      ;many primitives have shorter 'shortcuts'
    ]
    ;the fillcolor is the color used to create
    ;shapes such as typeset characters
    
    say item repcount :message
    ;speak the current word
    
    foreach "i item repcount :message [
      ;for each letter in the current word:
      typeset :i wait 1
      ;typeset the letter and wait 1/60th of a second
    ]
    
    if repcount != count :message [
      ;if this isn't the last word:
      repeat 12 - count item repcount :message [
        ;repeat 12 subtracted by the number of letters in the word:
        typeset spacebar wait 1
        ;type a 'space' and wait 1/60th of a second
      ]
    ]
  ]
  ;if we're here, we're finished the spiral!
  
  wait 120
  setxy -100 -150
  ;move the turtle to the center
  
  cam:notandem
  repeat 480 [
    cam:pullout 1 cam:rollright 1 wait 1
  ]
  ;spin the camera and pull it back
END

Codes and Cyphers

Whew! Myrtle’s had her workout, so she can take a well-deserved rest now. Let’s look at some fancier text manipulation, starting with a simple cypher.

Cyphers traditionally manipulate each letter in words in a specific, usually secret way, so that one can pass messages without those who intercept them having the ability to read them.

In the case of our simple example, we’re going to advance the ASCII value of each character by one, changing A into B and so-on.

This procedure is also our first encounter (in this article anyhow) with the “functionalisation” of a procedure in Logo.

In Logo, a procedure can either be just a procedure, in the sense that it is executed simply by declaring its name, and nothing more, or it can be a function, which requires input values be provided when it is declared, such as forward 20. It can also be a returner, which returns a result but requires no input, or a functional returner, which takes input and returns a result.

clearscreen – procedure
forward 20 – function
pencolor – returner
sin 20 – functional returner

Our cypher is a functional returner: it requires an input while returning an output. As a result, it needs to be executed by feeding it back into something else, such as print:

print cypher “albatross

This cypher example only encrypts a single word, or phrase if input is provided using the pipe symbols:

print cypher |I wish I was a secret agent!|

Now, as to the code itself, it first uses a boolean (listp) to check if the input is in fact a word / phrase and not a list, and complains if it is not. Booleans (predicates, which is why they typically end with p) return true or false, based on the input they are provided or the state of the turtleSpaces environment. The ‘if’ primitive takes a boolean result and if it is true then executes the supplied list.

See what I mean when I say lists of data and code are the same in Logo? You can manipulate lists of code just like any other list, and attempt to execute any list (although the results may not be that useful!)

Next we create an empty output container, and then foreach character in the input, we convert it to its ASCII value, add one, and then convert it back into a character, inserting it into the output container. Finally, we use the output primitive to return the result back to the calling primitive, for example print.

TO cypher :input
  ;A simple cypher:
  
  ;adding a :parameter to the end of a TO declaration
  ;causes the procedure to require the parameter when it
  ;is called.
  
  ;in this case, we're requiring a parameter called :input
  ;which when provided will place that given value into
  ;a container called :input _that only exists for the
  ;time this procedure is executed_ then vanishes!
  
  if listp :input [print |You can only provide a word to this procedure!| stop]
  ;check to see if the input is a list. If it is, reject it
  ;and stop processing this procedure
  
  make "output "
  ;initialize an empty container called :output
  
  foreach "letter :input [
    ;for each character in the :input container
    ;(represented by :letter) :
    
    make "output word :output char (ascii :letter) + 1
    ;update the :output container to contain the current contents
    ;of that container plus:
    
    ;the character representation of
    ;the ASCII value of
    ;the current :letter
    ;plus one.
    
    ;So, for example, the ASCII value of A is 65. We're
    ;going to add one to that (66) and then add the char(acter)
    ;representation (B) of that ASCII value to the existing :output
    ;container
  ]
  ;We do this for all the letters in the supplied word.
  
  output :output
  ;we 'return' our finished :output via the output command.
  ;This means that the output is passed on to the next command
  ;rather than just being printed out. It makes this procedure
  ;a _function_. Functions take input and return output.
  
  ;So, to show our cypher, we must enter a command such as:
  
  ;print cypher "elephant
  
  ;because if we just type: cypher "elephant
  ;Logo will not know what to do with the output
END

Deciphering the Gibberish

Of course we need to decipher our encrypted messages too:

TO cypherlist :input
  ;this function takes a list rather than a word,
  ;and uses cypher to encrypt each word separately:
  
  local "output
  ;we use :output in 'cypher', so we need our own
  ;'local' copy that is exclusive to this procedure
  ;and will not be modified by 'cypher'
  
  make "output []
  
  foreach "i :input [
    queue cypher :i "output
  ]
  
  output :output
  ;can you write a 'decypherlist'?
END

The Language of Music

Of course, English isn’t the only language Logo can speak — it can speak all sorts of languages! But especially, it can speak the language of music, using the playnotes primitive.

playnotes takes a list of music ‘commands’ and then plays them. These include:

L# – play the next provided note at the given length. L0 = 16th note … L9 = double whole note!

R# – plays a ‘rest’ (no tone) of the given length (similar to L)

C5 – plays a note of the given tone (C) and length (5)

Can we use list primitives to create random music? You bet we can!

This example uses the forever loop to play randomly generated music… forever! Inside the forever loop the code employs the list, word, pick and random primitives to piece together our computer-created composition:

TO randommusic
  ;but hey, all word and list handling isn't necessariy
  ;about text. Check out this random music generator:
  
  forever [
    (
      playnotes (pick
        ;pass to the playnotes primitive (which plays
        ;musical notes) one of the following two things:
        
        ;either:
        list (list word "R random 6)
        ;a list (which is the type of data playnotes
        ;requires) made up of a single word containing the
        ;letter R and a random number between 0 and 5,
        ;the combined word (eg R4) signifying a rest, or:
        
        (list
          word "L random 6
          word pick [C# D# F# G# A#] pick [3 4 5 6]
        )
        ;a list made up of two words, the first containing
        ;the letter L and a number between 0 and 5,
        ;and the second containing a note (eg C#) and
        ;an octave (eg 4)
      )
      ;use round brackets to space out your command statements
      ;across multiple lines, to make them easier to read
      ;and explain!
    )
  ]
END

Note how we can use the () round brackets to spread out a single complete instruction across multiple lines to make it easier to comment and read.

Doyay owknay igpay atinlay?

Pig Latin is a perennial favourite of children across the ages. A series of simple rules are used to create a ‘secret language’ that can only be understood by those who know them.

The rules are:

  1. If the word only has one letter (a) leave it as-is
  2. If the word only has two letters, add ‘yay’ to it
  3. If the world starts with ‘th’, move it to the end and add ‘ay’ to it
  4. If the word starts with a vowel, add ‘nay’ to it
  5. Otherwise, move the first letter to the end and add ‘ay’ to it.

The following example uses if, elsif and else to sort the input words through all of these rules, stitching together a result:

TO piglatin :input
  ;doyay owknay igpay atinlay?
  ;this procedure takes a list as an input
  
  make "output []
  ;initialize the output container as an empty list
  
  foreach "word :input [
    ;for each word in the input string:
    
    if 1 = count :word [
      ;if the word only has one letter (a):
      queue :word "output
      ;put it in the output untouched
    ]
    
    elsif 2 = count :word [
      queue word :word "yay "output
    ]
    ;if the word is two letters, add it to the output
    ;+ 'yay'
    
    elsif "th = leading 2 :word [
      ;otherwise, if the word starts with 'th':
      queue (word trailing (count :word) - 2 :word "thay) "output
      ;take the remaining part of the word minus the 'th' and add 'thay' to it
      ;then 'queue' it (add it to the end of) into the :output list
    ]
    
    elsif not memberp first :word [a e i o u y] [
      ;- 'not' reverses the boolean, making a true false
      ;- 'memberp' returns true if the first value provided to it
      ;is present in the list supplied as the second value
      
      ;and so, if the first letter in the word is NOT
      ;a vowel:
      
      queue (word butfirst :word first :word "ay) "output
      ;take everything except the first letter (butfirst)
      ;and then add the first letter to the end, followed
      ;by "ay, Note the brackets around the word function,
      ;they are needed because we are supplying three
      ;inputs: the end of the word, the first letter and "ay.
      
      ;finally we queue the result into :output
    ]
    
    else [
      ;FINALLY, if all else fails (the word starts with a vowel):
      queue (word :word "nay) "output
      ;we think you can figure this one out for yourself! :)
    ]
  ]
  
  show :output
  ;we're going to show the output rather than outputting it,
  ;but you could change this to output :output if you wanted
  ;to use this as a function.
END

Note the use of the leading and trailing primitives, which return the front and back of input words, respectively.

And now for something (somewhat) completely different…

You know that you can make containers containing values, and that you can use expressions to create those values. Typically these expressions are evaluated before they are put into the container, and so they are fixed at the point in time the make is executed. But what if you could put the expression into the container instead? This is where make! comes in handy:

TO nameexample
  ;this is a brief example of make!
  ;which creates a container whose value can be different
  ;every time you 'look' in it! (hence make!)
  
  ;in this case, when we define our container using
  ;make!, the expression goes into the container, not the result.
  ;This means that every time we show the container's 'contents'
  ;what we get back is an evaluation of the expression. So if
  ;we provide a dynamic expression, then the result will be
  ;varied.
  
  make! "name sentence pick [Big Little Stout Thin Tall Short] pick [Jim Fred Mark Paul Mike]
  show :name
  show :name
  show :name
  make! "time (se hours minutes seconds)
  show :time
END

As you can see from the example, containers created with ‘make!’ are more like magic boxes, whose contents change based on when you look inside them. Logo is magical, indeed!

A Sophisticated Story

Earlier, we told a simple story, now let’s tell a more sophisticated one.

In the following example, a series of list containers are created containing various story elements. These elements are then laid out on the graphical display using the typeset primitive. Note the absolute positioning set using the setxy primitive.

This is actually a fairly simple example, with the opportunity for participation from the entire classroom, in choosing the various words and phrases that make up the story:

TO story
  ;Let's tell a random story. This can be a fun yet simple project for students
  ;since they can pick the various items that go into each list of story elements:
  
  make "protagonist [|an old man| |a young lady| |a small dog| |a white cat| |a red walrus|]
  make "city [Vancouver Seattle |Los Angeles| |New York| Paris Rome]
  make "vehicle [|their car| |their bike| |the bus| |a taxi| |an Uber|]
  make "destination [supermarket mall dentist |computer store| |art gallery|]
  make "badevent [|slipped and fell| |got mugged| |lost their wallet| |got sick|]
  make "goodevent [|found $100| |won the lottery| |met Ryan Reynolds| |ate a burger|]
  ;first we 'make' lists for each element in the story
  ;note that phrases (also called 'long words') have to be surrounded with pipes ||
  
  clearscreen penup setxy -200 100
  ;setxy positions the turtle at the given x and y co-ordinates
  
  settypesize 9
  typeset (sentence |There was once| pick :protagonist "from word pick :city ",)
  ;sentence assembles multiple words into a list (including 'long words' or phrases)
  ;we're using word here to add punctuation to a word (or phrase) taken from the :city list.
  
  setxy -200 80
  typeset (sentence |who took| pick :vehicle |to the| word pick :destination ".)
  setxy -200 60
  typeset (sentence |Sadly, they| word pick :badevent "!)
  setxy -200 40
  typeset (sentence |But luckily, then they| word pick :goodevent "!)
  setxy -200 -50
  typeset |And they lived happily ever after.|
  home
END

And they lived happily ever after.

The next word, and the next word…

This next example is a simple little cracker, which uses the english primitive to retrieve random words from turtleSpaces built-in English dictionary, and then typesets them into the graphical display, rolling and turning the turtle to create a 3D ‘word cloud’.

If you click and drag on the graphical display area you can rotate around the output.

TO wordcloud
  ;creates a 3D word cloud out of random words:
  clearscreen penup
  
  repeat 100 [
    right pick [-90 90]
    typeset pick english 6
    ;'english' returns a list of english words of the given length
    slideright 10 rollright 90
  ]
END

If you are unable…

The next example tries to pick a random word out of the dictionary and turn it into an un-able variation, eg unfixable.

A naive version would look something like:

print (word “un pick english 5 “able)

which while straightforward is going to output a lot of rubbish.

Like piglatin, we’re going to define some rules that we’ll use to process the word and see if we can create something that makes sense. But this time we’re going to do this through exclusion — if the random word doesn’t conform to our rules, we will simply pick another one.

We’ll do this using the dountil primitive, which does something until specific conditions are met:

TO unable
  ;tries to create the 'un-able' version of a random word, eg unstoppable
  
  ;A simple version:
  
  ;print (word "un pick english 5 "able)
  ;stop
  
  ;A better version:
  
  dountil (
    ;we're going to cheat and find a good un-able word:
    ;'dountil' means perform the provided list, THEN
    ;check the conditions, and if they are false, perform
    ;the provided list of instructions AGAIN until the
    ;conditions are all true.
    
    and
    ;do this until all of the following are true:
    "un != leading 2
    ;the first two letters aren't 'un' -- we don't want 'ununable'
    :pick "er != trailing 2
    ;the last two letters aren't 'er' -- that would just be weird
    :pick not memberp last :pick [a e i o u y s d g]
    ;the last letter isn't a vowel or s, d or g
    
    ;note that the opening round bracket beside 'dountil'
    ;has allowed us to spread the above out across multiple lines.
    ;Without the brackets, all of that would have needed to be
    ;on the same line, or Logo would have become confused.
  ) [
    make "pick pick english 6
    ;pick an english word with 6 letters and place it into
    ;the :pick container
  ]
  print (word "un :pick "able)
  ;print the un-able word
END

Is this cheating? We’ll leave that for you to decide.

Check out these and other examples in the following turtleSpaces project:

turtlespaces.org/weblogo/?pub=193

Creating 3D-printable landscapes and craters in Logo

Terrain can be saved as STL files (under the File menu in the web IDE) and then 3D printed!

setterrain

[x1 y1 x2 y2] (list) | [height floor ceiling] (list) | seed (number) | algorithm (word) OR [algorithm magnification] | style (word)

Creates terrain on the z-plane between the specified x and y co-ordinates.

These co-ordinates represent 10 turtle-units, and the output can be scaled using setterrainresolution.

height specifies the maximum height in terms of single turtle-units, similarly scaled using setterrainresolution. The floor value specifies the lowest level rendered, and any values lower than that value are rendered at the floor level. Similarly, the ceiling value represents the highest value rendered, and anything higher is lowered to that value.

The seed is provided to the algorithm that generates the terrain, the algorithm is the method used (currently only fbm and flat (no algorithm) are supported) and the style (voxel, line, triangle or combo (line and triangle) — note that combo uses the terraininterior color to render its lines).

Providing a list containing the algorithm type and a multiplier allow you to ‘zoom in’ or out on the terrain, making it more dense and complex, or spacious and simple. Multiple blocks of terrain can be defined so long as they do not overlap.

See terrain, setterrainresolution, setterraincolors, setterraininterior, setelevation, elevation, lockelevation, elevationsnap, unlockelevation

setterrain [-10 -10 10 10] [25] 25 “fbm “voxel


setterrainresolution

number

Sets the ‘resolution’ of the terrain, or the size of each ‘sector’ in turtle-units within the terrain ‘grid’ which expands out from [0 0]. For example, the higher the terrainresolution is the larger each voxel is in the terrain in the voxel mode, and the more area the terrain covers. See setterrain, terrainresolution

setterrainreolution 5


setelevation

[x y elevation] list OR [[x y elevation][x2 y2 elevation2]…]]

Sets the elevation height of the terrain at the specified x and y co-ordinates. If a floor value is set in the terrain impacted by setelevation, the elevation will be set to the floor value if it is greater than the elevation specified, unless the new elevation is provided as a list of a single value.

setelevation can also take list of lists. See elevation, setterrain

setelevation [10 20 10]


Voxel-based terrain generation:

TO voxelterrain
  reset hideturtle
  setterrainresolution 5
  setterrain [-2 -2 2 2] [20 1 10] random 500 [fbm 2] "voxel
END


Triangle-based terrain generation:

TO triangleterrain
  reset hideturtle
  setterrainresolution 5
  setterrain [-2 -2 2 2] [20 1 10] random 500 [fbm 2] "triangle
  ;the only real difference is changing the last parameter above to 'triangle'
END

Voxel-based crater generation:

TO voxelcrater
  reset hideturtle
  setterrainresolution 5
  setterrain [-2 -2 2 2] [20 1 10] random 500 [fbm 2] "voxel
  stop
  dropanchor penup pullout 50
  repeat 10 [
    repeat 180 [
      orbitright 2
      setelevation {xpos ypos 40 + 5 * repabove 1}
    ]
    pullout 2
  ]
  
  pullout 2
  
  repeat 9 [
    repeat 180 [
      orbitright 2
      setelevation {xpos ypos 95 - 5 * repabove 1}
    ]
    pullout 2
  ]
END

Triangle-based crater generation:

TO trianglecrater
reset hideturtle
setterrainresolution 5
setterrain [-2 -2 2 2] [20 1 10] random 500 [fbm 2] "triangle
stop
dropanchor penup pullout 50
repeat 10 [
repeat 180 [
orbitright 2
setelevation {xpos ypos 40 + 5 * repabove 1}
]
pullout 2
]

pullout 2

repeat 9 [
repeat 180 [
orbitright 2
setelevation {xpos ypos 95 - 5 * repabove 1}
]
pullout 2
]
END

Project Idea: How to Code a Hangman-style game in Logo

You can open this project in the web-based IDE environment by following this link: https://turtlespaces.org/weblogo/?pub=122

Due to Logo’s enhanced string-handling capabilities and built-in dictionary, making Hangman-style games in turtleSpaces is easy-peasy!

The mechanics of a Hangman game are simple: the computer chooses a word, and then the player chooses letters. If the letters they choose are in the chosen word, then those letters are revealed. If they aren’t in the chosen word, the ‘hanged man’ is built — although these days we probably shouldn’t do that due to nasty historical context, and choose something else.

In our example, we’ve decided to reconstitute the Egyptian god Konshu (aka Khonsu) as a shameless reference to the Marvel TV show Moon Knight. Once Konshu is fully-reconstituted then he will block out the sun forever — we don’t want that! Another potential conceit could be a space portal being built by aliens which once complete will deliver an invading armada.

Whichever way you choose to present it, the mechanic is the same — once you run out of ‘misses’ the game is over.

  • Computer chooses a word
  • The number of ‘misses’ is specified
  • We prompt the user for a selection
  • We check to see if the letter is valid (hasn’t been picked before)
  • We search through the target word looking for the letter
  • If we find it, we reveal it by placing it into the ‘solution’
  • We show the player if they’ve uncovered any letters or not
  • If not, we add more on to Konshu (or the space portal, or what-have-you)
  • We repeat until the target word is entirely revealed, or Konshu is built

Here are the ways in which Logo makes building this program simple:

  • We can use the pick and english primitives to choose a word from the built-in dictionary
  • We can use forever to repeat our game loop… forever!
  • We can use question and answer to prompt for and receive input from the user
  • We can queue the user’s selection into the list that logs the user’s choices
  • We can use the boolean containsp to determine if the user’s choice has already been chosen, by passing it the user’s current choice and the list containing the users previous choices
  • We can use count to ensure the user only provides a single letter as input
  • We can use dountil to repeat the question until we get a valid answer
  • We can use foreach to cycle through each letter of the selected word and check for matches.
  • We can use a combination of setitem and loopcount to set the appropriate space in the ‘solution’ container to the guess, should it match. If we initially set the solution container to be a series of dashes, we can then check for dashes using containsp later, to see if we’ve completed the solution
  • We can call another procedure to build our ‘hangman’, passing it the number of tries remaining, so we know which part of the hangman to build. We can use switch and case to build the relevant part of our hangman
  • We can use decrement to decrease a counter by one, and use if to check to see if we are out of tries.

Because we have all of these tools at our disposal in Logo, the game logic does not occupy very many lines of code, and is nearly english-readable:

TO game
 reset hideturtle
  
  (print |You must determine the magic word required to 
   banish Konshu back to the netherrealm.|)
  (print |If Konshu is able to reconstitute himself in 
   this realm and awaken, he will banish the sun!|)
  ;instructions (in brackets for display purposes)
  
  make "attempts 10
  ;this could be made more, or less
  
  make "target pick english 6
  ;similarly, we could pick a different target word length
  
  make "solve "------
  ;this container reflects correct player choices
  ;if we change the word length, we will need to change 
  ;the number of dashes
  
  make "picks []
  ;this holds the players choices so we can discount 
  ;duplicate picks
  
  forever [
    dountil (and
      not containsp answer :picks
      1 = count answer
    ) [question |Pick letter:|]
    ;repeatedly ask which letter until the player enters only
    ;one letter, and it has not already been picked
    
    queue answer "picks
    ;add the selection to the :picks list
    
    make "hit false
    ;set the :hit boolean to false
    
    foreach "i :target [
      ;for each letter in the :target word:
      
      if :i = answer [
        ;if the letter matches the users choice
        
        setitem loopcount "solve answer
        ;update the appropriate character in the :solve
        ;container to reveal the matching letter
        
        make "hit true
        ;set the :hit boolean to true, so we don't
        ;advance the building of Konshu
      ]
    ]
    
    show :solve
    ;show the current state of the :solve container
    
    if not :hit [
      ;if our selection wasn't in the answer:
      
      dec "attempts
      ;decrease the :attempts container by one
      
      konshu :attempts
      ;execute the konshu procedure, passing the
      ;number of remaining attempts to it
      
      (print |Attempts remaining:| :attempts)
      ;placing round brackets around a statement allows more
      ;parameters to be passed to it than its default
      
    ]
    
    if not containsp "- :solve [
      ;if there are no dashes left in the :solve container:
      
      print |You have banished Konshu!|
      finish
    ]
    
    if :attempts = 0 [
      ;if we've no attempts left:
      
      (print |The word was:| :target)
      print |Darkness descends.... forever!|

      finish
    ]
  ]
END

See? That was pretty easy — it only took an hour to write that code! Then comes the building of our ‘hangman’ model:

TO konshu :attempts
  
  ;this procedure builds the relevant part of the Konshu
  ;model.
  
  switch "attempts
  ;switch takes a literal container name
  ;and then subsequent case statements execute
  ;based on the contents of that container:
  
  case 9 [
  ;this is what we build if there are 9 tries remaining
  ]
  case 8 [
  ;...
  ]
  ;etc...
END

You simply put the code to create each stage of construction inside each case block. This could make a great project to tie language / string manipulation to game coding, with a bit of 3D artistry (putting the A in STEAM) in the mix.

Logo is such a powerful, easy-to-use language it can be hard to decide what makes the best introduction for your students. But you know them best, and we hope that one of our examples will work for them, and you!

Thanks for checking out this project!

Past and Future Turtles Part 3: Logo Moving Forward

Past and Future Turtles Part One

Past and Future Turtles Part Two

When Seymour Papert originally conceptualized Logo, he envisioned a language that could be used to demonstrate not just how a computer followed instructions, but how a human being followed instructions, especially those of their own making, and how they developed them. As such, the language has never been successfully optimized for computer execution, as any attempts at doing so tend to defeat the purpose of having the language be easily understandable to a lay human, both to read and write it, without complex formatting or syntax rules. 

Due to these aims, Logo has historically been less a practical programming language (for production purposes) and more a vehicle for cognitive self-expression. However, the more complex that self-expression, the better for understanding how the computer — and the mind — works. And so, as computers become more powerful, the opportunities for more complex Logo programs appear — not because Logo is itself more optimal in its ability to execute code, but because the computer upon which that interpreter runs has more grunt. 

To that end, games make ideal subject matter for studying not just how the computer and the coder think, but also the player. But any games we create need to meet at least a minimal standard of engagement — this is the 2020s, after all, not the 1980s. And so the slow card or word-based games of yore are not really practical in a modern educational context, not if the aim is to impress the student and so impress upon them the concepts one is trying to teach.

Because of this, 21st-century Logos have tended to stay away from complex game mechanics and instead stick to more simple concepts where perhaps an image or two is moved about the screen, there’s some simple pixel-based ‘collision detection’ and a bit of sound — enough to be mildly engaging and provide some hope the student has developed some understanding of the underlying meaning, which is generally limited to ‘do these things’ and ‘if this, then this’. 

But I would argue that a reasonable understanding of logic requires more sophistication than the simple binary of ‘if A then B’ if only because these are, in the real world, almost never presented in isolation, but rather as a nested hierarchy of decision-making more akin to ‘if A then B unless C but always if also D and never if E (unless F, of course) — complex logic that tends to naturally evolve with games that themselves gradually develop their game mechanics and sophistication as they grow and become more polished.

And so, the simple ‘games’ created in platforms such as Scratch are only just scratching (pardon the pun) the surface and don’t really effect Papert’s true vision of encouraging children to develop an understanding of how to break down complex problems into considered and reasoned solutions. What we need is the ability to abstract away as much of the trappings of a complex game as possible so that we can focus mostly on the game logic and execution flow.  

Luckily, with Logo’s inherent ability to preempt its own built-in primitives, we can, as Logo interpreter developers, provide a myriad variety of high and low-level tools without interfering with the coder’s freedom in creating their own procedures with whatever names they desire. Logo’s parameter processing is also flexible, meaning that square 50 and square [50] can mean and do different things. And because they’re all built-in they can all have built-in documentation that is available directly in the IDE (integrated development environment) rather than having to load a third-party library and search for documentation on the web.

Logo’s strengths make it innately suitable for the Making of Grandiose Things, given efficient interpreter optimization and sufficient compute — these ‘things’ may not be as sophisticated as those created with a low-level game-development platform such as Unity but certainly comparable to user-created games in Roblox or Minecraft, and created in a language that is much easier to read and understand. For example, the primitive nearp returns true if there are other turtles within a certain distance of the ‘calling’ turtle (the turtle executing the command. 

And so, to detect if there are other turtles within 20 GL (turtle) units, all one needs to type is: 

if nearp 20 [do this stuff]

and that’s it. No need to load 3D libraries or anything else. If done properly, these additional primitives add very little to the execution cost of the Logo interpreter, especially in the general scheme of things. The Oxford English Dictionary has over 170,000 words in it, the average adult knows around 30,000 of those. Learning a couple of thousand Logo primitives is not out of the question, particularly with helpers such as pop-over help. 

Not to suggest that you need to learn all of these primitives right out of the gate — you absolutely don’t! You can learn a few dozen primitives and make some very complex models and artworks, just the way one always has in Logo. And the basic syntax has no need to change at all — more sophisticated syntax can be introduced as long as it doesn’t displace the traditional syntax, and there’s no reason for it to do so. But as the user gets curious, they can learn new primitives from other practical examples, and grow their own projects into other areas, creating ever-more sophisticated logic — the point of the Logo exercise.

Triangle Tempest is a version of the classic arcade game written in Logo

Over time, the modern Logo interpreter developer can add primitives that can do almost anything, at any level of sophistication. For example, play a song. Or play a note. Or play a frequency. Select a different instrument. Create your own instrument. And so forth. They just need to remember to document them! And try to give them intuitive names — which can be challenging, naming things being one of the hardest parts of development ;) And as the interpreter grows, its collection of examples will similarly grow, becoming more and more impressive, and hopefully inspire a userbase.

And inspiration is the key here. The more your Logo interpreter can do, the more ways a prospective user can be inspired. And in the modern environment, if you don’t inspire the user they will move on to something that does — nobody wastes time these days on anything that doesn’t immediately enthuse them. A modern Logo interpreter needs to grab their users by their collars and drag them in, especially in education! And speaking to education, teachers are increasingly turning to Minecraft because they’ve discovered that kids are much more interested in working with something that has outside outside, more widespread acceptance than coding environments that are ‘dedicated’ to education. 

Education also seems to be significantly turning towards 3D (both with coding and printing) so we’ll make that a given. It’s fair to say that 2D coding environments are niche and passe — not that they’re completely unappealing, only that the masses seem to be 3D-first, and if we want to engage as many people as possible, 3D is going to be where that’s going to happen. Also, if you can export 3D models from your Logo environment that can be printed, that’s not going to hurt. What else can we do to draw people in? 

Community and collaboration capabilities are definitely near the top of the list. In an increasingly-remote world, we need to allow multiple users to work on a project together. They need to be able to interact with each other to share knowledge and insight. They need to be rewarded for their efforts both in creating projects and in helping others, perhaps with tokens they can exchange for models or music, and status. The developers will need to listen to the needs of the community (once there is a community to listen to). But their minimum standards will require a fairly advanced interpreter before one can start to draw them in.

To that end, multi-player capabilities are likely a must. The ability to store game data in the ‘cloud’ is also a given. Whatever Roblox can do we need to _almost_ do — as Logo interpreter developers, the simplicity of the Logo programming language will always be our selling point, and can make up for shortfalls in other area. But there are certainly minimum standards to which we must adhere. 

And so we turn to sharing and distribution — users need to be able to share their projects, and good projects must be able to be discovered without scrolling endlessly through a generic list (something which almost nobody will do, leaving projects to languish without an audience.) Engagement must drive this, real engagement through metrics gathered by the platform, not just ‘likes’ (which can be gamed). And projects must be able to be shared on more than just the web — an ability to ‘package’ a project into a desktop or mobile app will certainly improve the desirability of the overall platform, especially if a user can distribute their game on broader app stores.

So, perhaps if we can implement all of this, Logo might be a ‘practical’ programming language after all. As we’ve seen, performance is only one small part of a very large whole. Could Logo take a noticeable or even significant share of the user-created gaming space? Perhaps. Will that result in it regaining a foothold into education and once again playing a significant part in computing curriculum? 

Only time will tell, ultimately, and when it does, maybe there will be a Past and Future Turtles Part 4.

IDE now available in offline (downloaded) version

We are pleased to announce that turtleSpaces now supports offline use of the web-based Integrated Development Environment. Simply download turtleSpaces for your relevant platform, and once you’ve signed in to a local account, type IDE in the console.

Your default web-browser should then open with the IDE in a new window or tab. You can use this IDE to control your local copy of turtleSpaces. This means that execution of Logo programs will generally happen much faster. Loading and saving will happen to / from your local turtleSpaces folder (present in your home or User folder).


Logo Game Design Introduction: Downhill Skiing

Downhill Skiing exercises Logo’s list handling capabilities and leverages turtleSpaces 3D functionality to create an engaging yet simple game.

Once loaded, click the flag icon to start.

Click here to open this project in the web IDE.

Herein lies a wonderful introduction to game development in turtleSpaces. The game mechanic behind downhill is simple: the player travels down the ski slope, avoiding randomly-positioned trees while shifting left and right to end in the target zone.

The core game mechanic is similar to simple early text-based ‘action’ games written in languages such as BASIC, where the player needs to avoid asteroids in an asteroid field, for example. It is straightforward and easy to understand.

As such, this program would make an excellent project for students moving from Scratch to text-based coding. It provides an introduction to the turtle, programmatically-generated lists, 3D model creation, user input and various sound primitives, without using any sophisticated math or complex language primitives.

The game logic is as follows:

  • Create initial graphic elements (stars, ground, slope)
  • Create the ‘landing zone’ and store its location in a container (variable)
  • Move the turtle across the ‘slope’ to each spot on a 39 x 40 grid
  • Decide randomly to create a tree or not, create that tree and log that decision in a list
  • Each row has a separate list (trees0 trees1 etc), made up of 39 values (one for each column)
  • Once finished, place the turtle randomly at the top, in a location free of trees
  • Loop through each row of trees (and their respective list containers) in descending order
  • Check the relevant list to see if the player is occupying the same location as a tree, if so crash
  • Check to see if the player has pressed a key, and act accordingly, moving the player
  • Pause between rows but for less time each iteration, so that the player speeds up as they descend
  • When we get to the ‘bottom’, check to see if we’re in the target zone
  • If we’re not in the target zone, retry with the same level
  • If we are in the target zone, create a new level increasing the odds of trees

As you can see, developing a lesson plan is easily achievable. Let’s explore each area of the code in depth. This tutorial assumes some familiarity with text-based coding on the part of the reader, and sometimes speaks in general terms. The fully-commented source code for this game is available at the end of this article, and inside the turtleSpaces environment itself as a published project.

In the beginning…

When the procedure starts, the first thing we need to do is reset the workspace, to ensure we’re working with a clean slate. Next, we need to provide the user with some instructions!

For this, we’ll use the simple text command print. We can change the color of the text using settextforeground. Note that for every set command there is a corresponding function to return the parameter’s status, such as textforeground. settextforeground takes a number as a parameter, which represents a color (type showcolors in the console to see a list of colors and their numeric values). However, turtleSpaces has a number of color primitives (red, orange, yellow etc.) that return their respective numeric values, so that you can say, for example, setttextforeground yellow (which works because yellow is a function that returns the number 13.)

The print command itself takes either a word (a single word preceded with a quote “) a list (a series of words wrapped in square brackets []) or a ‘long word’ (a series of words wrapped in pipes ||). You can use either a list or a long word to display a sentence, eg print [Welcome to turtleSpaces!] or print |This also works.| The advantage to using a list is that you can cherry-pick one word from it easily, eg print first [Welcome to turtleSpaces!], however it can be more complicated when pairing text with numeric values, for example, when using a long word would be preferable.

Note that print “Welcome to turtleSpaces” will throw an error, because the parser will attempt to execute to and turtleSpaces” as commands.

We can use cursordown to put a blank line between sections of text. We can also say text as well, to make things more interesting!

Next, we need to create some default containers (variables). We can create these using the make primitive, which is the traditional method in Logo (eg make “container 5), although turtleSpaces also supports put x in “container and “container := x (note the colon before the equals). A colon before a word in Logo returns the value stored in the container of that name, eg :container. But make needs the container name specified with a quote ” — this is because if you used a colon, make would create a container with the name of the value stored inside that container!

We need to set the initial :level (0). We’re also going to create a container containing the number of available ‘retries’ (we will give the player limited opportunities to generate a new level if the level provided to them is impossible.)

make “level 0 make “retry 3

Notice that we can ‘stack’ multiple commands on the same line! This can sometimes be a blessing, sometimes a curse, so use your discretion when stacking commands.

Finally, we’re going to declare a label, which can be returned to using the go primitive:

label “start

so that we can return here at the start of a new level.

My God, It’s Full of Stars!

It’s time to start building the graphical environment in which the game will take place. First, let’s create a starfield. This is a fairly simple algorithm:

  • set a ‘static’ z (depth) position
  • set a random x and y position
  • set a random ‘fill’ shade and color
  • set a random fill opacity
  • create a spot of varying size
  • do this all 100 times

In the code we use the setxy and setz primitives to accomplish the first two items, and the random function to generate the random values we need to give to each. There’s some turtleSpaces-specific primitives such as randomfillshade and randomfillcolor (the color used to create shapes is the ‘fill’ color, as opposed to the color used to create lines which is the ‘pen’ color.)

We wrap all of this in a repeat loop, which repeats the contents of the list provided to it the given number of times, for example repeat 20 [print repcount] which counts from 1 to 20.

We actually need to create two starfields, one behind the hill, and one in front of it (so that we see stars regardless of which direction we’re facing, either looking at the hill, or from it while we’re playing. We can make the single loop do double-duty by using the oddp primitive which returns true if the value passed to it is odd. As you saw with the above example, repcount returns the current repeat loop iteration, and so if we pass repcount to oddp, then oddp will be true on odd iterations of the repeat loop.

We can then pass oddp to if, which will then execute the first list of instruction if oddp is true, and the second list of instructions if it is false. In this way, we set the z position of the turtle in an alternating fashion.

Note that the back side of a spot is not ‘lit’ and so we need to enable twosided mode before we create the stars to ensure both sides of the spot are lit, since we’re going to be looking at them from both directions.

Making Ground

Next, we’re going to create the ground. This is another spot, like the stars, just a very big one! We use setxy and setz to position the turtle in the lower-centre of the screen, and then tilt it up 90 degrees (so that we see the ‘dark’ back side of the spot), setting random fill and shade colors before making the spot. The value passed to spot signifies its radius, and is given as ‘turtle units’, the same unit of measure used by all shapes and lines.

To choose the fill color we use the pick primitive, which randomly selects an item from a list, eg print pick [1 3 5 7 9]

The landing area is where our skiball will end up assuming the player avoids all of the trees. This is created using the quad primitive, which creates a filled rectangle. A container is created containing a random value signifying the left (from this perspective) side of the target area. It’s width is dependent on the level, but to begin with, it could just be arbitrary (eg 100 ‘turtle units’ wide). We will use the value in this container later, to determine if the player is inside the target zone.

There are, then, three quads, the left side before the target zone, the target zone itself, and the right side after the target zone. We color the target zone dark blue to distinguish it from the rest of the landing area.

Finally, we create the ski hill itself. Its angle does not matter that much, as from now forward the turtle will operate on the plane of the hill. In this example we’ve used the gradient mode to create a gradient fill on the quad that makes up the ski hill. In gradient mode, the pen and fill colors are both used to create the gradient, the pen color being the ‘near’ color and the fill color being the ‘far’ color.

It’s time to populate the hill with trees.

Seeing the forest for the trees

When this game was first developed, the ‘trees’ were simple icospheres. In creating a lesson plan, you can take two approaches here:

  • Create and validate the core game logic first, using a placeholder such as a sphere
  • Create the trees first, and then develop the game logic later

This is really a choice between whether we have vegetables or dessert first, but here we’ll start with dessert.

The trees are made up of firstly a cylinder (for the trunk), then a series of cutcones and then finally an icosphere on the top. We select the color of each trunk and tree using the pick primitive, and select a random fillshade for each layer of the tree.

We need to do a bit of turtle acrobatics to ensure the trees are upright relative to the ground, and not upright relative to the slope! Shapes are created beneath the turtle, and so as a result the turtle needs to be ‘flipped over’ and the trees trees created successively from the trunk ‘downward’ to the icosphere on the top of the tree.

From a default startup state, type cylinder 20 50 20 into the console, then click and drag on the view area to rotate the camera:

As you can see, the cylinder is created beneath the turtle. To create additional shapes at the opposite end of the cylinder, we will need to lower the turtle the length of the cylinder.

cutcones are similarly created under the turtle. However, icospheres are created around the turtle. See the shape guides available on this website for more information about shape orientations relative to the turtle.

And so we sweep left to right, working up the slope, deciding at each ‘stop’ whether or not to build a tree, and then noting in the list for the current row if we have created a tree at the current column.

Here comes the vegetables. At the start of each row we create a list:

make word “trees repcount []

word combines two inputs into a single output. We’re using it here to create a new list container [] based on the current repcount, prefixing it with the word “trees, creating for example :trees11

As we sweep across each row, we use the queue primitive to add either a 0 (no tree) or a 1 (tree) to the end of the list:

queue 1 word “trees repabove 1

repabove returns the iteration of the parent repeat loop, in this case the row repeat loop. Using repcount here would return the current column, as we are iterating through the row.

We will use these lists later to cross-reference with the turtle’s position and reveal if a tree is present at that location.

Introducing the Player

Once we’ve created all the trees, we could spend a bunch of time creating an actual skier model, but I like just using the amigaball, which creates a checkered ball based on the current fill and pen colors. We use setmodel to make it the turtle model. Later on we can use setpremodel to make it ‘roll’ down the hill, which looks pretty cool! Note that we will need to elevate the turtle the radius of the amigaball to ensure it’s ‘sitting’ on the slope.

Skiing the Slopes

So basically now we’re ready to position the turtle at the top of the slope. We pick a random location and then check :trees40 and :trees39 to ensure there isn’t a tree at the random location, or below it, respectively. We do this by using a container called :pos which contains the column number occupied by the player.

Alright, so now we enter the main game loop, which is a repeat loop based on the number of rows (40):

  • Check for keypresses and action them as appropriate
  • Move the ball down one row
  • Check for collisions and act accordingly

We use if to check keyp which returns true if there are any keypresses waiting in the keyboard buffer. If there are, we use peekchar to ‘peek’ at what the first keypress in the buffer is. If the key is j or k we check our :pos and if valid we then move the turtle player and increment or decrement the :pos container as appropriate.

We can also check for a press of the r key and then initiate a ‘retry’ but that is something that we can add in later. We don’t need to deal with it now.

Once we’ve dealt with the keypress, we can remove it and any superfluous keypresses from the key buffer using clearchar

The second thing we do in the loop is move the turtle forward 10 turtle units (one row). This is pretty straightforward.

Third, we check for a collision:

if 1 = item :pos thing word “trees 40 – repcount [do this stuff…]

Whew! That’s a mouthful, isn’t it? The first thing you’ll notice is the meat of our sandwich is on the right — other programming languages would tend to have the sides of the equals reversed, with the complicated bit first followed by the = 1. But Logo ‘parses’ right to left, which means that if we did that, the = comparator would only check 1 against repcount, ignoring all the rest of it.

We can solve that problem by putting round brackets () around the entire expression (the meat) but that adds extra clutter we don’t need if we just put the value first.

  • item returns the nth list item. So print item 3 [1 2 3] will return 3, for example. item :pos returns the list item based on the player’s current position.
  • thing returns the value stored in the container of the given name. It’s the longhand of :container. But it’s useful here because unlike using the colon method, we can construct the name of the thing to be retrieved, as we did with make earlier.
  • word acts similarly here to when we created the lists, with the exception of subtracting repcount from 40 in order to get the current row list in descending order.
  • And so, if the value returned from all of that is 1, we’ve hit a tree! Do the stuff in the list.

Ouch! Well, when all else fails, try, try again… we can use a label go pairing to send the player back up to the top, logically speaking. And we can wrap a tag around the player’s progress down the hill so we can erase it, sending the player turtle back to where it started, turtle-y speaking.

If we make it to the bottom of the hill we need to check to see if we’re in the target zone:

if and xpos > -200 + :zone xpos < -100 + :zone – 10 * :level [do this stuff…]

xpos holds the turtle’s current x position. We can use it along with the value stored in the :zone container to decide if we’re in the zone. This statement assumes we’ve factored the :level into the width of the :zone.

If we’re in the zone, congratulations! Then (if we’re not on the last level) we increase the level and send the player off to try again. If we’re not in the zone, too bad, and we send the player off to try the level again.

Of course, the version available to play has a few more bells and whistles, you can read all about them in the documented source code below.

Note: This was created as a monolith procedure, but you could break bits of it out into separate procedures in order to demonstrate Logo’s abilities in that area. For example, the tree model creation could be its own procedure, as could the contents of the main game loop, the crash logic, the level completion logic and so forth.

TO downhill
  ;myrtle builds a ski slope and then rolls down
  ;it in the guise of a rolling amiga ball.
  
  ;this is a wonderful introduction to game
  ;development in turtlespaces. The game mechanic
  ;is quite simple:
  
  ;the player needs to travel down the ski slope
  ;while avoiding the randomly-placed trees
  ;and finish in the highlighted zone.
  
  ;most of this procedure is window-dressing.
  ;at its core it simply fills a number of lists
  ;with 0s and 1s, and then checks these against
  ;indices inferred by the player's position, eg
  ;the 'row' being the current iteration of the
  ;player's progress down the ski hill, and the
  ;column being the player's horizontal location
  ;on that hill. The row matches against the list
  ;generated with the row number, eg :trees 10
  ;while the column (:pos) matches with the item
  ;number in that list, eg item :pos :trees10
  
  ;this game would be rather pedestrian with a
  ;simple text representation, but in turtlespaces
  ;we can 'jazz it up' and make it more engaging.
  
  ;Let's go!
  
  reset
  cam:pullout 10
  ;the slope doesn't quite all fit in the screen!
  ;so we'll pull out the camera turtle a little bit.
  ;'cam' is shorthand for whichever turtle is the current
  ;view turtle
  
  cleartext settextforeground red
  print |Welcome to Amigaball Backcountry Downhill Skiing!|
  ;bars indicate a 'long word' or a word that contains spaces
  ;while quotes indicate a single word and square brackets
  ;indicate a list. Curly braces indicate a list 'resolved'
  ;when the list is processed during execution. (Don't worry
  ;if you don't know what that means just yet!)
  
  cursordown
  settextforeground yellow
  print |Press J and K to steer your skier (Amigaball)|
  print |Land in the Blue Zone. Don't hit the trees!|
  print |More trees each level. Try to make it to level 10.|
  print |Press R to get a different map (3 retries) Q to quit|
  say |Welcome. Don't hit the trees!|
  make "level 0
  ;'make' creates a container with the given name containing the given value
  
  make "retry 3
  ;although the odds of trees on lower levels is less,
  ;it is still possible to get a very dense level if you are unlucky!
  ;and so we'll give the player three opportunities to regenerate
  ;the level
  
  ;hint: if you open this in the web IDE you can hover
  ;over the primitive names with the mouse and a popup will
  ;appear with their syntaxes
  
  label "start
  ;we will return here at the start of each 'level'
  ;the program gets redirected to labels using 'go'
  
  ;create the 'mountain':
  clearscreen hideturtle penup
  ;you can 'stack' multiple directives on the same line
  
  twosided ; by default the back side of faces is not 'lit'
  
  ;make the background stars:
  repeat 200 [
    if oddp repcount [setz -600] [setz 600]
    setxy -800 + random 1600 -100 + random 600
    randomfillshade ; aka randfs
    randomfillcolor ; aka randfc
    setfillopacity 50 + random 50 ; aka setfo
    ;opacity is the transparency of the shape
    ;it takes a value from 0 to 100 (full)
    spot 2 + random 7
  ]
  
  setfo 100 ; aka setfillopacity
  
  setz 0
  setxy 0 -115
  
  ;create the 'ground spot':
  notwosided
  up 90 raise 1
  setfs -5 + random 15 ; aka setfillshade
  setfc pick [4 5 8 9] ; aka setfillcolor
  spot 1000
  slideleft 200 lower 1
  
  ;pick colors:
  setbg pick [2 6 7] ; aka setbackgroundcolor
  setbs -5 + random 15 ; aka setbackgroundshade
  setpc pick [5 6] ; aka setpencolor
  setps random 10 ; aka setpenshade
  setfc pick [10 15 7 14] ;aka setfillcolor
  setfs -10 + random 10
  gradient
  ;this causes many shapes to transition from the
  ;pen color to the fill color
  
  ;create the landing area:
  make "zone random 300
  ;pick the 'target zone' area
  
  ;containers that hold values are created using 'make'
  ;with the given name and value
  
  twosided
  quad :zone 400 ; creates a quad stretching to the start of the zone
  ;values in containers are retrieved by specifying the container name
  ;prefaced with a colon. You can also use the 'thing' function to retrieve
  ;the value of containers, eg 'quad thing "zone 400'
  slideright :zone ; aka sr
  make "pencol pencolor
  ;we need to store the pencolor and restore it later
  setpc blue ; several color names translate to their color number
  quad 100 - 10 * :level 400 ; create the zone based on the level
  sr 100 - 10 * :level
  setpc :pencol
  ;this is where we restore the pencolor
  quad 300 - :zone + 10 * :level 400 ; create the remainder of the landing area
  sl 100 + :zone - 10 * :level ; return to the start
  
  
  ;create the ski slope:
  notwosided
  down 120
  quad 400 400
  nogradient
  
  
  ;position the turtle for creating trees:
  fd 5 ; aka forward
  sr 5 ; aka slideright
  
  ;place the trees:
  repeat 40 [
    ;we'll have 40 rows of trees
    
    make word "trees repcount []
    ;our strategy here is to make a series of lists, each of which
    ;indicate the presence or absence of a tree in a particular
    ;location on a particular 'line' of the ski slope
    
    repeat 39 [
      ;there are 39 columns on each row of the ski slope
      sr 10
      
      if 1 = random 10 - :level [
        ;the higher the level the more likely a tree will be
        ;placed in a given spot
        
        noise (10 * repcount) + (200 * repabove 1) 1
        ;let's make a little noise based on position
        
        up 150
        ;most shapes are created under the turtle, so we need
        ;to flip it over
        
        make "size 0.5 + 0.1 * random 10
        ;pick a random size
        
        setfc pick [5 8 9]
        cylinder (1 + 0.1 * random 10) * :size 10 * :size 4 + random 10
        ;create the tree trunk. cylinder takes radius, depth and sides
        
        lo 10 * :size
        ;remember, these shapes are created under the turtle
        ;so we have to 'lower' to continue to build 'beneath' them
        
        setfc pick [4 5 6 7 12 14]
        
        ;create the body of the tree:
        repeat 5 [
          randfs
          cutcone (7 - repcount) * :size (5 - repcount) * :size 2 * :size (5 + random 10) * :size
          ;cutcone takes 4 parameters: the starting radius, ending radius, depth and sides
          lo 2 * :size
        ]
        
        ;put a little 'cherry' on the top of each tree:
        randfc ico 1 * :size
        
        ra 20 * :size
        dn 150
        ;return to the base of the tree and reorient back
        
        queue 1 word "trees repabove 1
        ;a 1 in the list indicates a tree
        ;queue adds it to the end of the list
      ]
      [
        ;this second list executes if the if condition is false:
        queue 0 word "trees repabove 1
        ;a 0 indicates no tree
      ]
    ]
    sl 390
    fd 10
    ;move ahead a row and return back to the starting column
    
  ]
  ;return to the start of the repeat loop and loop until finished
  
  ;we're done making trees! Let's place the player:
  
  bk 10
  ;pick a random placement:
  make "pos 5 + random 30
  sr 10 * :pos
  ;and check to make sure there's no tree there or directly in front:
  until (
    and 0 = item :pos :trees39
    0 = item :pos :trees40) [
    sr 10
    inc "pos
    if :pos > 39 [sl 400 make "pos 1
      ;if we hit the end of the row, circle back to the start
    ]
  ]
  rt 180
  ;turn to face down the hill
  ra 5
  ;elevate a little bit off the hill
  
  make "startpos :pos
  ;store the starting position to return back to it later
  
  label "attempt
  ;we will return here if the player's attempt fails
  
  setpremodel []
  ;setpremodel allows for the manipulation of the orientation
  ;and position of the turtle model.
  ;we use setpremodel later and need to clear it if
  ;the player needs another attempt
  
  begintag "route
  ;we're going to place the players 'route' into a 'tag'
  ;so that we can erase it if the player's attempt fails.
  ;this way we can keep the level we've generated and
  ;they can try again
  
  setview "myrtle
  ;view the scene from myrtle's perspective
  myrtle:setlight 1
  snappy:setlight 0
  ;switch the light to myrtle's position
  setviewpoint [0 10 -30]
  ;set the viewpoint offset from myrtle's position
  
  randpc ; aka randompencolor
  setpenwidth 4 ; make the turtle draw fat lines
  
  pendown ; let's draw the route the player takes!
  ;because why not? It'll look interesting later
  
  clearchar
  ;clears the keyboard buffer so the player doesn't
  ;end up with a bunch of buffered keypresses
  ;influencing movement
  
  setmodel [
    setfc red
    ico 5 ; aka icosphere
  ]
  ;sets the turtle 'model' to the given contents
  ;setmodel can also use tags
  
  ;Ready set go:
  showturtle
  type "Ready...
  toot 1000 30
  ;frequency and duration in 60ths of a second
  
  setmodel [
    setfc white
    ico 5
  ]
  type "Set...
  toot 1000 30
  print "Go!
  setmodel [
    setfc red
    setpc white
    amigaball 5 10 20
    ;creates a chequred ball
  ]
  toot 2000 60
  ;and we're off!
  
  repeat 39 [
    setpremodel {"dn repcount * 20}
    ;the premodel processor doesn't know what 'repcount' is, and so we need
    ;to use curly braces to make a 'soft list' that is evaluated when it is
    ;executed -- that is, repcount is resolved into its value, which is then
    ;passed to setpremodel
    
    fd 10
    ;move forward
    
    if keyp [
      ;has a key been pressed?
      
      if and :pos < 39 "j = lowercase peekchar [ ;if it's the j key and the position is less than 39: sl 10 ; aka slideleft inc "pos ; increment the 'pos' container value ] if and :pos > 0 "k = lowercase peekchar [
        ;similarly, if the k key and the position is greater than 0:
        sr 10 ; aka slideright
        dec "pos ; decrement the 'pos' container value
      ]
      
      if and :retry > 0 "r = lowercase peekchar [
        ;if the player presses the r key and has retries remaining:
        dec "retry
        (print :retry |retries remaining...|)
        setview "snappy
        snappy:setlight 1
        setlight 0
        ;switch the light and view back to snappy, the default view turtle
        endtag
        ;close the route tag
        go "start
        ;jump back to the start label
      ]
      
      if "q = lowercase peekchar [finish]
      ;I quit!
      
      clearchar
      ;clear the key buffer
    ]
    
    if 1 = item :pos thing word "trees 40 - repcount [
      ;are we where a tree is?
      
      ; - 'thing' returns the value of the given container.
      ;   we need to use it because we programatically
      ;   created a series of list containers earlier named
      ;   trees0 trees1 trees2 etc. and so we're using thing
      ;   and 'word' to create the appropriate container name
      ;   and then using 'item' to retrieve the value in the
      ;   relevant column (list index)
      
      ; - 'repcount' returns the current iteration of the
      ;   repeat loop. there is a similar function for other
      ;   loops called 'loopcount' and indeed loopcount will
      ;   also return the current repeat loop iteration. But
      ;   repcount is used by a number of different Logos and
      ;   it's a useful distinction
      
      ; so apparently we did:
      
      pr |Ouch! You Crashed! Try again.| ; aka print
      playsound "crash
      say pick [|too bad| |ouch| |that hurt| |dont hit the trees| |wipeout|]
      
      setview "snappy
      snappy:setlight 1
      setlight 0
      ;return the view and light back to 'snappy' the default view turtle
      
      repeat 2 [ht wait 30 st wait 30] ; aka hideturtle and showturtle
      ;wait causes the program to pause for the given number of 60ths of a second
      ;this is due to early computers operating at 60 frames per second
      ;you can also use 'sleep' which takes milliseconds
      
      make "pos :startpos
      ;return the value of the 'pos' container to its starting value
      endtag
      ;close the 'route' tag
      erasetag "route
      ;erase the 'route' tag. This returns the turtle to the position
      ;it was at at the start of the tag, as we have erased part of its
      ;'turtle track'
      go "attempt
      ;return to the 'attempt' label and continue execution from there
    ]
    ;indicates the end of instructions to execute if the player hits a tree
    
    noise repcount * 200 (40 - repcount) * 0.5
    wait (40 - repcount - :level) * 0.5
    ;make a little static noise based on progress down the hill
    ;and similarly wait a little bit based on the progress and the level.
    ;this makes us speed up as we descend the hill
    
  ]
  
  ;we've made it to the bottom!
  up 60
  ;reorient the turtle upward
  
  repeat 100 [
    setpremodel {"fd repcount "dn 10 * repcount}
    ;this causes the ball to move ahead of the camera
    setmodel [
      setfc 1 setpc 15
      setfillopacity 100 - repcount
      setpenopacity 100 - repcount
      amigaball 5 10 20
      ;this causes the ball to fade out
    ]
    setpenopacity 100 - repcount
    ;this causes the line to fade out
    forward 1 noise 8000 - 80 * repcount 1]
  ;do a little victory 'lap'
  
  endtag
  ;close the 'route' tag
  
  setfo 100 setpo 100 ; aka setfillopacity setpenopacity
  ;set the fill and pen opacity back to full
  
  setview "snappy
  snappy:setlight 1
  setlight 0
  ;set the view and light back to snappy, the default view turtle
  
  if and xpos > -200 + :zone xpos < -100 + :zone - 10 * :level [
    ;are we in the zone? if so:
    
    say pick [|great job| |good effort| |way to go|]
    playsound "cheers
    inc "level
    
    if :level < 10 [
      (print |Great Job! Try level| word 1 + :level "!)
      ;round brackets allow more than the default number of
      ;parameters to be 'passed' to a primitive, in this case
      ;print
      
      go "start
      ;return back to the 'start' label to create a new level
    ]
    
    print |You Win! Game Over.|
    say |you win|
    finish
    ;this finish isn't strictly necessary because we will fall out
    ;of execution at this point anyway...
  ] [
    ;we're not in the zone! Let's try this again:
    
    playsound "aw
    print |You missed the Blue Zone! Try Again.|
    say pick [|try again| |go again| |you can do it| |you'll get it this time|]
    wait 120
    make "pos :startpos
    erasetag "route
    go "attempt
  ]
  ;that's all folks!
END


Alpine Trees: an Introduction to Terrain

turtleSpaces new terrain functionality provides some great opportunities for simple coding examples with few lines of Logo code, in this case less than 30.

First, we need to introduce the setterrain primitive. setterrain creates ‘terrain’ or a contiguous object of varying elevation.

The above is an example of the object created by setterrain. The setterrain primitive takes a number of parameters, and is a good opportunity to explain the different types of parameters used in turtleSpaces to students.

The setterrain command used to create the above is:

setterrain [-5 -5 5 5] [0 50 10 40] random 1000 [fbm 2] “voxel

As you can see, the command has a number of different parameters.

The first parameter is a list containing the number of quadrants (blocks of ten elevation points, by default spaced one turtle-unit apart) in each direction from [0 0], the center of the turtleSpace, expressed as X Y pairs.

So, in this case, we are creating a grid of 25 quadrants in each of the four directions (forward/left, back/left forward/right back/right) surrounding [0 0], for a total of. 100 quadrants.

The second list contains four values: The elevation (or z value) of the ‘bottom’ of the terrain, the elevation of the highest points of the terrain mathematically generated, the ‘floor’ of the terrain which is the lowest level of the generated terrain rendered (so you can create lakes) and the ‘ceiling’ of the terrain which is the highest elevation of the generated terrain rendered (so you can create plateaus).

You can use the setterraincolors primitive to set the colors of various elevations, but this is beyond the scope of this article.

The third parameter is the ‘seed’ of the terrain generator. In the case of our example, we are using the random function to generate a random number to use as the seed, to create a different terrain each time we execute the command. But you can use an absolute number, eg 433, which will create the same terrain every time. This allows you to build additional objects on the terrain and ensure that terrain is the same every time you execute your program.

The fourth parameter, the algorithm used to generate the terrain, is a chameleon of sorts: it can either take a list or a word value depending on your intent. You can provide just a word, eg “fbm (the only algorithm type currently available) or a list, eg [fbm 2] — the second value in the list provides the ‘magnification’ of the algorithm. The larger the number, the less dense the terrain will be in terms of peaks and troughs. If you use a fraction eg 0.2 then the terrain will become more dense, to the point of looking more like a cityscape then terrain!

The final parameter is a word that specifies the style. There is currently only one style, voxel, hence the parameter in our example is “voxel

And so, as you can see, we have lists, numbers and words all as parameters passed to setterrain.

You can play with these values a bit and see the results. Be aware that you need to either call reset or clearterrain (not clearscreen, which does not affect terrain) before you execute the setterrain command again, because you cannot ‘overwrite’ existing terrain. But keep in mind you can create different blocks of terrain in different areas, so long as they do not overlap!

The voxels in the terrain by default are only one turtle-unit cubed, which are very small, You can increase the size of the voxels used in the terrain by using the setterrainresolution primitive to change that size, eg setterrainresolution 10. This will expand the size of the terrain by a factor of 10, so keep in mind your camera may end up ‘inside’ the terrain and you will need to use the scroll wheel on your mouse to pull the camera to the outside of it. Or you could use commands like:

cam:setorbitdistance 1000

cam:orbitdown 60

which pulls the camera turtle away from the center point and ‘orbits’ it down 60 degrees, cam: denoting that we are talking to the camera turtle, by default ‘snappy’ (if you use the setview primitive to change the camera turtle, then cam: commands that turtle instead.)

And so the start of our program looks like this:

TO trees
  reset hideturtle penup
  setterrainresolution 10
  
  setterrain [-5 -5 5 5] [0 50 10 40] random 1000 [fbm 2] "voxel
  ;create random terrain
  
  cam:setorbitdistance 1000
  cam:orbitdown 60
  ;position camera
END

and results in this:


And so we have our terrain, which is by default all white and suits our purposes. But now we need to put trees on it!

Our trees are made up of cylinders, of varying size and side counts, to provide variety. A random icosphere adorns the top of each tree.

First, we’ll create a repeat loop of 100, to create 100 trees:

repeat 100 [

]

The lines between the square brackets are where we’ll put the lines we want to repeat. Next we want to position the turtle in a random spot on the terrain, but we want the treeline to be at least 200 turtle-units on the positive Z axis.

We’re going to be using the elevation primitive, which returns the elevation at the given x and y co-ordinates expressed as the z co-ordinate of the elevation NOT the voxel count (remember, we’ve set the terrainresolution to 10, which means the actual z co-ordinate will be 10 times the voxel count).

We’re also going to be using dountil, which repeats an action until the condition provided to it is satisfied. And so we’re going to position the turtle in random spots within the area of the terrain and measure the elevation there, only continuing if the elevation is 200 or greater:

    dountil 200 < elevation pos [
      setxy -480 + random 960 -480 + random 960
    ]

Once we’ve found an appropriate spot, we’re going to set our elevation to the top of the terrain and flip the turtle upwards 180 degrees, because cylinders are created beneath the turtle:

    setz elevation pos up 180

We need to pick a color for the trunk (8 is brown and 9 is orange) and a random shade:

    setfillcolor pick [8 9]
    randomfillshade

Next we’ll create containers containing randomly-generated values determining the size of the tree and the number of sides it has:

    make "size 5 + random 20
    make "sides 3 + random 20

We’ll use the values contained in these containers in our cylinder commands to create our tree appropriately. Next we make the trunk based on these values:

    cylinder :size / 2 2.5 * :size :sides

cylinder takes three parameters: the radius of the cylinder, the depth of the cylinder and the number of sides. :size returns the value stored in the “size container, similarly with :sides.

Next we’ll lower the turtle to the end of the cylinder:

    lower 2.5 * :size

Now comes the creation of the tree’s ‘foliage’. First we need to select the tree’s color, then create 20 cylinders making up the foliage, then place a randomly-colored icosphere on the top.

    setfillcolor pick [4 12 14]

4, 12 and 14 are greenish colors.

repeat 20 [

]

We’re going to make 20 cylinders. Inside the repeat loop we place the following:

      setfillshade 15 - 1.5 * repcount
      cylinder 2.5 * :size - ((2.5 * :size) / 20) * repcount :size / 4 :sides
      lower :size / 4
      right 90 / :sides

repcount returns the current repeat ‘loop’ we’re in, and so first we set the fill shade (fill colors are used by shape primitives such as cylinder) based on the repeat loop. Second we create the cylinder, third we lower the turtle to the bottom of the cylinder, and finally we turn the turtle right based on the number of :sides the cylinder has, creating the spiral effect.

    randomfillshade randomfillcolor
    raise :size / 4 lower :size / 5
    icosphere :size / 5 up 180

Next, we set a random fillshade and fillcolor, raise the turtle back up so that we can lower it with a more appropriate value for our icosphere, then create the icosphere based on the :size value. Finally, we create the icosphere. Then we repeat all of this 100 times for 100 trees, ending up with something like this:

Here is the listing in full:

TO trees
  reset hideturtle penup
  setterrainresolution 10
  ;the terrain resolution affects all terrain! If you change it, terrain is regenerated.
  
  setterrain [-5 -5 5 5] [0 50 10 40] random 1000 [fbm 2] "voxel
  ;create random terrain
  
  cam:setorbitdistance 1000
  cam:orbitdown 60
  ;position camera
  
  ;create 100 trees:
  repeat 100 [
    dountil 200 < elevation pos [
      setxy -480 + random 960 -480 + random 960
    ]
    ;position the turtle someplace where the elevation is 200 or greater
    
    setz elevation pos up 180
    ;raise the turtle to that elevation and flip it on its back
    
    setfillcolor pick [8 9]
    randomfillshade
    ;select trunk color / shade
    
    make "size 5 + random 20
    make "sides 3 + random 20
    ;select random values
    
    cylinder :size / 2 2.5 * :size :sides
    ;make the trunk
    
    lower 2.5 * :size
    setfillcolor pick [4 12 14]
    ;select foliage colors
    
    repeat 20 [
      ;create 20 'rings'
      setfillshade 15 - 1.5 * repcount
      cylinder 2.5 * :size - ((2.5 * :size) / 20) * repcount :size / 4 :sides
      lower :size / 4
      right 90 / :sides
      ;this creates a spiral effect in the tree
    ]
    
    randomfillshade randomfillcolor
    raise :size / 4 lower :size / 5
    icosphere :size / 5 up 180
    ;make the 'ball' on top
  ]
END

Don’t forget that you can click and drag the mouse to move the camera around the model, and scroll in and out to zoom!


Turtle Wordle: A Clone of Wordle in 60 Lines of Logo

Wordle, a cross between Mastermind and Hangman, seems to be the rage these days. Also, implementing it in as few lines as possible. In Logo we get to cheat a little about the second bit, as we can stack multiple commands on the same line. But we still need to keep things within a reasonable line length.

We’re happy to say we succeeded in our efforts, and even expanded on the model somewhat, adding progressively longer words and hints, among other things. This is a pretty good example of string and list management in Logo, which is what it was initially created for, even before the turtle!

Check out the source code below, or open in the web IDE…

TO wordle
  reset hideturtle make [score level stage] [0 1 1] maximize settextsize 1
  cleartext overlayscreen settextwindow [0 30 99 47] settextforeground 14 ;short form: settf
  print |TurtleWordle: Get one point for each letter in solution, lose one point for each guess.|
  print |You have word-length + 1 chances to guess the word. Level acts as score multiplier.|
  print |Get 6 4-letter words correct to advance, 5 5-letter words, 4 6-letter words and so-on.|
  print |Game ends when you run out of guesses, or guess the 9-letter word! (You brain you!)|
  print |Uppercase indicates correct letter and position, lowercase only that letter is in word.|
  cursordown playsound "drop ;we use simple encryption not to make this too easy!
  make "words1  [bsai dpme ql?n kgli hskn ap?@ jmai qj?k afsk ngli mtcp jmem dgpc @cr? @jsc ctcl]
  make "words2  [xc@p? nsnnw kmsqc ?@msr slbcp fmpqc qmslb jmaiq @p?gl ilmai lmprf ?jnf? glbcv]
  make "words3  [q?j?kg ngaijc afccqc igrrcl ngejcr rsprjc rmgjcr @mtglc amddcc ecp@gj bctglc]
  make "words4  [mar?nsq qg@jgle mnsjclr ejsrrml n?wkclr asqfgml n?p?qmj jcrrcpq gltmjtc @j?licr]
  make "words5  [bp?k?rga nclr?eml kmrmpa?p qmjsrgml slbcpqc? mtcpam?r sk@pcjj? l?rrpcqq qslqfglc]
  make "words6  [qs@k?pglc u?rcpd?jj qrpccra?p slbcpuc?p bcqrpmwcp ?n?prkclr bmaskclrq pm?bam?af]
  label "select ;return here using 'go'
  if :level = 7 [settf 3 print |Congratulations! You win!| playsound "applause go "playagain]
  make "selection random count thing word "words :level
  make "enword uppercase item :selection thing word "words :level
  make word "words :level remove :selection thing word "words :level
  make "word empty foreach "char :enword [make "word word :word char (ascii :char) + 34]
  make "chances 1 + count :word make "tries 0 clearscreen penup setfillcolor 12 ht
  settypesize 20 setxy -200 80 typeset "Turtle setxy 80 80 typeset "Wordle settypesize 10 home st
  foreach "letter "abcdefghijklmnopqrstuvwxyz [make :letter instances :letter :word]
  forever [
    foreach "letter "abcdefghijklmnopqrstuvwxyz [make word "p :letter 0]
    settf 6 (print |Tries remaining:| :chances - :tries) settf 15
    dountil (count :guess) = (count :word) [
      (type |Word is | count :word | letters: |) make "guess lowercase readword]
    inc "tries make "correct 0 make "hits []
    setxy 0 - (5 * count :word) 100 - (:tries * 20)
    foreach "letter :guess [
      if :letter = item loopcount :word [inc word "p :letter] ]
    foreach "letter :guess [
      if :letter = item loopcount :word [
        settf 4 type uppercase :letter
        setfc 4 typeset uppercase :letter
        inc "correct playsound "drop queue loopcount "hits
      ] [if containsp :letter :word [inc word "p :letter
          if (thing word "p :letter) <= thing :letter [ settf 13 type lowercase :letter setfc 13 typeset lowercase :letter playsound "drip] [ settf 15 setfc 15 type "- typeset "- playsound "dunk] ] [settf 15 setfc 15 type "- typeset "- playsound "dunk] ] ] print empty slideright 10 if :correct = count :word [ settf 12 type |You got it! | playsound pick [sheep sheep2 sheep3] make "score :score + ((1 + ((count :word) - :tries)) * :level) if (:chances - :tries) > 0 [
        inc "stage if :stage = 8 - :level [
          make "stage 1 inc "level settf 9 print |Level up!| playsound "please] ] [
        settf 1 print |No points. Try again.| playsound "crow]
      settf 13 print sentence |Your score is: | :score go "select]
    if :tries = :chances [settf 3 (print |Word was:| :word)
      settf 7 (print |Too bad! Final score: | :score) playsound "evil go "playagain]
    if 0 = remainder :tries 3 [
      dountil not containsp :pick :hits [make "pick 1 + random count :word] settf 8
      (print |Psst: the letter in position | :pick | is | uppercase item :pick :word |!|)] ]
  label "playagain settc 13 question |Play again? (Y/N)|
  if "N = uppercase answer [restore resetall finish] [wordle]
END