Archives 2021

Past and Future Turtles: Logo’s Adventures in Academia (Part 2)

This is a continuation of Past and Future Turtles: The Evolution of the Logo Programming Language (Part 1)

So, Logo was the greatest thing that had ever happened to education, and it was going to foster a bright new generation of geniuses who were going to change the world. We just had to get it out there, and Logo would do the rest.

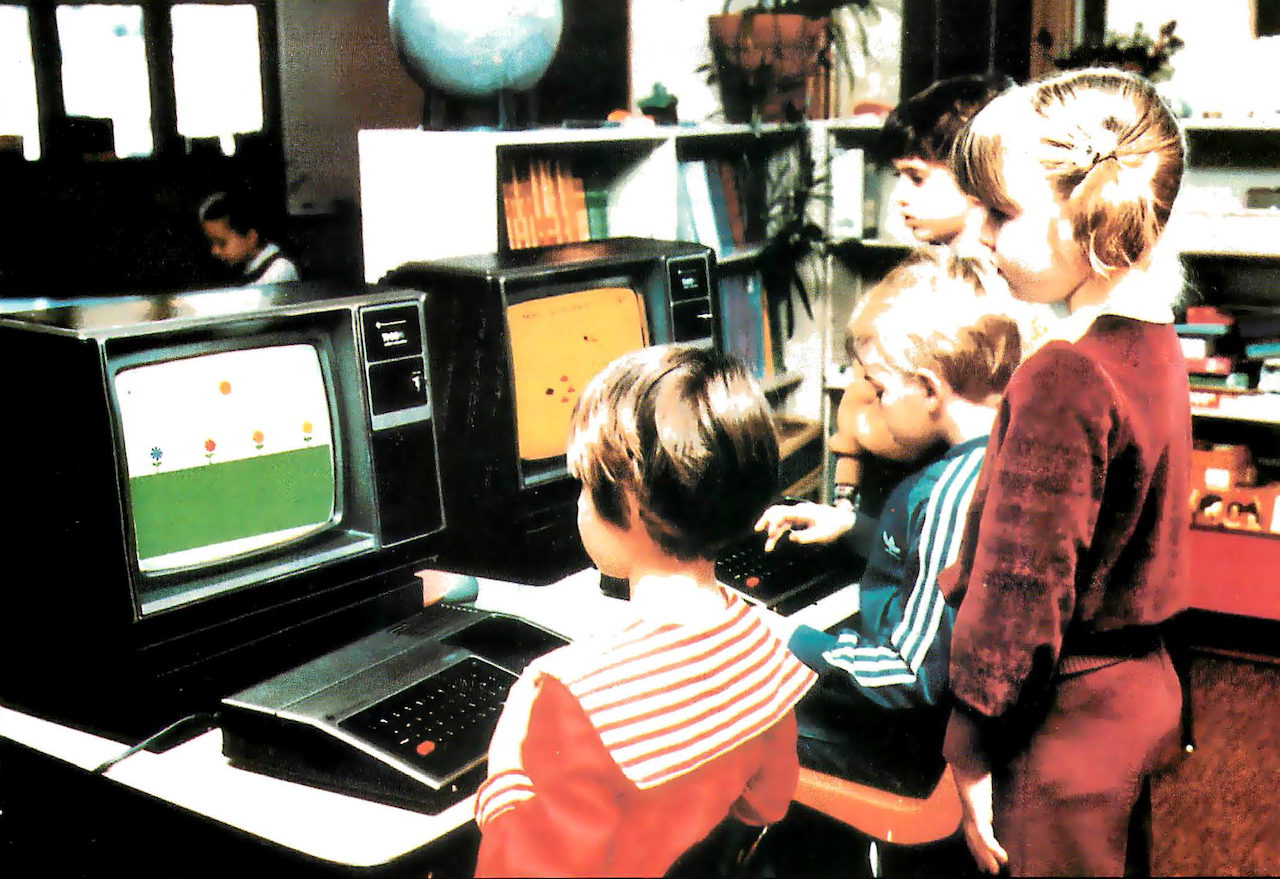
That was the message its creators sent to the world. And people were listening. In particular, computer manufacturers. It was the early 1980s, an era where the price of a personal computer had dropped into the range of affordability for most of the Western market, with computers such as the VIC-20 and the Sinclair ZX81 costing as little as $100, and even those at the higher-end of the market falling below $1000.

Schools and homes could afford to own computers — barely. But to justify the expense, they needed a little additional something that promised a real benefit to those children that used them. And Logo made that promise: Logo would make children ‘think better’. The children that used Logo were going to build a better world.

An ad for TI-Logo II

And so, nearly every computer manufacturer commissioned their own version of Logo: Apple Logo, Atari Logo, Commodore Logo, TI Logo… the list went on. And they used their Logo to sell their computers: our Logo will teach Timmy and Janie how to think like rocket scientists! Our Logo will give your children the skills they need to become doctors and mathematicians. Just buy them a computer and Logo will do the rest. You can sleep peacefully at night knowing your children now have a bright, secure future!

The message resonated. The manufacturers sold plenty of computers! So many computers. Then the discount wars began between Atari, Commodore, Tandy, Coleco and Texas Instruments and they sold even more computers, with TI and Coleco eventually giving up and dumping their computers on the market for as little as $49.

Sadly, while the computer manufacturers did well, Logo did not. I mean, it did okay in the sales sense, but it didn’t do what it promised. There was a flaw in the Logo ethos: the idea was that if you gave children a tool, and showed them what the tool could do, their natural inquisitiveness would take hold and they would explore the potential of that tool to its limits, learning all of the concepts related to that tool along the way. Sounds great, doesn’t it?

But if they had only looked at domains outside of computer programming, they would have realized that this was a flawed premise. How many pianos and guitars languish in children’s bedrooms, having been played only once or twice? Painting sets? Meccano? Electronics kits? I could go on and on… the point of course is that the vast majority of people (not just children) don’t really do anything without an impetus to do so, an external drive. Very few of us are actually driven to create on our own.

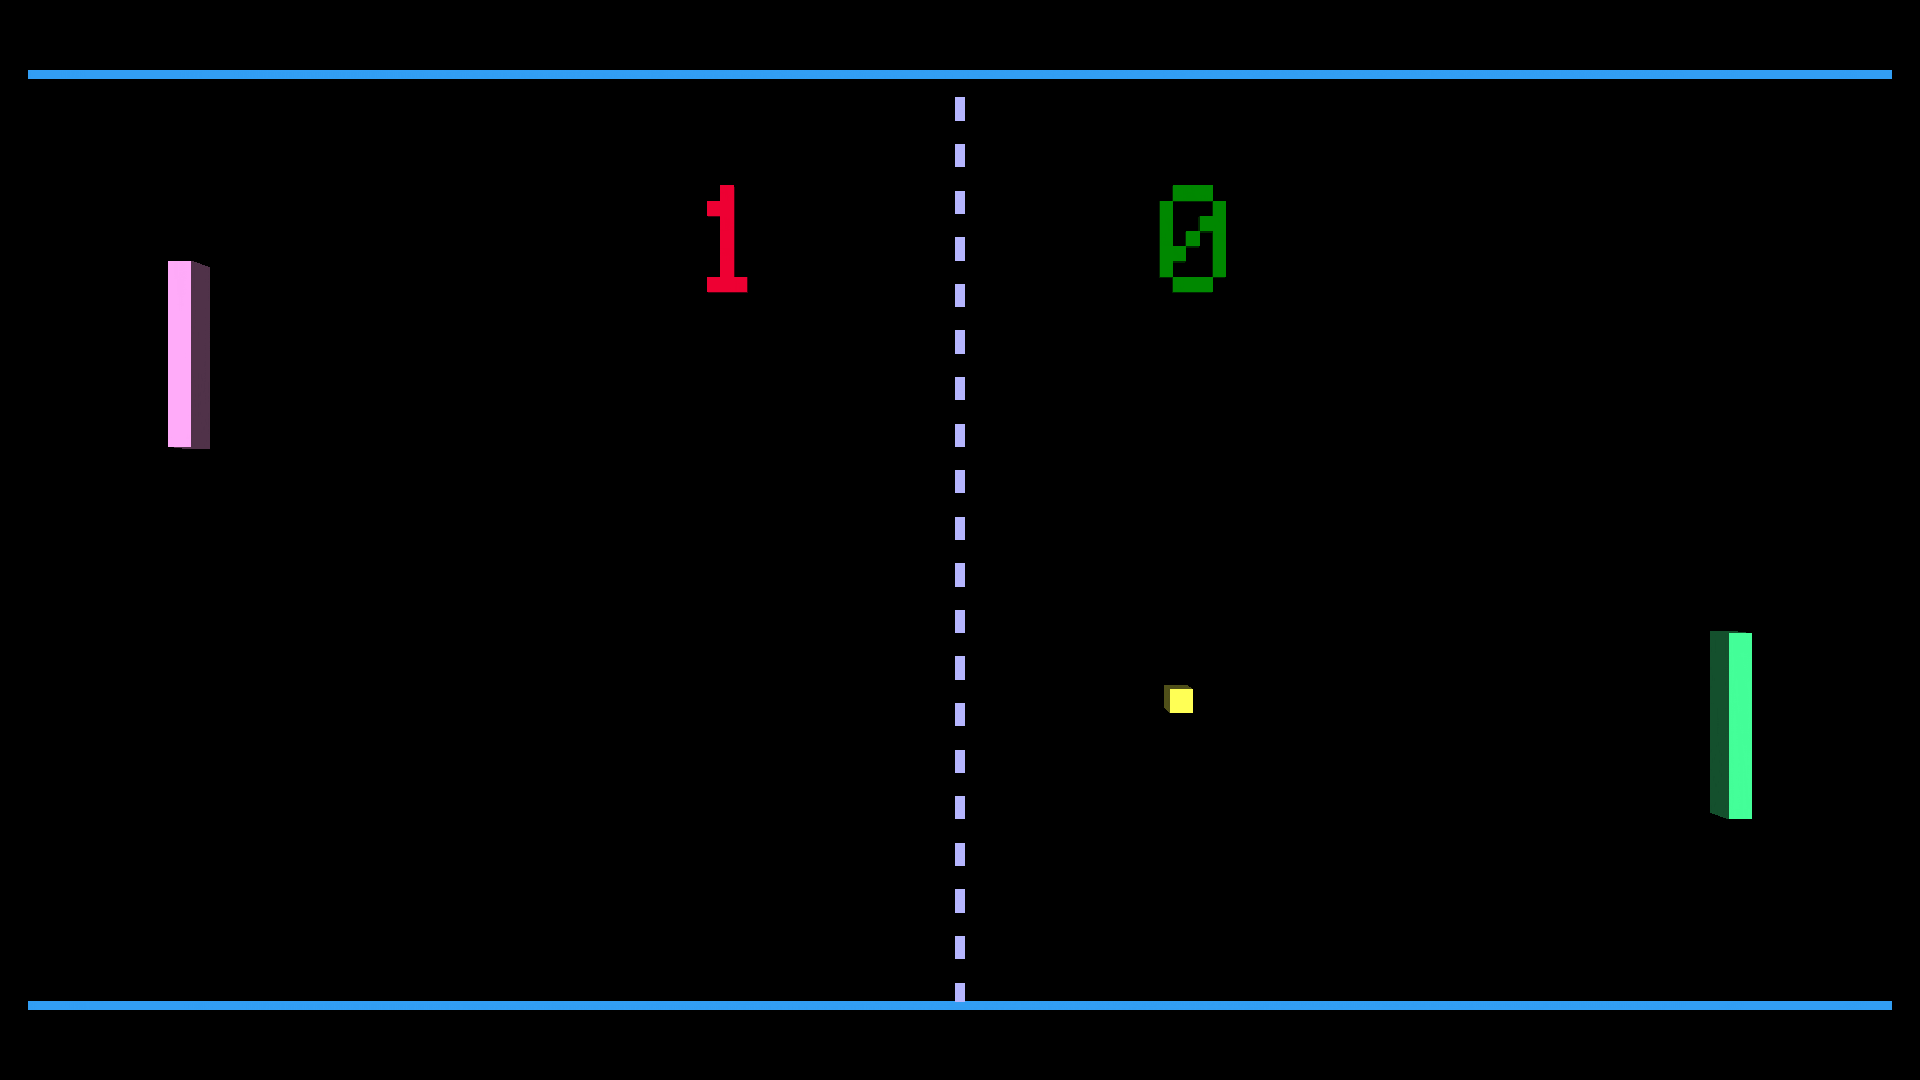
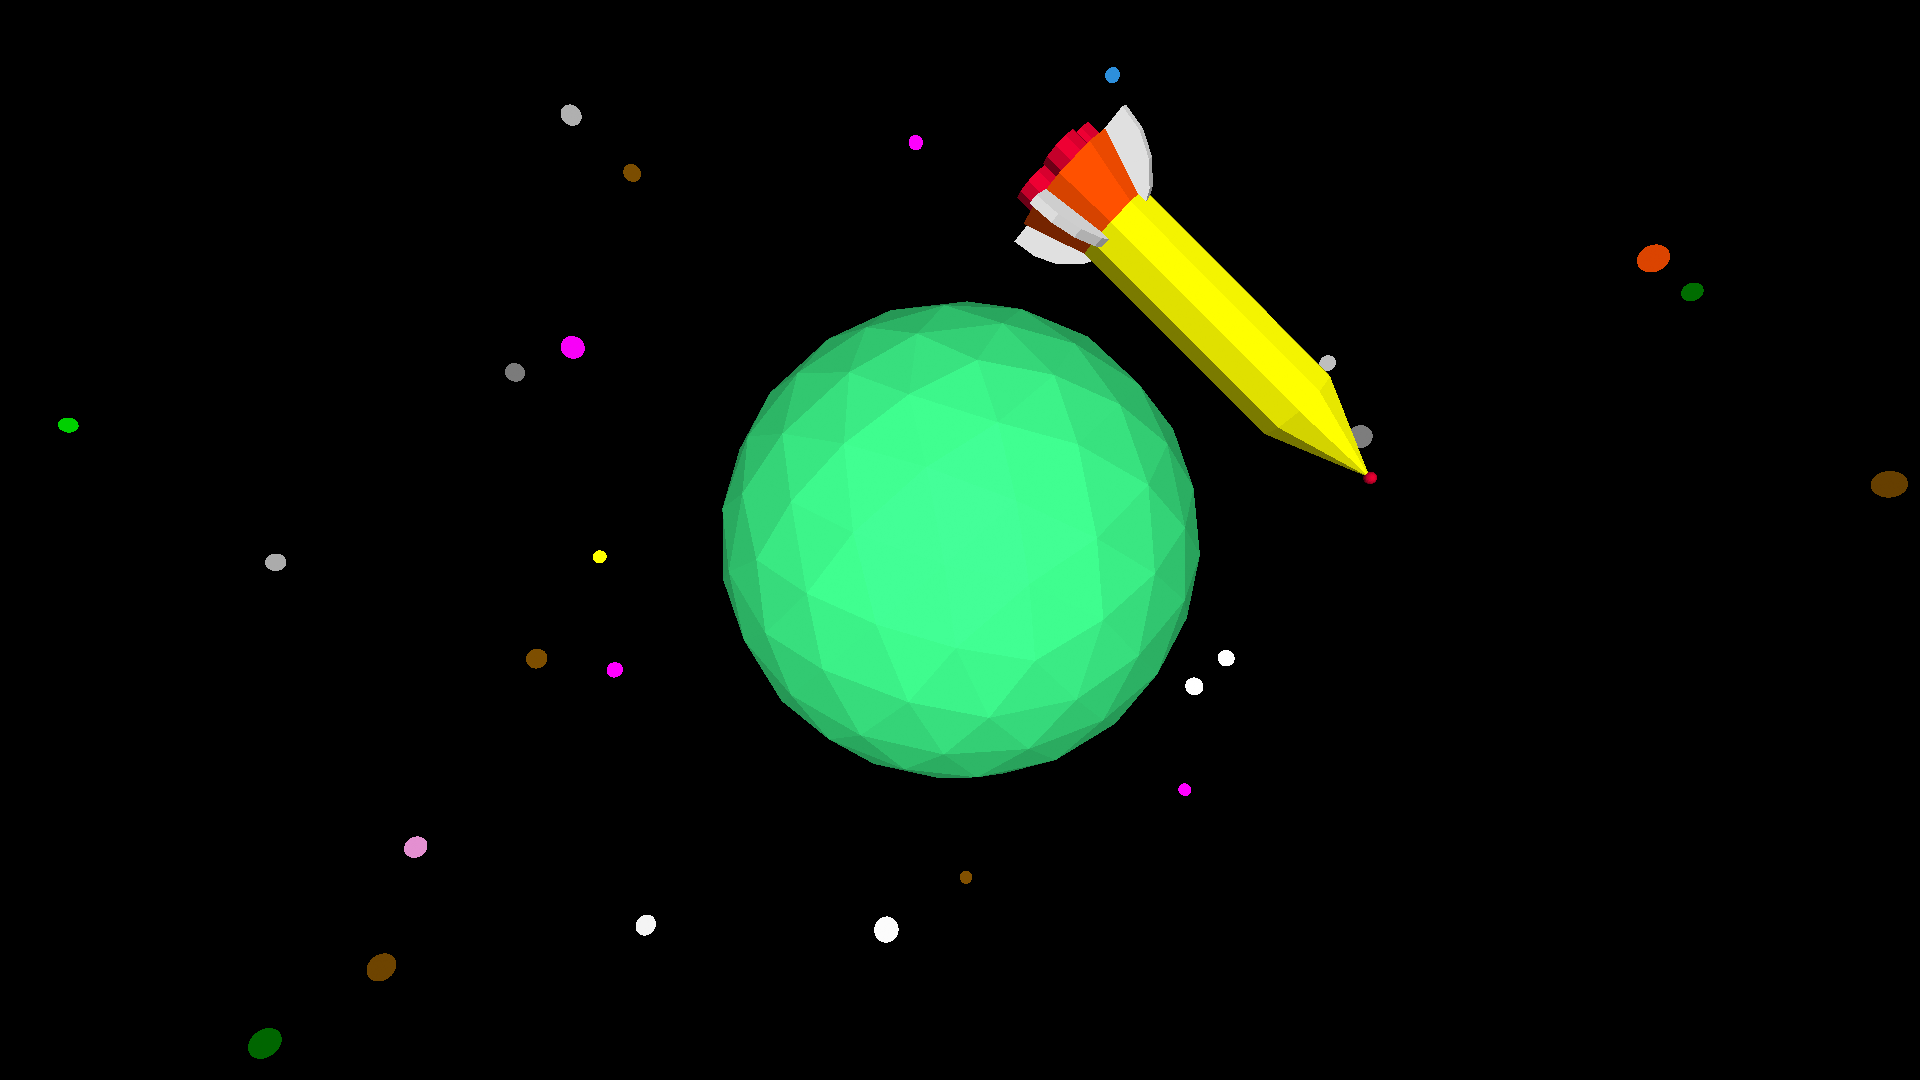
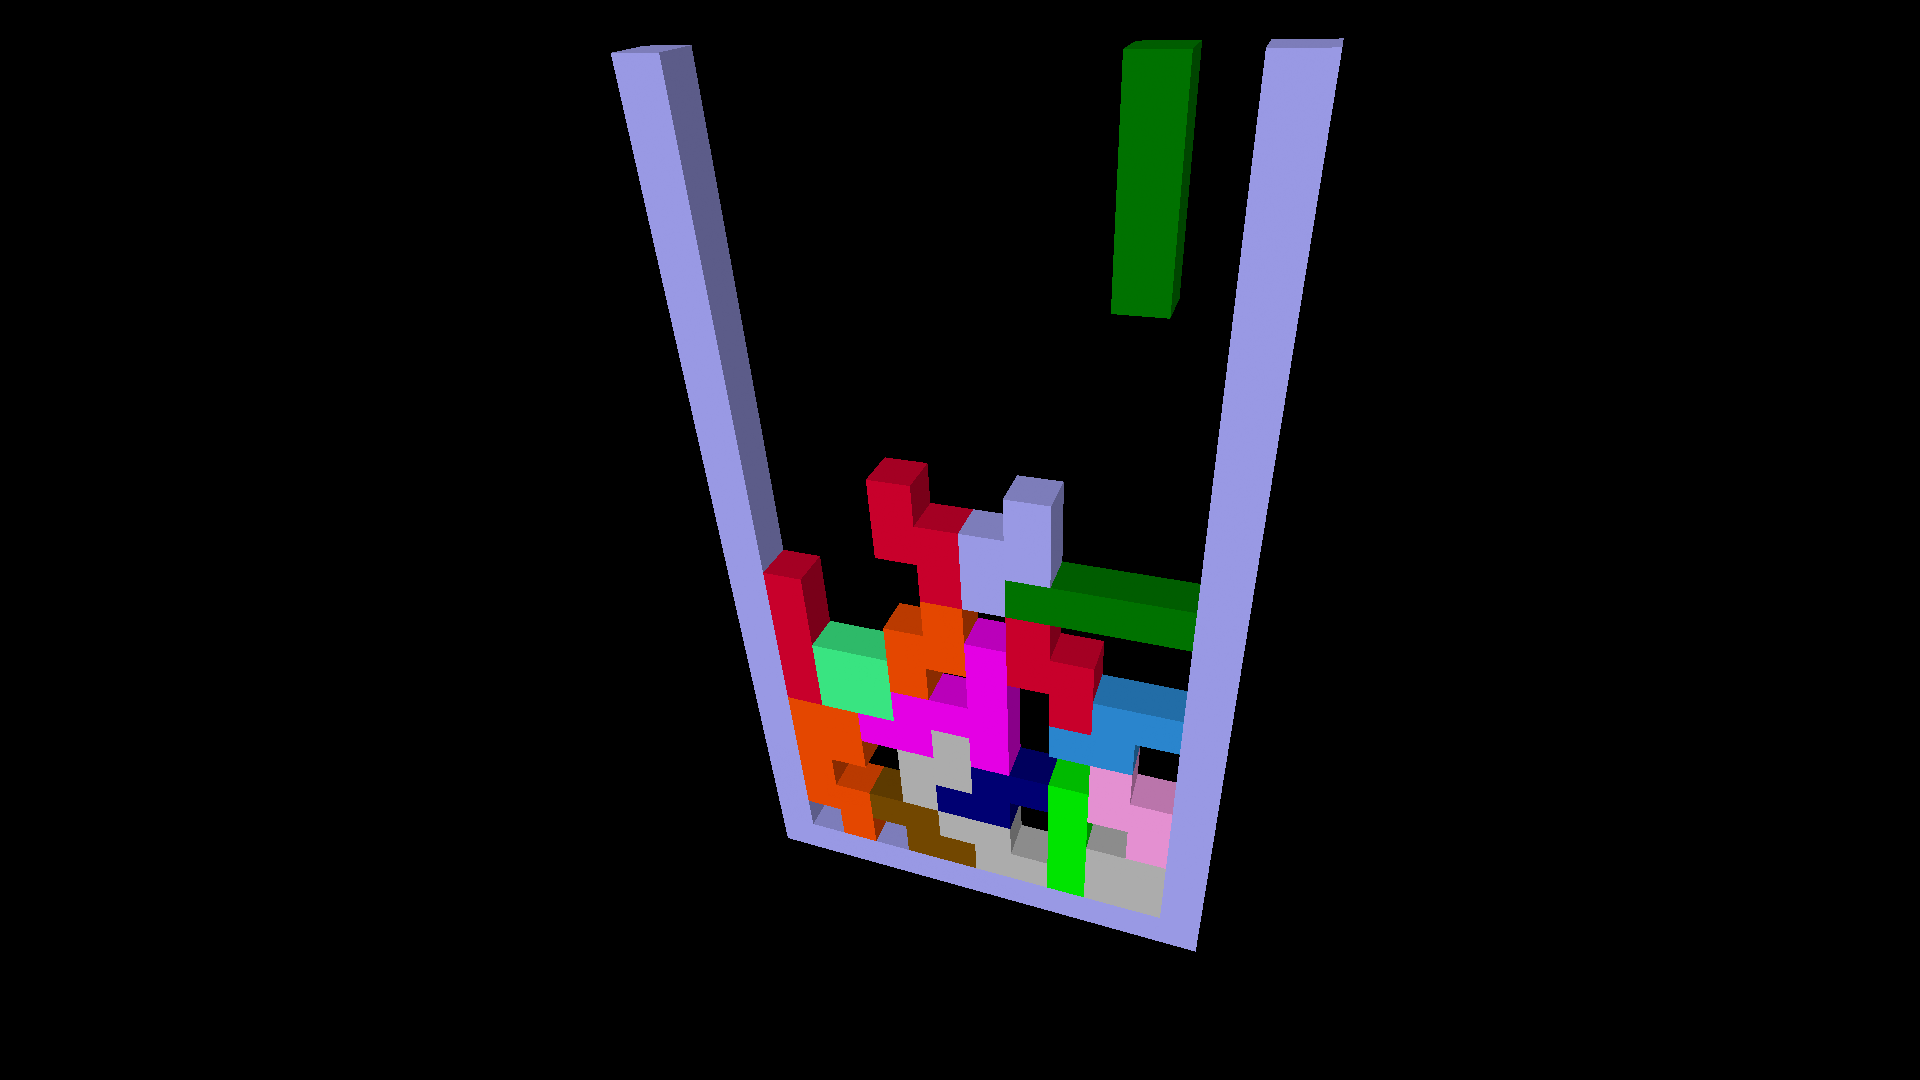
To make matters worse, the Logo of the early 1980s did not actually have great utility. While the language was easy to learn and use, it was very resource-hungry and slow. And this meant it wasn’t useful for creating the thing those children who actually had that self-drive wanted to create: games! And so, Logo’s purpose for them was to simply demonstrate that you could make the computer do things, and once they understood that, they quickly moved on to BASIC and Assembly language, and Logo languished unused.

This was perhaps the only Logo ‘magazine’, a small section inside TI99er magazine

Logo’s lack of utility also meant there were few resources available for it, because programs that can demonstrate a programming language’s utility were an extension of that utility, which was extremely limited graphically to drawing algorithmic art and charts. While it was still very useful for text-based applications, everyone wanted graphics! Graphics were king. Sound was queen (and all most versions of Logo could do was TOOT a tone given in hertz, which made even playing Mary had a Little Lamb a tedious exercise of transcribing from a table buried in the back of a reference manual).

And so libraries and bookstores were full of books and magazines that had listings in BASIC and machine language, maybe a little Pascal and Forth and virtually no Logo. Logo what? Never heard of it! Turned out into the cold, the turtles retreated back into the schools, their quest to find a place out in the wider world a failure (they went to make it on Broadway and, as the story goes, they didn’t make it.)

But they still had education — they were well-established there, the teachers had at least been taught the basics and they were going to keep teaching it until told otherwise. Logo was there to stay.

There were two main companies that had been commissioned by the computer manufacturers to develop versions of Logo who were more than happy to continue to support Logo in the education market. The first was Logo Computer Systems Inc (LCSI), which was founded by some of the original Logo designers including Seymour Papert, and which had created Logo for the Apple II and Atari.

Terrapin started out in 1979 making robotic turtles

The second was Terrapin, which had developed versions of Logo for a number of computers including the Commodore 64. These two companies continued to develop and release new versions of Logo for subsequent computer systems, including the Macintosh and those running Microsoft Windows, adding utility as time went on to encourage Logo’s use, and emphasizing Logo’s strengths such as list manipulation.

For example, LogoWriter, released by LCSI, presented a word-processing like environment where users could use Logo to manipulate and generate text inside it, creating macros, templates and performing search-and-replace operations, amongst others. This was a moderately successful attempt to find an application for Logo that was less reliant on performance and better showcased its features.

Terrapin, meanwhile, created more accessible versions of turtle graphics for younger users. This trend continued, with Terrapin seeming to cater more for younger children, while LCSI grew with its users, working to make their offerings suitable for older students, into junior and senior high school.

From LogoWriter they went on to develop Microworlds, a Logo-based environment that leveraged the graphical user interface of the computer’s operating system while at the same time binding itself to it. However, there was never a goal of Microworlds projects ever leaving its environment — like Hypercard, what was made in Microworlds stayed in Microworlds.

Early editions of Coding for Kids for Dummies used Microworlds as their learning platform

Which was fine, because the purpose of Microworlds was to demonstrate the power of programming and other concepts, not to be an end unto itself. But it reinforced the notion that Logo was not a practical programming language, and outside of the education setting, Logo fell further into irrelevance, despite the fact that as computers advanced in power, it became increasingly more viable.

But thankfully, post-secondary academia would come to the rescue, realizing Logo’s potential. University of California, Berkeley lecturer Brian Harvey would spearhead development of a version of Logo first released in 1992, UCB or Berkeley Logo, which was more suited to post-secondary computer science education and featured concepts such as multi-dimensional arrays and advanced list handling functions.

As computers became capable of handling large amounts of independent turtles, those interested in real-world simulation took notice. In 1999 Northwestern University released NetLogo, designed to use Logo to model a number of phenomena in economics, physics and chemistry using turtles and ‘patches’, areas that influenced the turtles in various ways.

In 2001, MIT developed StarLogo, which took Logo and adapted it to facilitate agent-based simulations where hundreds or even thousands of turtles could interact with each other based on simple rules, allowing for the exploration of virtual ant colonies, for example.

On the other end of the education spectrum, Mitchel Resnick and others obtained a grant in 2003 to develop a new programming environment for children. They took up residence at the MIT Media Lab — the site of the development of the original Logo language — and began to develop a coding environment based on the idea of blocks — draggable representations of commands that could be snapped together, eliminating the need to remember complex syntax or rules involving hierarchy.

With Scratch, if the program could be snapped together, it would at the very least execute, although it may not do what you want. You can drag and place objects (turtles) into a starting position, building a scene and then animating it, using logic. This borrowed a lot from Microworlds, while adding the blocks element. Scratch has been very successful, becoming the defacto tool for teaching introductory coding (a new version, Scratch Jr, does away with language entirely, using pictographic blocks).

Blocks based coding became all the rage. But it created a new problem: how to transition children from blocks to text? Particularly when the complex syntax of languages like Python was the reason for the creation of blocks in the first place?

In some places, this is still Logo — LCSI and Terrapin both continue to provide versions of Logo that use text. But the numbers of schools that use them are seemingly in decline, with a continuing increasing number of schools doing their best to jump their students from Scratch to Python, with limited success, in the pervasive (and false) belief that most children can ‘only learn one text-based programming language’, as if children have never had any success learning a second spoken language, but yet the belief exists (just like some people believe COVID-19 doesn’t).

And so, Logo stands today at a crossroads. How can it overcome efforts by some parts of the Python community to dispose of it, and take its place as the first text-based language for children? How can it prove itself as a viable programming language in its own right, to overcome concerns (true or not) held by educators that it may be the only language their students are capable of learning, and beat back Python?

After all, despite Logo’s successes (and they are many, numbering into the millions at the level of individual students), Papert’s vision of it as a language with low threshold and no ceiling has not yet come to fruition. Can it with today’s technology? Or how about tomorrow’s?

To explore potential answers to these questions, come back next time for part three: Logo Moving FD

Example: Towers of Hanoi

This rendition of Towers of Hanoi is a simple game to code and makes introductory use of 3D shapes. Recreating it could serve as a great introduction to turtleSpaces and Logo coding in general.

In the game, you attempt to transfer the disks on post 1 to post 3 ending in the same order the disks started in (smallest to largest, starting from the top). To do this, you can transfer disks between posts, but disks can only be placed on top of disks smaller than they are.

This example uses lists to store the disks on each post, and the queue and dequeue primitives to ‘transfer’ the disks from one ‘post’ (list) to another.

The graphical representation of the game is optional and can be added after first creating the game logic, using text output. A potential project would be to first create the game logic, using the game rules (and for the instructor, this example) as a guide. In its most basic form, it can be created using conditionals (if), lists (make, queue, dequeue). loops (label, go), and input/output (print, question) primitives.

Then, add the graphical representation, once the game is working correctly. The example here uses voxels, cylinders and typeset text. Finally, add some camera movements.

The example follows, and is commented:

SETABOUT |Towers of Hanoi (run myrtle:hanoi)|

CREATORS [melody]

NEWTURTLE "myrtle

TO hanoi
  ;This is a simple recreation of the classic
  ;Towers of Hanoi game. It has fairly basic logic
  ;and would nake a great introduction to game creation
  ;using turtleSpaces

  ;as a project, we would create the text-game
  ;first and then add the graphical representation
  ;later (as a 'stretch goal')

  reset
  hideturtle
  penup
  ;reset and set up workspace

  make "moves 0
  ;initialize the moves counter

  ;*** OPTIONAL ***
  make "camerastep 1
  ;define camera 'step'
  cam:orbitdown 90
  ;position camera
  ;*** END OPTIONAL ***

  print |*** TOWERS OF HANOI ***|
  print |Move the disks from rod 1 to rod 3, keeping the same order|
  print |(largest at the bottom to smallest at the top)|
  cursordown
  playsound "doodoo
  ;instructions

  label "start
  question |Number of Disks (3-9)?|
  make "disks answer
  if not numberp :disks [go "start]
  if or :disks < 3 :disks > 9 [go "start]
  ;select number of disks to play with
  ;and validate choice

  if :disks > 6 [print |Wow! You're brave! Good luck!| cursordown]
  ;message of encouragement for hard levels

  ;*** OPTIONAL ***
  control "snappy {"raise 2 * :disks}
  control "snappy {"pullin 140 - (8 * :disks)}
  make "snappypos snappy:position
  make "snappyvec snappy:vectors
  ;position camera based on number of disks
  ;and store the camera position.
  ;this can be omitted if text-only game
  ;*** END OPTIONAL ***

  make "rod1 reverse range {1 :disks}
  make "rod2 []
  make "rod3 []
  ;define the rod lists, creating the disks
  ;on the first rod

  label "select
  ;labels can be returned to using 'go'

  (show :rod1 :rod2 :rod3)
  ;show the rod lists
  (show |Moves elapsed:| :moves)
  ;and the move count

  ;*** OPTIONAL ***
  drawdisks
  ;draw the graphical representation
  ;(via the optional drawdisks user procedure)
  ;*** END OPTIONAL ***

  question |Rod?|
  make "selection word "rod answer
  if not namep :selection [print |Invalid selection!| go "select]
  if (count thing :selection) = 0 [print |Invalid rod!| go "select]
  ;select the source rod and check for validity

  label "dest
  question |Destination?|
  make "destination word "rod answer
  if not namep :destination [print |Invalid selection!| go "dest]
  if (last thing :destination) < (last thing :selection) [
    print |Invalid move!|
    go "select
  ]
  ;select the destination rod and check for validity

  make "disk dequeue :selection
  queue :disk :destination
  ;move the disk, by 'dequeuing' or removing the last
  ;item from the selected rod into a variable,
  ;and then queuing the item (adding it as the last
  ;item) to the destination rod

  inc "moves
  ;increment the moves counter

  ;*** OPTIONAL ***
  ;the following orbits the camera around the game
  ;to spice it up a little:
  inc "camerastep
  ;increment the camerastep container
  cam:repeat 45 [orbitright 1]
  ;orbit the camera 45 degrees right
  if divp 3 :camerastep [cam:repeat 45 [orbitright 1]]
  ;if camerastep divisible by 3 then orbit another 45
  ;so we're not looking at the side of the game
  ;*** END OPTIONAL ***

  if :rod3 = reverse range {1 :disks} [
    drawdisks
    ;update the graphics (OPTIONAL)

    control "snappy {
    "setposition :snappypos
    "setvectors :snappyvec
    }
    ;restore the camera position (OPTIONAL)

    print |You win! Great job. Try more disks!|
    (print |Moves taken:| :moves)
    playsound "applause
    finish
  ]
  ;check the third rod for a completed tower
  ;and if complete, displays 'win' message and quits

  go "select
  ;return (loop back) to select label

END

TO drawdisks
  ;the graphical representation of the towers is
  ;optional, and makes a good 'stretch goal'

  ;you can start with just rendering the disks,
  ;then add a base and rods, and finally
  ;rod numbers (to make it easier to keep track
  ;of the rods when playing with camera rotation
  ;enabled)

  norender
  ;don't update graphics until render is called

  clean
  ;erase graphics

  setposition {-50 - 4 * :disks 0 - 4 * :disks 0}
  setfillcolor brown
  voxeloid 2 * (50 + 4 * :disks) 2 * (4 * :disks) 5
  ;create base of appropriate size

  repeat 3 [
    setposition {-100 + (50 * repcount) 0 0}
    rollright 180
    setfillcolor brown
    cylinder 2 5 + :disks * 5 10
    rollright 180
    raise 5
    ;create rod of appropriate height

    if 0 < count thing word "rod repcount [ ;if there are disks on the rod: foreach "i thing word "rod repcount [ ;for each disk on the rod: setfillcolor :i ;set the color based on the disk size cylinder 2 + (2 * :i) 5 10 * :i ;create the disk raise 5 ] ] ] ;create disks on each rod up 90 settypesize 5 + (:disks / 4) repeat 3 [ setfc item repcount [13 11 14] setposition { (-100 - :disks / 2) + 50 * repcount 0 - 4 * :disks (-14 - (:disks / 3)) - (:disks / 4) } typeset repcount ] ;print numbers under towers rollright 180 repeat 3 [ setfc item repcount [14 11 13] setposition { (100 + :disks / 2) - 50 * repcount 4 * :disks (-14 - (:disks / 3)) - (:disks / 4) } typeset 4 - repcount ] ;print numbers under towers opposite side rollright 180 down 90 ;return the turtle to the proper orientation render ;resume rendering if :moves > 0 [playsound "knock]
  ;if not the start of the game, make a sound

END

NEWTURTLE "snappy


NEWTURTLE "libby


How to create and 3D print a chess pawn in turtleSpaces Logo

First, open the weblogo.

Then, click in the bottom right REPL area

Create the ‘head’ of the pawn using the ico primitive

cs penup ico 20


If you start the line with a cs, you can use the up arrow to go back to the line after adding each command (and seeing the result) to edit what you’ve done and add more! Append all of the following instructions on to the same line, then just keep re-executing it.

We’re going to be making a cone next, and cones are created under the turtle. So we need to tiilt the turtle down, and lower it close to the bottom of the ico, in preparation for creating a ‘cut cone’:

dn 90 lo 17

Next we create a cutcone, lower the turtle and create another cutcone. Type help “cutcone to see the parameters…

cutcone 10 20 5 20


Lower the turtle and create the next cone segment

lo 5 cutcone 20 15 5 20


Lower the turtle again and create a larger cone

lo 5 cutcone 10 20 40 20


… smaller cone, but deeper than is visible so that the 3D printer slices the pawn correctly …

lo 40 cutcone 22 28 20 20


… a torus … (type help “torus to see the parameters)

lo 15 torus 5 24 20 20

… another torus …

lo 5 torus 3 28 20 20

… and a cylinder to finish the base! (type help “cylinder to see the parameters)

cylinder 31 5 20


All done! Now you can download the STL file under the File menu, open it up in your slicing program and print it. But don’t forget to type hideturtle first or you might get a surprise!

The pawn sliced in Ultimaker Cura…

The whole line of code should look something like this:

cs ico 20 dn 90 lo 17 cutcone 10 20 5 20 lo 5 
cutcone 20 15 5 20 lo 5 cutcone 10 20 40 20 lo 40 
cutcone 22 28 20 20 lo 15 torus 5 24 20 20 lo 5 
torus 3 28 20 20 cylinder 31 5 20 hideturtle

Easy peasy! Click and hold the left mouse button over the model and drag to rotate it.

Read through the shape guides available under the Docs menu on this website and think about how you could create other chess pieces!

This is the chess pawn as a procedure:

TO pawn
  cs penup
  dn 90 
  ico 20 
  lo 17 
  cutcone 10 20 5 20 
  lo 5 
  cutcone 20 15 5 20 
  lo 5 
  cutcone 10 20 40 20 
  lo 40 
  cutcone 22 28 20 20 
  lo 15 
  torus 5 24 20 20 
  lo 5 
  torus 3 28 20 20 
  cylinder 31 5 20 
  hideturtle
END

You can turn it into a procedure just by typing to pawn in the REPL, pressing the up arrow until you retrieve the pawn code, press enter, and then type end. Then you can save it!

A Fully Commented turtleSpaces Logo Listing of PONG

When I was a kid I had a home PONG machine, one of those that was sold through a department store (in this case Sears) in the late 1970s, which my Dad bought from a garage sale for $5. It was black and white, and the paddles were controlled by knobs on the front of the unit, and the NES had come out by this point and so it wasn’t very enticing for the other kids in the neighbourhood, but my brother and I spent hours playing it anyway.

I’ve decided to take a different approach with this version of PONG, using a single turtle and a single thread taking a linear path through the code, rather than a multi-turtle approach because many programming languages do not have threads and it’s important to think about how you can accomplish things without them.

So, in this example, while the turtle acts as the ball, it also draws the paddles and the scoreboard as needed, and some tricks are used to smooth this over, the way you would in other single-threaded programming environments. Meanwhile, it also demonstrates the directional capabilities of the turtle, and how it operates in the turtleSpaces environment from its own perspective.

This project is divided into a number of user-defined procedures which could be worked on in groups in a classroom setting. There are a number of problems to be solved: moving the ‘ball’, bouncing it off of the walls and paddles, moving the paddles using the keyboard, updating the score. Pong is a well-known game and so its mechanics require little explanation. The key here is how do we do all of that with a single turtle?

Read on to find out!


SETABOUT |Use A and Z to control left paddle, K and M to control right paddle|

CREATORS [melody]

NEWTURTLE "myrtle

TO pong

  ;this version of Pong uses a single turtle to re-create
  ;the game, employing a more traditional linear method
  ;rather than a multi-turtle, multi-threaded method.
  ;For a demonstration of the latter, see turtleSpaces
  ;Breakout, under the Examples menu in the web interpreter

  ;this is an extremely thoroughly commented listing, so
  ;please read through. It should be fairly straightforward
  ;to adapt this into a series of lessons for your class.

  ;There are many more comments than lines of code in this
  ;listing! Hopefully this will demonstrate to both you
  ;and your students the simplicity and power of Logo

  ;It might be helpful to first read the introduction to
  ;one of the Logo books available on the turtleSpaces
  ;website

  setup
  ;executes the setup procedure. Here we initialize containers
  ;(variables), draw the playfield, create the ball and paddles

  ;Note: medium-blue keywords indicate user-defined procedures

  forever [
    checkkeys
    ;checks for and acts on player keypresses

    moveball
    ;moves the ball depending on a few factors

    checkball
    ;checks the ball position and acts if necessary
  ]

  ;square brackets indicate lists. In this case, we're
  ;providing the forever primitive (or command) with a list
  ;containing the three procedures we wish to execute
  ;'forever' (and also some comments, which get ignored)

  ;lists can generally be spaced out over multiple lines
  ;for readability. They also discard whitespace between
  ;items in the list. Logo is not a stickler for whitespace
  ;or formatting!

  ;there, that was easy, right? ;)
  ;now for the nitty-gritty...

END

TO setup

  reset
  ;reset the workspace. This returns all the turtles to
  ;their default states and positions

  resettime
  ;we're going to use the system time to 'speed up' the ball
  ;as gameplay goes on, and so we'll reset it now. The time
  ;is not reset by the reset primitive and so we need to
  ;declare it seperately

  penup
  ;no need to draw lines here! But for fun you can
  ;try to comment this line out and see what happens.
  ;It gets kind of messy, particularly because the turtle
  ;'ball' sneaks away and moves the paddles and updates
  ;the scoreboard while you aren't looking...

  noaudiowait
  ;don't delay while audio is played. For historical reasons,
  ;sound primtives (commands) such as toot and playnotes cause
  ;execution to pause while they are being played, but we can
  ;turn that off to make things proceed more smoothly

  makemodel
  ;create the turtle model (a voxel, or 3D pixel, to keep
  ;in the 1970s mood). This is a user-defined procedure

  arena
  ;draw the 'arena' or playfield. This is also a user-
  ;defined procedure

  make "keytimer 0
  ;here we 'make' a 'container' used as a counter
  ;to limit the rate at which keys can be pressed
  ;and prevent 'flooding' of the game with too many
  ;keypresses

  make "movepaddle false
  ;used to indicate if the paddle has been moved
  ;and increase the speed of ball movement to allow the
  ;game to 'catch up'

  make "leftscore 0
  make "rightscore 0
  ;initialize the score containers and assign them
  ;values of 0

  updatescore
  ;set up and draw the scoreboard. This is a user-defined
  ;procedure

  make "leftpaddle -20
  drawpaddle "leftpaddle
  ;set the initial position of the left paddle
  ;and draw it, using the user-defined drawpaddle
  ;procedure, to which we pass the name of the paddle

  make "rightpaddle -20
  drawpaddle "rightpaddle
  ;set up and draw the right paddle

  home
  ;reset the turtle's position to the home position
  ;and its orientation to the default

  showturtle
  ;show the turtle (ball)

  right 10 + (random 70) + ((random 3) * 90)
  ;set starting angle for the ball by turning
  ;the turtle to the right a random amount, ensuring
  ;that it doesn't send the ball straight up or down!
  ;That would get boring very quickly...

  ;Note:

  ;Round brackets () ensure the order of operations
  ;is correctly processed. turtleSpaces uses BEDMAS
  ;but processes equal-order operations right to
  ;left (like original Logo), which means that without
  ;brackets, the last 'random' primitive would be passed
  ;270 (3 * 90) which is not what we want!

  ;All right, we're all ready to go!
  ;let's return back to the main pong procedure...

END

TO makemodel

  setpremodel [setvectors [[0 1 0] [0 0 1] [1 0 0]]]
  ;setpremodel takes a list of commands, in this case
  ;we're providing it with a single command which itself
  ;takes a list of three lists, indicating orientation
  ;vectors (you don't need to worry about vectors for now).
  ;But you can see in this example how lists can get nested
  ;on a single line.

  setmodel [
    setfillcolor yellow
    ;there are 16 default colors, and they each have an
    ;associated keyword, which just returns the index
    ;number of the color, which in the case of yellow is 13

    setfillshade -5
    ;you can set a shade for the color, which can be a
    ;value between -15 and 15. Excluding pure white and black
    ;there are 434 default colors, created using a combination
    ;of shade and color. But you can also define arbitrary
    ;colors using the definecolor primitive

    back 2.5 raise 2.5
    ;raise elevates the turtle in the Z dimension,
    ;and this is the extent of the use of 3D movement
    ;primitives in this source code listing

    slideleft 2.5 voxel 5
    ;because voxels are created to the front,
    ;right and beneath the turtle, we need to
    ;move the turtle before making the voxel if
    ;we want the voxel to be centered on the
    ;turtle's position
  ]

  ;The contents of lists can be spaced out across
  ;multiple lines for easier readability

  ;some explanation:

  ;The setvectors command inside the setpremodel command
  ;'fixes' the orientation of the voxel used as the turtle
  ;model regardless of the orientation of the turtle itself
  ;to appear more like a classic Pong pixel, while
  ;the setmodel primitive creates the voxel model itself.

  ;(For technical reasons, you can't assign a fixed
  ;orientation to a model inside a setmodel command)

  ;Comment out the makemodel command in the setup procedure
  ;by preceding it with a semicolon (like these comments are)
  ;to play instead with the actual turtle, and watch it as
  ;it changes direction when it bounces off the walls and
  ;paddles (THIS IS RECOMMENDED)

  ;This is because we use the turtle's current 'heading'
  ;or direction to determine how much to turn when we bounce
  ;the ball (or turtle) off of things. In reality, the turtle
  ;is constantly moving forward

END

TO arena

  ;let's draw the playfield:

  setpencolor lightblue
  setpos [0 -100]
  ;setpos takes a list of two values, X and Y.
  ;Remember, coordinates behind and to the left of
  ;the turtle's default position (at the center of
  ;the screen) are negative.

  ;Another primitive, setposition, takes a list
  ;of three values (X, Y and Z) with Z being positive
  ;above the turtle's default position, and negative
  ;below it. But because we're only working in two
  ;dimensions, we can use setpos here

  repeat 20 [mark 5 forward 5]
  ;draw dotted center line
  ;using 20 'dashes' or marks.
  ;the mark primitive uses the pen color
  ;to create a filled rectangle, like a marker

  setpc mediumblue
  ;setpc is shorthand for setpencolor. setfc is
  ;similarly shorthand for setfillcolor

  ;mediumblue returns 6, the palette index of
  ;the color that is a medium blue. Functions can
  ;be chained in intricate ways, passing their return
  ;values to other functions and finally commands
  ;(primitives that do not return a value). Logo is
  ;very flexible this way!

  setpos [-200 -100]
  right 90
  ;turn the turtle to the right 90 degrees
  mark 400
  ;mark the bottom line

  setpos [-200 100]
  mark 400
  ;mark the top line

  ;That was simple! You could make it more complex
  ;if you like, but the retro aesthetic is groovy!

END

TO moveball

  if :movepaddle = false [
    repeat 4 [forward 1]

    ;if the paddles haven't been moved since the last
    ;time we moved the ball, let's move it four turtle
    ;units forward

    if and xpos < 145 xpos > -145 [
      make "move time / 1000
      if :move < 20 [repeat int :move [forward 1]]
      else [repeat 20 [forward 1]]
    ]
    ;if the ball is presently well inside the area between
    ;the paddles, lets move the ball a bit more based on the
    ;amount of time elapsed since the round has started
    ;(to a maximum of 20 turtle units)

    ;This way, the ball will get faster and faster
    ;until someone misses it!

  ]

  else [
    ;if the paddles HAVE been moved...

    if and xpos < 145 xpos > -145 [
      ;and the ball is well inside the area between the paddles...

      repeat 10 [forward 1]
      ;move 10 turtle units instead of 4 so we can 'catch up'
      ;and reduce the 'lag' caused by moving the paddle

      make "move time / 1000
      if :move < 20 [repeat int :move [fd 1]] [repeat 20 [fd 1]] ;also apply additional time-based 'speed' as above... ;fd is a shortcut for forward. Also if you supply a second ;list of instructions to an if statement, it will execute ;the second list if the comparison provided is false, ;similarly to the else primitive (although you can use ;else later in a procedure as it will take note of the ;result of the last comparison.) ] else [ repeat 4 [forward 1] ] ;but if the ball is closer to the paddles then let's move ;it only four, to provide a little more help catching it ;but also to ensure we detect the ball has 'hit' the ;paddle and doesn't accidentally pass through it, which ;will cause the player distress! make "movepaddle false ;finally, reset the movepaddle 'flag' to false ;(since we've dealt with it) ] ;and we have moved the ball! END TO checkball ;in this procedure, we check to see if the ball has ;passed over the boundary at the top and the bottom of ;the playfield, or if it has 'touched' the paddles, ;or if it has gone out of play, and we act accordingly if ypos > 100 [
    ;if the ball has exceeded the top boundary of
    ;the playfield (the center of the playfield
    ;has x and y values of 0, which increase going
    ;upward and to the right, and decrease going downward
    ;and to the left):

    toot 600 10
    ;make a 600 hz tone for 10/60ths of a second

    if heading > 180 [left 2 * (heading - 270)]
    ;the turtle's heading is a degree value increasing
    ;from zero in a clockwise direction (to the right)
    ;and so when the turtle is pointing right, its heading
    ;is 90, when pointing down 180, and when up 0.

    ;Here we check if the turtle is pointing to the left,
    ;(has a heading value greater than 180) and if so, we
    ;turn the turtle left twice the value of the heading
    ;minus 270 degrees, because we know the value of the
    ;heading is going to be greater than 270 degrees since
    ;the turtle is at the top wall.

    ;And so we turn double the angle between the turtle's
    ;current heading and the angle of the wall, thus causing
    ;the turtle to 'bounce' off of the wall

    else [right 2 * (90 - heading)]
    ;otherwise, we can assume the turtle is pointing to
    ;the right, and we do a similar calculation, instead
    ;subtracting the heading from 90 degrees, because
    ;we know the heading is going to be 90 degrees or less,
    ;based on the turtle striking the top boundary, and
    ;the turtle pointing to the right.

    forward 2 * (ypos - 100)
    ;because the ball can move more than one turtle unit
    ;at a time in order to make the gameplay speedy, we
    ;need to bring the ball back 'in bounds' so that we
    ;don't inadvertently read that the ball is out of bounds
    ;again before it has a chance to re-enter the playfield

    ;there is probably a more accurate way to do this, but
    ;simply doubling the distance the ball is out of bounds
    ;seems to be sufficient. But if the ball ever gets
    ;'stuck' out of play, you know what you need to fix!

  ]

  if ypos < -100 [ toot 600 10 if heading > 180 [right 2 * (90 + (180 - heading))]
    else [left 2 * (90 - (180 - heading))]
    forward 2 * abs (ypos - -100)
  ]

  ;this is similar to the above, except with the bottom
  ;boundary. Note that because the location of the bottom
  ;boundary is negative, we need to get the absolute (positive)
  ;value of the current turtle position minus the boundary
  ;(using the abs primitive) because the result of that
  ;calculation is otherwise negative

  ;now we check the paddles:

  if and xpos > 164 xpos < 171 [ ;if the ball is in the right paddle X 'zone': if and ypos > :rightpaddle ypos < (:rightpaddle + 40) [ ;AND if the ball is in the right paddle Y 'zone' (the ;area currently occupied by the paddle): toot 500 10 ;make a 500hz tone for 10/60ths of a second if heading > 90 [right 2 * (90 - (heading - 90))]
      else [left 2 * heading]
      ;this is similar to the top and bottom boundary
      ;calculations, except instead of changing based on
      ;if the turtle is facing right or left, here we
      ;do different calculations based on if the turtle is
      ;pointing downward or upward

      right -20 + (ypos - :rightpaddle)
      ;apply 'english' to the ball -- depending on the
      ;location on the paddle the ball is striking, turn
      ;the turtle to the left (which it does when a negative
      ;number is provided to the right primitive) or
      ;the right a related number of degrees. This allows
      ;the player to affect the trajectory of the ball
      ;and makes the game more interesting!

      forward 2 * (xpos - 164)
      ;make sure the ball is no longer in the 'strike'
      ;zone for the paddle, because otherwise it could
      ;be detected again and cause some strange behavior.
      ;There's probably a better way to do this, but
      ;this method seems to suffice

    ]
  ]

  ;Let's do this all again for the left paddle:

  if and xpos < -164 xpos > -171 [
    ;if the ball is in the left paddle X 'zone':

    if and ypos > :leftpaddle ypos < (:leftpaddle + 40) [ ;and the ball is in the vertical area occupied by ;the paddle: toot 500 10 ;toot if heading > 270 [rt 2 * (360 - heading)]
      else [lt 2 * (90 - (270 - heading))]
      ;bounce

      left -20 + (ypos - :leftpaddle)
      ;apply 'english'

      forward 2 * (abs (xpos - -164))
      ;get away from the paddle
    ]
  ]

  ;finally, we check if the ball has sailed past a player:

  if or xpos > 200 xpos < -200 [ ;if the ball's position exceeds either the left ;or right boundaries: toot 100 100 ;make a 100hz tone for 100/60ths of a second ;(1.66 seconds) if xpos > 200 [inc "leftscore]
    else [inc "rightscore]
    ;if the ball is past the right boundary, credit the left
    ;player with a point. Otherwise, credit the right player
    ;with a point. The inc primitive increases the value of
    ;the specified container by one. Note that it takes a
    ;quoted name, not a colon name for the container.

    updatescore
    ;update the score

    resettime
    ;we reset the time because we're using it to
    ;speed up the ball

    wait 100
    ;wait 100/60ths of a second, for the toot to
    ;finish sounding

    if or :leftscore = 10 :rightscore = 10 [
      ;if either player's score is now 10:

      hideturtle
      setpos [-90 -20]
      setfillcolor orange
      foreach "i |GAME OVER| [typeset :i wait 10]
      ;type out GAME OVER, but with a delay between
      ;each character, for dramatic effect

      audiowait
      playnotes "L3B3A3G3F3L6E3
      ;play a little ditty, and wait for it to finish

      finish
      ;game over, man, game over!
    ]

    clean
    arena
    updatescore
    drawpaddle "leftpaddle
    drawpaddle "rightpaddle
    ;Because we're using a single turtle for this
    ;game, it is a good idea to 'clean' and redraw
    ;the game elements between rounds, because otherwise
    ;the 'turtle track' will gradually accumulate all of
    ;the ball movements and slow down its rendering over
    ;time. We want a speedy game so let's clean it up

    home showturtle
    right 10 + (random 70) + ((random 3) * 90)
    ;reposition, and randomly orient the ball
  ]

  ;we're done for now!

END

TO checkkeys

  ;in this procedure, we will check to see if a key
  ;has been pressed, and if so, act accordingly
  ;(by moving a paddle, if a paddle movement key
  ;has been pressed)

  inc "keytimer
  ;Because of key repeat, we want to ensure the player
  ;can't 'flood' the game with too many keypresses, and
  ;by using a simple counter, we can ensure this
  ;doesn't happen

  if and keyp :keytimer > 1 [
    ;and so, we check to see if a key has been pressed
    ;(keyp) AND the :keytimer container's value is
    ;at least two. That means at least two ball movement
    ;cycles have to pass between paddle moves, keeping
    ;the game moving!

    make "keytimer 0
    ;reset the keytimer container to 0

    make "key readchar
    ;take a key from the keybuffer and put it into
    ;the key container

    clearchar
    ;clear the keyboard buffer. If we don't, key
    ;repeat (or a player hammering the key) can clag
    ;up the game

    if :key = "a [if :leftpaddle < 60 [ make "leftpaddle :leftpaddle + 20 drawpaddle "leftpaddle ] ] ;if the 'a' key is pressed, and the left paddle isn't ;already as high as it can go, increase its position ;by 20 turtle units and redraw it if :key = "z [if :leftpaddle > -100 [
        make "leftpaddle :leftpaddle - 20
        drawpaddle "leftpaddle
      ]
    ]
    ;if the 'z' key is pressed, and the left paddle isn't
    ;already as low as it can go, decrease its position by
    ;20 turtle units and redraw it

    if :key = "k [if :rightpaddle < 60 [ make "rightpaddle :rightpaddle + 20 drawpaddle "rightpaddle ] ] ;if the 'k' key is pressed, and the right paddle isn't ;already as high as it can go, increase its position by ;20 turtle units and redraw it if :key = "m [if :rightpaddle > -100 [
        make "rightpaddle :rightpaddle - 20
        drawpaddle "rightpaddle
      ]
    ]
    ;finally, if the 'm' key is pressed, and the right paddle
    ;isn't already as low as it can go, decrease its position
    ;by 20 turtle units and redraw it

  ]
  ;that's all for now!

END

TO updatescore

  ;this procedure updates the scoreboard

  hideturtle
  ;hide the ball

  norender
  ;suspend drawing the graphical elements while
  ;we update the scoreboard

  settypesize 20
  ;set the size of the type, the graphical text

  if tagp "score [erasetag "score]
  ;if there is already a score 'tag', erase it.
  ;Tags mark areas of the 'turtle track' so that
  ;they can be copied, removed or used to create
  ;turtle models

  begintag "score
  ;create a score tag

  home
  ;reset the turtle's position and orientation

  setpos [-60 50]
  setfillcolor red
  typeset :leftscore
  ;type the left player's score

  setpos [40 50]
  setfillcolor green
  typeset :rightscore
  ;type the right player's score

  endtag
  ;close the score tag

  render
  ;resume rendering -- voila, the score is updated!

END

TO drawpaddle :paddle

  ;drawpaddle takes a parameter, which is 'passed' into
  ;the :paddle container, which exists only inside this
  ;procedure. Once we exit this procedure, it vanishes!

  ;We use the value contained in :paddle (the value we
  ;passed to drawpaddle) to decide which paddle to draw
  ;and reduce the amount of code we need to write (since
  ;we only need one procedure for both paddles)

  norender
  ;because we are going to erase the old paddle and
  ;then draw a new paddle, stop rendering the graphics
  ;so that it just seems like the paddle moved.
  ;It's magic!

  make "heading heading
  make "pos pos
  ;save the current position and heading of the turtle
  ;into two containers with similar names

  home
  ;reset the turtle's position and orientation

  if :paddle = "leftpaddle [
    setfillcolor pink
    setpos {-170 :leftpaddle}
  ]
  ;if the paddle we're drawing is the left paddle,
  ;set the fill color to pink and move to the left paddle's
  ;position

  ;Curly-braces indicate a 'soft list', a list that is evaluated
  ;at the time of execution. Soft lists can contain :containers
  ;and functions which then get resolved to their values / results
  ;before being passed to the primitive they are attached to.
  ;This is how you can dynamically pass values to primitives
  ;that ordinarily take 'hard' [] lists

  ;Note that if you pass a string value in a soft list, you
  ;will need to precede it with a " or place it between pipes ||

  else [
    setfc cyan
    setpos {165 :rightpaddle}
  ]
  ;otherwise set the fill color to cyan and set the right
  ;paddle's position

  if tagp :paddle [erasetag :paddle]
  ;if there's already a paddle, erase its 'tag' from the
  ;turtle track. This erases the paddle, if it exists

  begintag :paddle
  ;create a new 'tag' with the name of the paddle, eg
  ;leftpaddle

  ;tags mark sections of the turtle track for manipulation
  ;later, such as to erase them, or use them to create a
  ;turtle model

  voxeloid 5 40 5
  ;create the paddle voxel

  endtag
  ;close the tag

  setpos :pos
  setheading :heading
  ;reset the turtle's heading and position

  make "movepaddle true
  ;set the movepaddle container to true. This tells
  ;code in the moveball procedure that the paddle has
  ;moved and to make up for the time we lost doing it

  render
  ;start updating the graphic elements again
  ;abra cadabera! The paddle has moved!

  ;We've reached the end of this listing!

  ;Now, exactly how much Python code would you
  ;have had to have written in order to accomplish
  ;all this? Hint: a lot more!

  ;Thanks for reading! I hope this helps you on your
  ;journeys inside turtleSpaces. Bon Voyage!

END

NEWTURTLE "snappy


NEWTURTLE "libby


An Introduction to Logo Movement with Myrtle the Turtle

This catchy song introduces the turtleSpaces Logo movement primitives.

This animation was made inside turtleSpaces, and demonstrates its ability to create animated content.

You can use screen capture software such as ScreenFlow or the built-in SAVEWEBM primitive to export a recording of the screen, and then sync it to your music.

You can also load music in OGG format into turtleSpaces and then work on synchronizing your animation with it in realtime using the SLEEP and WAIT primitives. This animation was done that way. Keep in mind that the animation may play back at different speeds on different computers unless you use the TIME primitive to keep everything locked to timing points!

It took around three hours to create the animation in this video using the Logo programming language. The captions are done by creating a turtle (I named “caption”) and then directing it to create the captions using the CONTROL primitive, eg control “caption [typeset |And I ORBIT all round…|]


Example: Plane Trapped in a Torus

This example demonstrates the use of various camera-related functions, shape inversion, the premodel primitive and others to create this cool animation of a plane trapped in a torus!

The procedure first sets the turtle model to the built-in plane model, before creating a tag that sets the color of the torus. Then it creates an inverted torus (one whose inside is rendered instead of its outslde) because we’re going to fly inside it!

We then position the turtle to prepare it for its orbital flight path, position the camera behind it and set up its light. Then we begin orbiting, and while we do so we use setpremodel to move the turtle relative to the camera, creating the drifting motions of the plane as it flies.

Every so often, we change the color of the torus by replacing the contents of the color tag. Cool stuff!

Read through the source code below and take note of the comments, which explain what various parts of the trapped procedure do.

TO trapped
  reset
  setmodel "plane
  ;sets Myrtle's model to the built-in plane model
  
  begintag "col
  setfillcolor 1 + random 15
  endtag
  ;the contents of tags can be used to create models, or
  ;they can be disabled or replaced. We're going to replace
  ;the contents of this tag later in our procedure, to change
  ;the color of the torus 'on the fly' (ba-dum)
  
  torus 30 -50 20 20
  ;creates an inverted torus by inverting the radius parameter.
  ;Closed shapes such as the torus don't ordinarily have an 'inside'
  ;unless we create them inverted.
  
  ;Why do we want to invert it?
  
  ;We're going to switch the camera turtle to Myrtle, and so
  ;we want to see inside the torus, not the outside. To do this,
  ;we invert it, as demonstrated above.
  
  penup
  ;don't forget, the turtle draws a line by default
  
  dropanchor
  tether
  pullout 50
  left 90
  ;We're going to use the orbit primitive to move Myrtle
  ;inside of the torus. So we 'dropanchor' at Myrtle's position,
  ;to set the 'anchorpoint' that the orbit primitives rotate around,
  ;'tether' to keep the anchor point static (because otherwise
  ;when Myrtle turns the anchor point moves to stay in front of
  ;her) 'pullout' 50 turtle units from the anchor point, and then
  ;turn left 90 degrees (which we can do because we called tether)
  
  ;To demonstrate the need for tether, try:
  ;reset repeat 36 [repeat 90 [orbitleft 4] right 10]
  ;As you can see, the point Myrtle orbit arounds moves when she
  ;turns right. Put a 'tether' primitive before the first repeat
  ;and notice the difference!
  
  setpremodel [rt 10]
  ;'setpremodel' allows us to put commands between the 'turtle track'
  ;that contains everything the turtle draws and the turtle model
  ;itself.
  
  ;When we attach the camera to a turtle, its position is
  ;set before premodel (and the turtle model) and so we can use
  ;setpremodel to change the position and orientation of the turtle
  ;as seen from the camera. And so we will see the model pointing
  ;slightly to the right
  
  setview "myrtle
  ;set the camera to show Myrtle's point of view
  
  snappy:setlight 0
  ;turn Snappy (the normal camera turtle)'s light off.
  ;Snappy has a light on by defalt.
  
  setlight 2
  ;turn Myrtle's light on. The value 2 is a point light,
  ;which casts light around Myrtle
  
  setdiffuse [40 40 40 100]
  setambient [0 0 0 0]
  ;these set paramets related to the light.
  ;see their help entries for more information
  
  setviewpoint [5 10 -50]
  ;sets the position of the camera relative to the turtle
  ;as a list of [x y z]. So in this case, to the right, above
  ;and behind the turtle
  
  forever [
    
    setpremodel {
    "right 20 - 30 * (sin 0.5 * loopcount)
    "slideright -5 + 10 * (sin 0.5 * loopcount)
    "up 10 * (sin loopcount)
    "raise 2.5 - 10 * (0.5 * sin loopcount)
    }
    
    ;curly braces indicate a 'softlist', a list that is
    ;evaluated at the time of execution (the point at
    ;which the interpreter interprets the list).
    ;They allow us to use functions and containers to
    ;assemble a list dynamically.
    
    ;In this case, we're using the sin function and loopcount
    ;to move the turtle model relative to its position and
    ;simulate the motion of an aircraft in flight.
    
    ;loopcount is similar to repcount, but is used in non-repeat
    ;loops such as forever, while, until, dowhile, dountil and
    ;foreach.
    
    ;it counts the number of times the loop has been executed
    
    orbitleft 0.5
    ;orbit to the left half a degree. In this case, 'to the left'
    ;causes the turtle to appear to move forward. But remember,
    ;we turned the turtle to the left earlier in the procedure!
    
    if divp 300 loopcount [
      replacetag "col {
      "setfillcolor 1 + random 15
      "setfs -15 + random 30
      }
    ]
    ;divp (or divisorp) returns true if the numerator (the first
    ;number) divides equally into the denominator (the second
    ;number, in this case the loopcount.)
    
    ;if divp returns true, we replace the "col tag we created
    ;earlier in the procedure with new contents setting a random
    ;color and shade. We need to use curly braces so that the
    ;random numbers are generated at the time we call replacetag.
    
    ;note that the primitives need to have a " in front of them
    ;so they are not themselves executed when the softlist is
    ;evaluated! By putting a quotation mark in front of them,
    ;they are evaluated as words and passed verbatim to
    ;the replacetag primitive.
    
    ;there are other ways to do this that you can do in other
    ;Logo environments but they are more cumbersome.
    
    sleep 5
    ;sleep for 5 milliseconds
    
  ]
  ;do this forever, or until we press escape or the stop button
  
END


A Guide to 3D Printing Using turtleSpaces

This guide is in development

Turtle Pen:

In the 3D turtleSpaces environment, pen sizes greater than 1 create cylinders.

setpensize 20

There is also a square pen style more suitable for 3D printing flat objects called mark. To activate it, type:

setpenstyle “mark

mark is two-dimensional by default. But you can increase its depth by setting pendepth using:

setpendepth 20

Valid shapes:

Shapes must be closed, that is they must have no exposed ‘inside’ faces. Closed shapes include:

voxel, voxeloid, sphere, spheroid, icosphere, icospheroid, cappeddome, cappeddomoid, cylinder, torus, etc.

Note: the cylinders used for large pen sizes (rope) are valid shapes and appear to slice correctly.

Warning: open shapes will be rejected by your 3D printer’s ‘slicing’ software!

Making hollow forms:

To create a ‘hollow’ form, an inverted shape must be created within the outer shape. For example:

ico 50 ico -40

or

voxel 100 fd 90 lo 90 sr 90 voxel -80

cone 50 100 10 rr 180 ra 10 cone 40 -80 10

Rocket Orbit

This simple commented project allows for the introduction of 3D movements and shapes (the rocket procedure) including a basic introduction to repeat, the creation of turtle models and the use of premodel, an introduction to the orbit primitives and the use of a new worker (thread) for orbiting the camera!

TO rocket
  forward 70
  down 90
  ;these two commands orient the rocket better for use as
  ;a turtle model
  
  setfillcolor yellow
  ;yellow is a function that returns the value 13
  ;it is a shortcut used for convenience in learning
  ;as is red, green, blue etc.
  
  cylinder 20 120 10
  ;cylinder takes   
  
  rollright 180
  ;flip the turtle over to create the nose cone
  
  cone 20 50 10
  
  lower 50
  ;lower the turtle to create the 'nose'
  
  setfillcolor red
  icosphere 3
  
  setfillcolor orange
  ra 50 + 120
  ;ra is short for raise
  
  rr 180
  ;rr is shorthand for rollright
  
  cutcone 20 30 30 10
  ;move the turtle to the bottom of the rocket and
  ;create the tail
  
  up 90 bk 30.1
  ;bk is short for back
  
  setfillcolor white
  repeat 2 [cylinderslice 40 5 20 10 rr 90]
  ;create the fins
  
  setfillcolor red
  dn 90 sl 10 bk 10 cylinder 10 10 10
  ;sl is short for slideleft
  
  fd 20 cylinder 10 10 10 sr 20
  ;fd is short for forward
  ;sr is short for slideright
  
  cylinder 10 10 10 bk 20 cylinder 10 10 10
  ;create the jets
  
END

TO createmodel
  clearscreen
  ;cs is short for clearscreen
  
  begintag "rocketmodel
  ;tags are used to create turtle models
  ;among other uses. You can also use them to
  ;show or hide parts of the 'turtle track'
  
  rocket
  ;run the rocket procedure
  
  endtag
  ;close the tag
  
  newmodel "rocket "rocketmodel
  ;create a new model called 'rocket' based on the
  ;rocketmodel tag
  
  setmodel "rocket
  ;set the turtle's model to the rocket model
  
  clearscreen
  ;clear away the tagged model, leaving only the
  ;turtle
END

TO starfield :number
  hideturtle
  norender
  ;suspend rendering of the scene until we're done drawing the stars
  penup
  repeat :number [
    home
    randomvectors randomfillcolor
    ;randomvectors orients the turtle randomly
    ;while randomfillcolor sets a random fill color
    
    forward 1000 + random 1000
    ;move forward a random distance
    
    up 90
    ;orient the turtle up in preparation of creating a spot
    ;because the spot is created around and below the turtle
    
    spot 10 + random 10
    ;create a randomly-sized spot
    
  ]
  
  home
  showturtle
  render
  ;resume rendering
  
END

TO main
  reset
  ;resets turtleSpaces to a default state
  
  createmodel
  ;execute the createmodel procedure
  
  starfield 200
  ;execute the starfield procedure, passing the parameter value 200
  
  setmodelscale 0.5
  ;decrease the size of the turtle model to half normal
  
  setpremodel [lt 90]
  ;inserts 'left 90' into the turtle track between the scene
  ;and the turtle model ('pre' the model)
  
  setfillcolor 14
  ;sets the fillcolor to 14. Type 'showcolors' or 'sc' in the console
  ;to see a list of default colors. You can also definecolor your own!
  
  ico 50
  ;create an icosphere (the planet)
  
  penup
  dropanchor
  ;set the 'anchor point', or the point the turtle 'orbits' around
  ;using the orbit commands, to the current turtle position
  
  pullout 80
  ;pull away 80 turtle units from the anchor point
  
  snappy:newworker [forever [orbitleft 0.1]]
  ;tell snappy the camera turtle to create a new routine or thread
  ;that forever orbits around the scene to its left one tenth of
  ;a degree at a time
  
  make "rotation 0
  ;define a container (variable) called 'rotation'
  ;and set it to 0. We're going to use it to keep track of the
  ;rotation of the rocket
  
  forever [
    inc "rotation
    ;same as make "rotation :rotation + 1
    ;there is also dec (decrement)
    
    setpremodel {"lt 90 "rollright :rotation % 360}
    ;curly braces indicate a 'softlist', a list that is evaluated
    ;at runtime. In this case, so that we can have a dynamic
    ;rotation value we pass to setpremodel
    
    ;% is shorthand for modulus
    
    orbitleft 1
    ;orbit the rocket one degree to the left
    
    wait 1
    ;wait one sixtieth of a second
    
  ]
END


Example: Tetris written in turtleSpaces Logo

What do Steve Wozniak and George H.W. Bush have in common? They’ve both been seriously into Tetris! But who can blame them? The object of the game (as if you didn’t know) is to complete horizontal lines using falling shapes of various configurations. When you finish a line, it disappears, causing the rest of the blocks to fall down a line. However, if you stack up shapes to the point they overflow the top of the playfield: Game Over. When you finish a certain number of lines, the level ends… and in the next, the shapes fall faster, and you need to complete more lines! The insanity never ends.

In an era where games were becoming increasingly more complex, the simplicity of Tetris was seen as a breath of fresh air. Tetris would inspire a number of other “falling block puzzle games” such as Sega’s colour-matching Columns, and the three-dimensional Welltris. But Tetris would always remain king (tsar?) of the arcade puzzle game world, with sequelsclones and variations being released for virtually every console, computer, and operating system worldwide.

A little history

Alexey Pajitnov’s Tetris – early unauthorised versions of which, such as Spectrum Holobyte’s rendition described above, began appearing on home computers in 1987 – spawned a whole new generation of shape-based puzzle games.

Holobyte’s version took next year’s CES by a storm, and garnered the attention of the Soviet government, who held the rights to the game. They sold the arcade rights to Atari and the console rights to Nintendo.

Nintendo released Tetris on both its Nintendo Entertainment System and on the Game Boy, the latter as a pack-in with the portable console. The inclusion of Tetris arguably made the Game Boy a success –the game was perfect for smaller screen sizes, and was very addictive, spawning a whole generation of Tetris ‘junkies’. 

Nintendo’s version of Tetris for the NES was criticised for not having a two-player mode; however, Atari Games, perhaps mistakenly believing their arcade licensing gave them the right to release a console version, came out with their own Nintendo Tetris game through their Tengen subsidiary (created after the consumer rights to the Atari name were sold to Jack Tramiel, see Point & Click) which featured head-to-head play.

Nintendo sued, and Tengen was eventually forced to withdraw its cartridge from sale, after selling around 100,000 copies. They are collectibles.

All right, so let’s take a look at the listing. The first thing you’ll notice is that it’s very monolithic, there’s only one procedure! That’s okay, though, in this context. While Logo is very versatile, sometimes aspects of that versatility such as the use of multiple procedures are unneeded.

You can also view the example inside of turtleSpaces webLogo by clicking File -> Browse Published… after it finishes loading and selecting the Tetris project.

In this example, we handle most of the structure using dountil and switch / case — dountil loops its contents until a condition is true, while switch takes a value from a container (variable) and then case compares the value it is given with the switch, and executes its list if that condition is true.

The game procedure begins with some basic initialization, such as creating the table we will use to note the finishing positions of the pieces, draws the border around the playfield and then proceeds into the main ‘run loop’, the dountil :gamover which loops until the gameover container is set to true.

Inside the dountil loop we choose the next Tetris piece to play, set a random fill color, set the starting position for the piece based on its characteristics (we don’t want it overlapping the edges or starting ‘over the top’) and ensure that the new piece doesn’t overlap an existing piece (if so, game over!)

If it doesn’t, we continue into the dountil :dropped loop, which runs until the piece has fully ‘dropped’ into its final position. We use a switch statement and case statements to run the logic relevant to the current piece. For readability I decided to make each orientation of a piece its own piece — while this means there are a lot more ‘pieces’ than if I had handled variants (rotations) using the same chunks of code, these are simpler to understand than they would have been had they had all of these conditionals in them dependent on the orientation of the piece.

Also, you can hand each orientation of a new piece off to a student to complete, which could make for an interesting group project. A number of pieces have not been implemented in this example, which could be implemented by your students, based off of the pieces that have been implemented.

Inside each piece subroutine we check for a keypress, then act if there was a keypress, checking to see if the action (moving left, right, or ‘rotating’ (switching to another orientation)) would collide with an existing piece or the edges before performing the action.

Then we draw the piece, and delay. There is a ‘drop key’ that sets the delay to zero for the remainder of the piece’s time in play. Then we see if we’ve ‘landed’ either on another piece or on the bottom, by checking the appropriate cells in the table. If so, we set the :dropped container to true, so that we will ‘drop out’ of the dountil loop, and we set our current piece’s occupied cells in the table. We only bother to set these when the piece has finished moving because there is no point in setting them while it’s dropping.

If we haven’t landed, we turn off rendering (so things don’t flicker) and ‘backtrack’ the necessary number of steps to ‘undo’ the drawing of the piece. Since turtleSpaces graphics are made out of 3D shapes, we can’t just erase a particular area, we have to erase or backtrack part of the turtle track — the list of objects the turtle has created.

You could also use tags to do the same thing, wrapping the piece in a tag, and then erasing the tag. turtleSpaces is versatile!

If the current piece has ‘dropped’ we then check to see if we’ve filled in any lines. To do this we sequentially run horizontally through each row in the table, checking each column, and adding to a counter each time a column has a value in it. If we count up to 10, we have a full row, and we erase it by copying the contents of all of the above rows down one row, clearing the top row when we are done. We add one to a score counter, and inform the user of their success.

The game then continues until the :gameover dountil condition is met, at which point it terminates.

TO game
  reset
  penup hideturtle
  
  ;create table to hold tetris piece placement information:
  newtable "board [10 21]
  
  ;draw playfield border:
  setpos [-60 -110]
  voxeloid 10 210 10
  voxeloid 120 10 10
  setpos [50 -110]
  voxeloid 10 210 10
  
  make "gameover false
  make "score 0
  
  dountil :gameover [
    
    ;pick random piece:
    make "piece pick [square hline vline hzed vzed hess vess]
    
    ;the logic is easier to implement if each orientation of a shape
    ;is its own piece. While this means implementing a lot of pieces
    ;to make a full Tetris game, it avoids cumbersome if statements
    
    ;TODO: tee0 tee90 tee180 tee270 -- T shapes
    ;TODO: jay0 jay90 jay180 jay270 -- J shapes
    ;TODO: elle0 elle90 elle180 elle270 -- L shapes
    ;MAYBE: crowbar corkscrew rightangle cshape?
    
    show :piece
    
    randomfillcolor
    
    ;choose random starting placement based on the piece.
    ;We need to make sure the piece is fully in the playfield
    ;and doesn't overlap any edges:
    
    if :piece = "square [make "y 1 make "x 1 + random 9]
    if :piece = "hline [make "y 0 make "x 1 + random 7]
    if :piece = "vline [make "y 3 make "x 1 + random 10]
    if :piece = "hzed [make "y 0 make "x 1 + random 8]
    if :piece = "vzed [make "y 2 make "x 1 + random 8]
    if :piece = "hess [make "y 1 make "x 1 + random 8]
    if :piece = "vess [make "y 2 make "x 2 + random 9]
    
    ;check if the area selected for the new piece is already
    ;occupied by another piece, if so then game over:
    
    if :piece = "square [
      if (or not emptyp cell "board {:x :y}
      not emptyp cell "board {:x + 1 :y}
      not emptyp cell "board {:x :y + 1}
      not emptyp cell "board {:x + 1 :y + 1}) [make "gameover true]]
    if :piece = "hline [
      if (or not emptyp cell "board {:x :y + 1}
      not emptyp cell "board {:x + 1 :y + 1}
      not emptyp cell "board {:x + 2 :y + 1}
      not emptyp cell "board {:x + 3 :y + 1}) [make "gameover true]]
    if :piece = "vline [
      if (or not emptyp cell "board {:x :y + 1}
      not emptyp cell "board {:x :y}
      not emptyp cell "board {:x :y - 1}
      not emptyp cell "board {:x :y - 2}) [make "gameover true]]
    if :piece = "hzed [
      if (or not emptyp cell "board {:x :y + 1}
      not emptyp cell "board {:x + 1 :y + 1}
      not emptyp cell "board {:x + 1 :y + 2}
      not emptyp cell "board {:x + 2 :y + 2}) [make "gameover true]]
    if :piece = "vzed [
      if (or not emptyp cell "board {:x :y + 1}
      not emptyp cell "board {:x :y}
      not emptyp cell "board {:x + 1 :y}
      not emptyp cell "board {:x + 1 :y - 1}) [make "gameover true]]
    if :piece = "hess [
      if (or not emptyp cell "board {:x :y + 1}
      not emptyp cell "board {:x + 1 :y + 1}
      not emptyp cell "board {:x + 1 :y}
      not emptyp cell "board {:x + 2 :y}) [make "gameover true]]
    if :piece = "vess [
      if (or not emptyp cell "board {:x :y + 1}
      not emptyp cell "board {:x :y}
      not emptyp cell "board {:x - 1 :y}
      not emptyp cell "board {:x - 1 :y - 1}) [make "gameover true]]
    
    make "dropped false
    ;boolean to indicate the piece has 'landed'
    make "speed 10
    ;the speed at which the pieces 'fall'
    
    dountil :dropped [
      ;repeat the following until :dropped is true
      
      switch "piece
      ;based on the value of the "piece container, execute one
      ;of the following case statements:
      
      case "square [
        
        make "y :y + 1
        ;increment "y
        
        if keyp [
          make "key readchar
          if :key = "j [
            if :x > 1 [
              if (and emptyp cell "board {:x - 1 :y}
              emptyp cell "board {:x - 1 :y - 1}) [dec "x]]]
          if :key = "k [
            if :x < 9 [ if (and emptyp cell "board {:x + 2 :y} emptyp cell "board {:x + 2 :y - 1}) [inc "x]]] if :key = "m [make "speed 0] clearchar ] ;we check to see if a key has been pressed, and ;if it has, then we see if it's one of the keys ;we respond to, and then we respond to them IF ;moving the piece will not collide with already ;existing pieces. m sets the speed to 0 and causes ;it to drop as quickly as possible ;clearchar clears the keyboard buffer sety 100 - :y * 10 setx -60 + :x * 10 voxeloid 20 20 10 ;sets the turtle's position and draws the shape if :speed > 0 [trackrender]
        ;don't render if the shape is 'dropping'
        ;(eg we pressed the m key)
        
        wait :speed
        ;delay in 60ths of a second, so 10 is 1/6th of a second
        
        ;check to see if we've landed on another piece,
        ;or hit the bottom, and then enter the piece position
        ;into the table:
        if (or :y = 20
        not emptyp cell "board {:x :y + 1}
        not emptyp cell "board {:x + 1 :y + 1}) [
          setcell "board {:x :y} fc
          setcell "board {:x + 1 :y} fc
          setcell "board {:x :y - 1} fc
          setcell "board {:x + 1 :y - 1} fc
          make "dropped true
          ;set dropped to true so we continue to the
          ;line check routine
        ]
        
        ;if we haven't 'landed' then turn off rendering,
        ;and 'undo' the drawing of the piece in preparation
        ;for the next move:
        else [notrackrender backtrack]
        
      ]
      ;that's it for this piece, on to the next!
      ;As the pieces get more complex, so does the logic
      ;needed to position and move them
      
      case "hline [
        
        make "y :y + 1
        if keyp [
          make "key readchar
          if :key = "j [
            if :x > 1 [
              if emptyp cell "board {:x - 1 :y} [dec "x]]]
          if :key = "k [
            if :x < 7 [ if emptyp cell "board {:x + 4 :y} [inc "x]]] if :key = "i [ if :y > 3 [make "piece "vline]]
          if :key = "m [make "speed 0]
          clearchar
        ]
        
        sety 100 - :y * 10 setx -60 + :x * 10
        voxeloid 40 10 10
        if :speed > 0 [trackrender]
        wait :speed
        
        if (or :y = 20
        not emptyp cell "board {:x :y + 1}
        not emptyp cell "board {:x + 1 :y + 1}
        not emptyp cell "board {:x + 2 :y + 1}
        not emptyp cell "board {:x + 3 :y + 1}) [
          setcell "board {:x :y} fc
          setcell "board {:x + 1 :y} fc
          setcell "board {:x + 2 :y} fc
          setcell "board {:x + 3 :y} fc
          make "dropped true
        ]
        else [notrackrender bt]
      ]
      
      
      case "vline [
        
        make "y :y + 1
        if keyp [
          make "key readchar
          if :key = "j [
            if :x > 1 [
              if (and emptyp cell "board {:x - 1 :y}
              emptyp cell "board {:x - 1 :y - 1}
              emptyp cell "board {:x - 1 :y - 2}
              emptyp cell "board {:x - 1 :y - 3}) [dec "x]]]
          if :key = "k [
            if :x < 10 [
              if (and emptyp cell "board {:x + 1 :y}
              emptyp cell "board {:x + 1 :y - 1}
              emptyp cell "board {:x + 1 :y - 2}
              emptyp cell "board {:x + 1 :y - 3}) [inc "x]]]
          if :key = "i [
            if :x < 8 [ if (and emptyp cell "board {:x + 1 :y + 1} emptyp cell "board {:x + 2 :y + 1} emptyp cell "board {:x + 3 :y + 1}) [make "piece "hline]]] if :key = "m [make "speed 0] clearchar ] sety 100 - :y * 10 setx -60 + :x * 10 voxeloid 10 40 10 if :speed > 0 [trackrender]
        wait :speed
        
        if (or :y = 20 not emptyp cell "board {:x :y + 1}) [
          setcell "board {:x :y} fc
          setcell "board {:x :y - 1} fc
          setcell "board {:x :y - 2} fc
          setcell "board {:x :y - 3} fc
          make "dropped true
        ]
        else [notrackrender bt]
      ]
      
      
      case "hzed [
        
        make "y :y + 1
        if keyp [
          make "key readchar
          if :key = "j [
            if :x > 1 [
              if (and emptyp cell "board {:x - 1 :y}
              emptyp cell "board {:x :y + 1}) [dec "x]]]
          if :key = "k [
            if :x < 8 [if (and emptyp cell "board {:x + 2 :y} emptyp cell "board {:x + 3 :y + 1}) [inc "x]]] if :key = "i [if :x > 1 [if (and
              emptyp cell "board {:x + 1 :y}
              emptyp cell "board {:x + 1 :y - 1})
              [make "piece "vzed]]]
          if :key = "m [make "speed 0]
          clearchar
        ]
        
        sety 100 - :y * 10 setx -60 + :x * 10
        voxeloid 20 10 10 bk 10 sr 10 voxeloid 20 10 10
        if :speed > 0 [trackrender]
        wait :speed
        
        if (or :y = 19 not emptyp cell "board {:x :y + 1}
        not emptyp cell "board {:x + 1 :y + 2}
        not emptyp cell "board {:x + 2 :y + 2}) [
          setcell "board {:x :y} fc
          setcell "board {:x + 1 :y} fc
          setcell "board {:x + 1 :y + 1} fc
          setcell "board {:x + 2 :y + 1} fc
          make "dropped true
        ]
        else [notrackrender repeat 4 [bt]]
      ]
      
      
      case "vzed [
        
        make "y :y + 1
        if keyp [
          make "key readchar
          if :key = "j [
            if :x > 1 [
              if (and emptyp cell "board {:x - 1 :y}
              emptyp cell "board {:x - 1 :y - 1}
              emptyp cell "board {:x :y - 2}) [dec "x]]]
          if :key = "k [
            if :x < 9 [ if (and emptyp cell "board {:x + 1 :y} emptyp cell "board {:x + 2 :y - 1} emptyp cell "board {:x + 2 :y - 2}) [inc "x]]] if :key = "i [ if (and :y > 2 :x < 9 :y < 19) [ if (and emptyp cell "board {:x + 1 :y + 1} emptyp cell "board {:x + 2 :y + 2} emptyp cell "board {:x + 3 :y + 2}) [ make "piece "hzed]]] if :key = "m [make "speed 0] clearchar ] sety 100 - :y * 10 setx -60 + :x * 10 voxeloid 10 20 10 fd 10 sr 10 voxeloid 10 20 10 if :speed > 0 [trackrender]
        wait :speed
        
        if (or :y = 20
        not emptyp cell "board {:x :y + 1}
        not emptyp cell "board {:x + 1 :y}) [
          setcell "board {:x :y} fc
          setcell "board {:x :y - 1} fc
          setcell "board {:x + 1 :y - 1} fc
          setcell "board {:x + 1 :y - 2} fc
          make "dropped true
        ]
        else [notrackrender repeat 4 [bt]]
      ]
      
      
      case "hess [
        
        make "y :y + 1
        if keyp [
          make "key readchar
          if :key = "j [
            if :x > 1 [
              if (and emptyp cell "board {:x - 1 :y}
              emptyp cell "board {:x :y - 1}) [dec "x]]]
          if :key = "k [
            if :x < 8 [ if (and emptyp cell "board {:x + 2 :y} emptyp cell "board {:x + 3 :y - 1}) [inc "x]]] if :key = "i [ if (and :y > 2 :x > 1) [
              if (and emptyp cell "board {:x :y}
              emptyp cell "board {:x - 1 :y}
              emptyp cell "board {:x - 1 :y - 1}) [
                make "piece "vess]]]
          if :key = "m [make "speed 0]
          clearchar
        ]
        
        sety 100 - :y * 10 setx -60 + :x * 10
        voxeloid 20 10 10 fd 10 sr 10 voxeloid 20 10 10
        if :speed > 0 [trackrender]
        wait :speed
        
        if (or :y = 20
        not emptyp cell "board {:x :y + 1}
        not emptyp cell "board {:x + 1 :y + 1}
        not emptyp cell "board {:x + 2 :y}) [
          setcell "board {:x :y} fc
          setcell "board {:x + 1 :y} fc
          setcell "board {:x + 1 :y - 1} fc
          setcell "board {:x + 2 :y - 1} fc
          make "dropped true
        ]
        else [notrackrender repeat 4 [bt]]
      ]
      
      
      case "vess [
        
        make "y :y + 1
        if keyp [
          make "key readchar
          if :key = "j [
            if :x > 2 [
              if (and emptyp cell "board {:x - 1 :y}
              emptyp cell "board {:x - 2 :y - 1}
              emptyp cell "board {:x - 2 :y - 2}) [dec "x]]]
          if :key = "k [
            if :x < 10 [ if (and emptyp cell "board {:x + 1 :y} emptyp cell "board {:x + 1 :y - 1} emptyp cell "board {:x :y - 2}) [inc "x]]] if :key = "i [ if (and :y > 2 :x < 9 not :y = 20) [ if (and emptyp cell "board {:x + 1 :y + 1} emptyp cell "board {:x + 2 :y - 1}) [ make "piece "hess]]] if :key = "m [make "speed 0] clearchar ] sety 100 - :y * 10 setx -60 + :x * 10 voxeloid 10 20 10 fd 10 sl 10 voxeloid 10 20 10 if :speed > 0 [trackrender]
        wait :speed
        
        if (or :y = 20
        not emptyp cell "board {:x :y + 1}
        not emptyp cell "board {:x - 1 :y}) [
          setcell "board {:x :y} fc
          setcell "board {:x :y - 1} fc
          setcell "board {:x - 1 :y - 1} fc
          setcell "board {:x - 1 :y - 2} fc
          make "dropped true
        ]
        else [notrackrender repeat 4 [bt]]
      ]
      
    ]
    
    ;if the game is over, don't bother checking for lines:
    if :gameover [go "gameover]
    
    ;the following code checks to see if we've made any lines:
    trackrender
    ;turns on rendering the turtle track
    
    ;we're going to check every column of every row. Every time
    ;we get a 'hit' checking a column, we add up a counter, called
    ;"count. If :count hits 10, then we've made a line:
    
    repeat 20 [
      make "count 0
      repeat 10 [
        if not emptyp cell "board {repcount repabove 1} [inc "count]
      ]
      ;repabove 1 returns the loop value of the repeat loop above
      ;the current repeat loop. repabove 2 returns the loop count
      ;above that, and so on
      
      ;if we've made a line, we need to shuffle every line above
      ;it down one, in order to remove it:
      
      if :count = 10 [
        inc "score
        (print "Score: :score)
        ;increase the player's score by one and display the score
        
        repeat repcount - 1 [
          repeat 10 [
            (setcell "board {repcount (repabove 2) - (repabove 1) + 1}
            cell "board {repcount (repabove 2) - (repabove 1)})
          ]
        ]
        
        ;we need to remember to clear the line at the top:
        repeat 10 [setcell "board {repcount 1} empty]
        
        ;now we need to redraw the playfield to match the table:
        
        notrackrender
        cs
        setfc 7
        setpos [-60 -110]
        voxeloid 10 210 10
        voxeloid 120 10 10
        setpos [50 -110]
        voxeloid 10 210 10
        ;draw the border
        
        ;we iterate through the table and if there's a color
        ;recorded in the specific cell, we create a matching
        ;voxel:
        
        repeat 20 [
          repeat 10 [
            setx -60 + 10 * repcount
            sety 100 - 10 * repabove 1
            if not emptyp cell "board {repcount repabove 1} [
              setfc cell "board {repcount repabove 1} voxel 10]
          ]
        ]
        
        trackrender
        
      ]
    ]
    
    label "gameover
    
  ]
  ;game over, man... game over!
  
  print |Game Over!|
  
END


Example: Invasion (3D Space Invaders Clone)

Check out this simple space invaders clone, featuring 3D UFO’s and UFO and player movement. This runs well on both the application and in the web version using modest hardware.

Rather than using hatchlings each with its own thread (worker), Invasion creates 15 static turtles representing each UFO, then iterates through moving them using the main (Myrtle) worker, more like a conventional single-threaded application would.

One procedure is used to generate randomly-colored UFO models, which are then assigned to each UFO turtle. The UFO turtles move in a 3D pattern created by ‘rolling’ them (rotating them on the Z axis), moving them left or right using slideleft and slideright, and raising and lowering them (using raise and lower) – a great exploration of 3D movement in turtleSpaces.

The code is commented and follows below. It’s also available inside the WebIDE under the menu FIle -> Browse Published…

NEWTURTLE "myrtle

TO game
  ;invasion is a simple space invaders clone with a 3D twist
  
  reset
  release
  ;reset the workspace and release the non-standard turtles (ufos)
  
  stars:drawstars
  ;draw a starfield using the stars turtle
  
  nokeyclick
  ;don't click keys
  
  noaudiowait
  ;don't pause on audio playback
  
  snappy:newworker [
    pullout 100
    forever [
      repeat 45 [orbitleft 1 wait 5]
      repeat 90 [orbitright 1 wait 5]
      repeat 45 [orbitleft 1 wait 5]
      repeat 45 [orbitup 1 wait 5]
      repeat 90 [orbitdown 1 wait 5]
      repeat 45 [orbitup 1 wait 5]
    ]
  ]
  ;create a new 'worker' to move the camera around the scene
  ;independently of other activity
  
  make "fleet []
  share "fleet
  ;the fleet container holds the list of UFO turtle names
  ;it needs to be shared so all the UFO turtles can edit it
  
  make "score 0
  share "score
  ;the score cotnainer holds the score, the number of UFOs destroyed
  ;the UFOs themselves increment the score, and so it must be shared
  
  repeat 3 [
    repeat 5 [
      newtu word repcount repabove 1
      ;create a new turtle with the name column + row
      ;note: newtu is NOT the same as newturtle, newturtle is a
      ;declaration used in the workspace file (this), while newtu
      ;creates a new turtle during execution and selects it
      ;(we should change its name to instatiate?)
      
      noaudiowait
      
      makemodel
      ;create its UFO model
      
      queue turtle "fleet
      ;add the turtle name to the fleet container
      
      make "shootcount 0
      ;reset its shootcounter to 0
      
      penup
      ;don't draw anything!
      
      setposition {-225 + repcount * 75 -25 + (repabove 1) * 50}
      ;set its position based on its row and column number
      ;curly braces indicate a 'soft list', a list that is evaluated
      ;at runtime. repabove gets the loop count of the repeat enclosing
      ;the current repeat
      
      showturtle
      ;show the UFO
    ]
  ]
  ;create three rows of 5 UFOs each
  
  setturtle myrtle
  ;reselect myrtle
  
  setmodel "spaceship
  ;change myrtle's model to the built-in spaceship model
  
  setmodelscale 2
  ;set the model's scale (size) to a factor of 2
  
  penup back 150
  ;position Myrtle
  
  newworker [
    forever [
      movefleet
      ;run the movefleet procedure
      
      toot 200 + random 1000 2
      ;make a random beep
      
      wait 10
    ]
  ]
  ;create a new 'worker' to move the UFOs 'forever'
  
  make "delay 0
  ;stores the delay between player shots
  
  forever [
    if :delay > 0 [dec "delay]
    ;decrease the delay value by one, if it is above zero
    
    if keyp [
      ;if a key has been pressed:
      
      make "key uppercase readchar
      ;store the uppercase value of the key in the key container
      
      switch "key
      ;use the value of the key value for the following case comparisons:
      
      case "J [repeat 10 [repeat 10 [sl .1]]]
      case "K [repeat 10 [repeat 10 [sr .1]]]
      case "I [repeat 10 [repeat 10 [ra .1]]]
      case "M [repeat 10 [repeat 10 [lo .1]]]
      ;move Myrtle as required
      
      case "A [
        ;should I shoot?
        if :delay = 0 [
          ;yes, I should shoot!
          
          ;we're going to 'hatch' a missile BUT if we just
          ;do that, our detection routine will think we've been shot.
          ;to work around this, we're going to stop rendering our
          ;spaceship while we launch our missile from a position
          ;slghtly forward of our current position.
          
          notrackrender
          ;don't render this turtle's graphics
          
          forward 31
          updatestate
          ;update the state of the turtle. This is usually done while
          ;rendering, so we need to do this manually while rendering is
          ;off
          
          hatch [
            showturtle
            repeat 300 [fd 1]
          ]
          ;hatch our 'missile', which goes forward 300 steps and then 'dies'
          
          back 31
          ;move back to where we were before
          
          trackrender
          ;turn track rendering back on
          
          playsound "pew
          ;play a 'pew' sound
          
          make "delay 20
          ;set the delay container to 20, which causes us to have to wait
          ;before firing again
        ]
      ]
    ]
    
    if nearp 30 [
      ;check to see if we've been hit. If we have:
      
      playsound "explosion
      hideturtle
      print |Boom! Game over!|
      repeat 50 [
        randomfillcolor
        icosphere repcount
        wait 1
      ]
      ;explosion animation
      
      clean finish
      ;finish stops all execution
    ]
    
    wait 1
    ;wait 1/60ths of a second between loops
  ]
  ;do it again
  
END

TO movefleet
  ;this procedure moves the UFOs
  
  if :fleet = emptylist [
    ;if there are no UFOs left:
    print |Great work!|
    playsound "applause
    wait 120
    finish
  ]
  
  foreach "ufo :fleet [
    ;for each of the UFOs remaining:
    
    setturtle :ufo
    ;select the ufo turtle
    
    rollright 10
    ;roll right 10 degrees
    
    if 1 = last :ufo [slideright 5]
    if 1 = first :ufo [lower 5]
    if 2 = last :ufo [slideleft 5]
    if 2 = first :ufo [raise 5]
    if 3 = last :ufo [slideright 5]
    if 3 = first :ufo [lower 5]
    ;do a merry dance
    
    if :shootcount > 0 [dec "shootcount]
    if and 1 = random 20 :shootcount = 0 [
      make "shootcount 20
      hatch [
        right 180 showturtle
        repeat 300 [fd 1 rr 1]
      ]
    ]
    ;fire!
    
    foreach "i near position 50 [
      if "m = second :i [ht
        newworker [repeat 50 [ico repcount wait 1] clean]
        ;boom
        
        make "fleet without turtle :fleet
        ;remove ufo turtle from fleet list
        
        inc "score (print |Score:| :score)
        ;increase the score and tell the user
        
        playsound "explosion
        ;play an 'explosion' sound
        
        myrtle:try [halt hatchlingworker :i] []
        ;stop the missle that shot me (if it still exists)
        
      ]
    ]
    ;you got me!
  ]
  
  tu myrtle
  ;reselect Myrtle
END

NEWTURTLE "snappy


NEWTURTLE "libby

TO makemodel
  ;make the UFO model for the calling turtle
  
  begintag turtle
  makeufo
  endtag
  newmodel word "ufo turtle turtle
  
  clearscreen
  ;this applies only to the calling turtle
  
  setmodel word "ufo turtle
END

TO makeufo
  ;create the UFO itself
  
  penup
  randomfillcolor
  
  make "sides 3 + random 6
  down 90
  rollright 180
  
  torus 10 25 3 :sides
  ;make the outer ring
  
  switch {fc}
  case 1 [setfc 9]
  case 2 [setfc 7]
  case 3 [setfc 11]
  case 4 [setfc 12]
  case 5 [setfc 10]
  case 6 [setfc 2]
  case 7 [setfc 6]
  case 8 [setfc 13]
  case 9 [setfc 1]
  case 10 [setfc 15]
  case 11 [setfc 3]
  case 12 [setfc 14]
  case 13 [setfc 8]
  case 14 [setfc 12]
  case 15 [setfc 5]
  ; select a complementary fill color
  
  dome 25 3 :sides
  ;make the top dome
  
  polyspot 25 :sides
  ;make the bottom spot
  
END

NEWTURTLE "stars

TO drawstars
  ;draw the starfield
  penup
  
  repeat 100 [
    ;do 100 times:
    home
    ;go home
    
    randomvectors
    ;pick a random vector orientation
    
    forward 1000 + random 1000
    up 90
    randomfillcolor
    spot 5 + random 10
    ;create a randomly colored 'star'
  ]
  
END